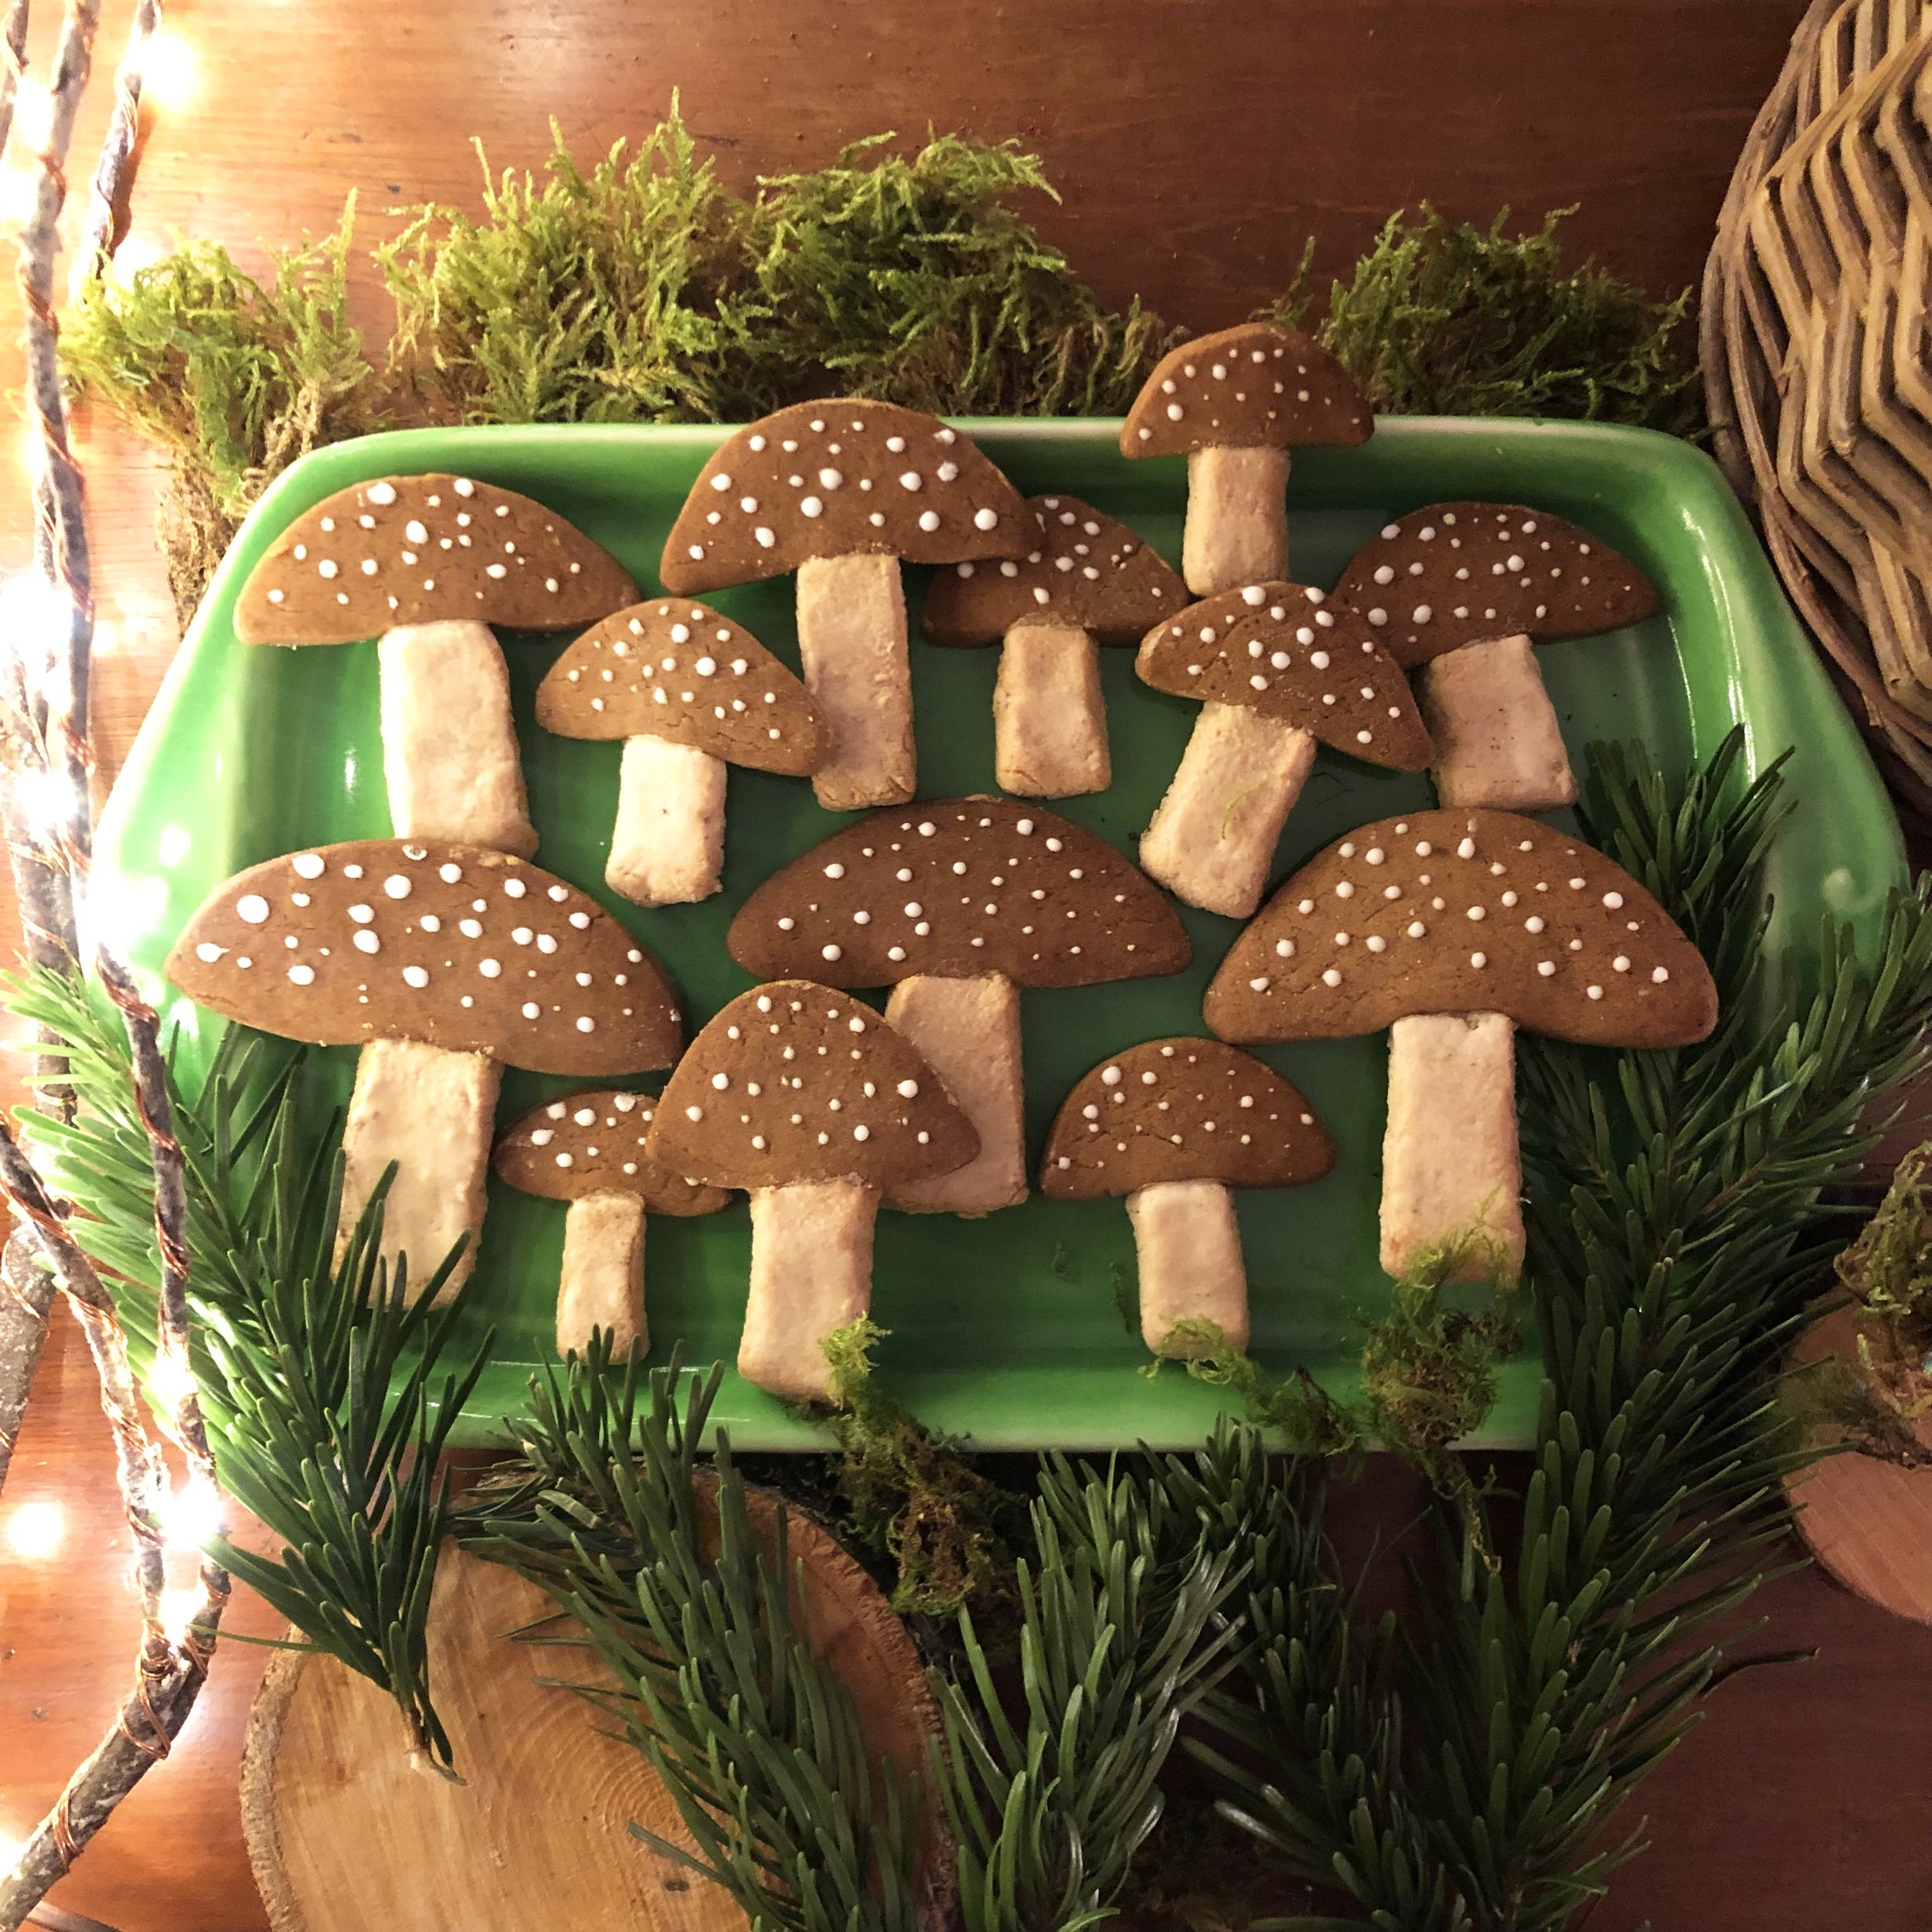
Enchanted Toadstool Biscuits

Ingredients:

For the gingerbread tops:

  • 125g butter

  • 250g plain flour

  • 100g dark Muscovado sugar

  • 1tsp Bicarbonate of Soda

  • 4 tbsp Ground Ginger

  • 4tbsp Golden Syrup

For the stalks - one batch of Zimtsterne biscuit dough (see previous blog post) You’ll also need a small paintbrush.

For icing the spots on the caps:

1 small egg white

100g icing sugar

squeeze of lemon

cocktail stick

These fairytale toadstool biscuits are made from two different batches of dough. The tops are made from gingerbread, and the stalks from Zimtsterne dough.

Pre-heat the oven to 160˚/ gas mark 3 and line a baking tray with baking paper.

For the Gingerbread:

In a saucepan gently melt together 125g of butter, 4 tbsp of golden syrup and 100g of dark muscovado sugar. Stir well until the sugar has dissolved.

In a bowl sift together 250g of plain flour, 4 tsp of ground ginger and 1 tsp of bicarbonate of soda. Pour the melted ingredients into the bowl of dry ingredients and mix until a soft dough is formed.

Wrap up the dough in cling film or baking paper and chill it in the fridge for 10 - 15 minutes.

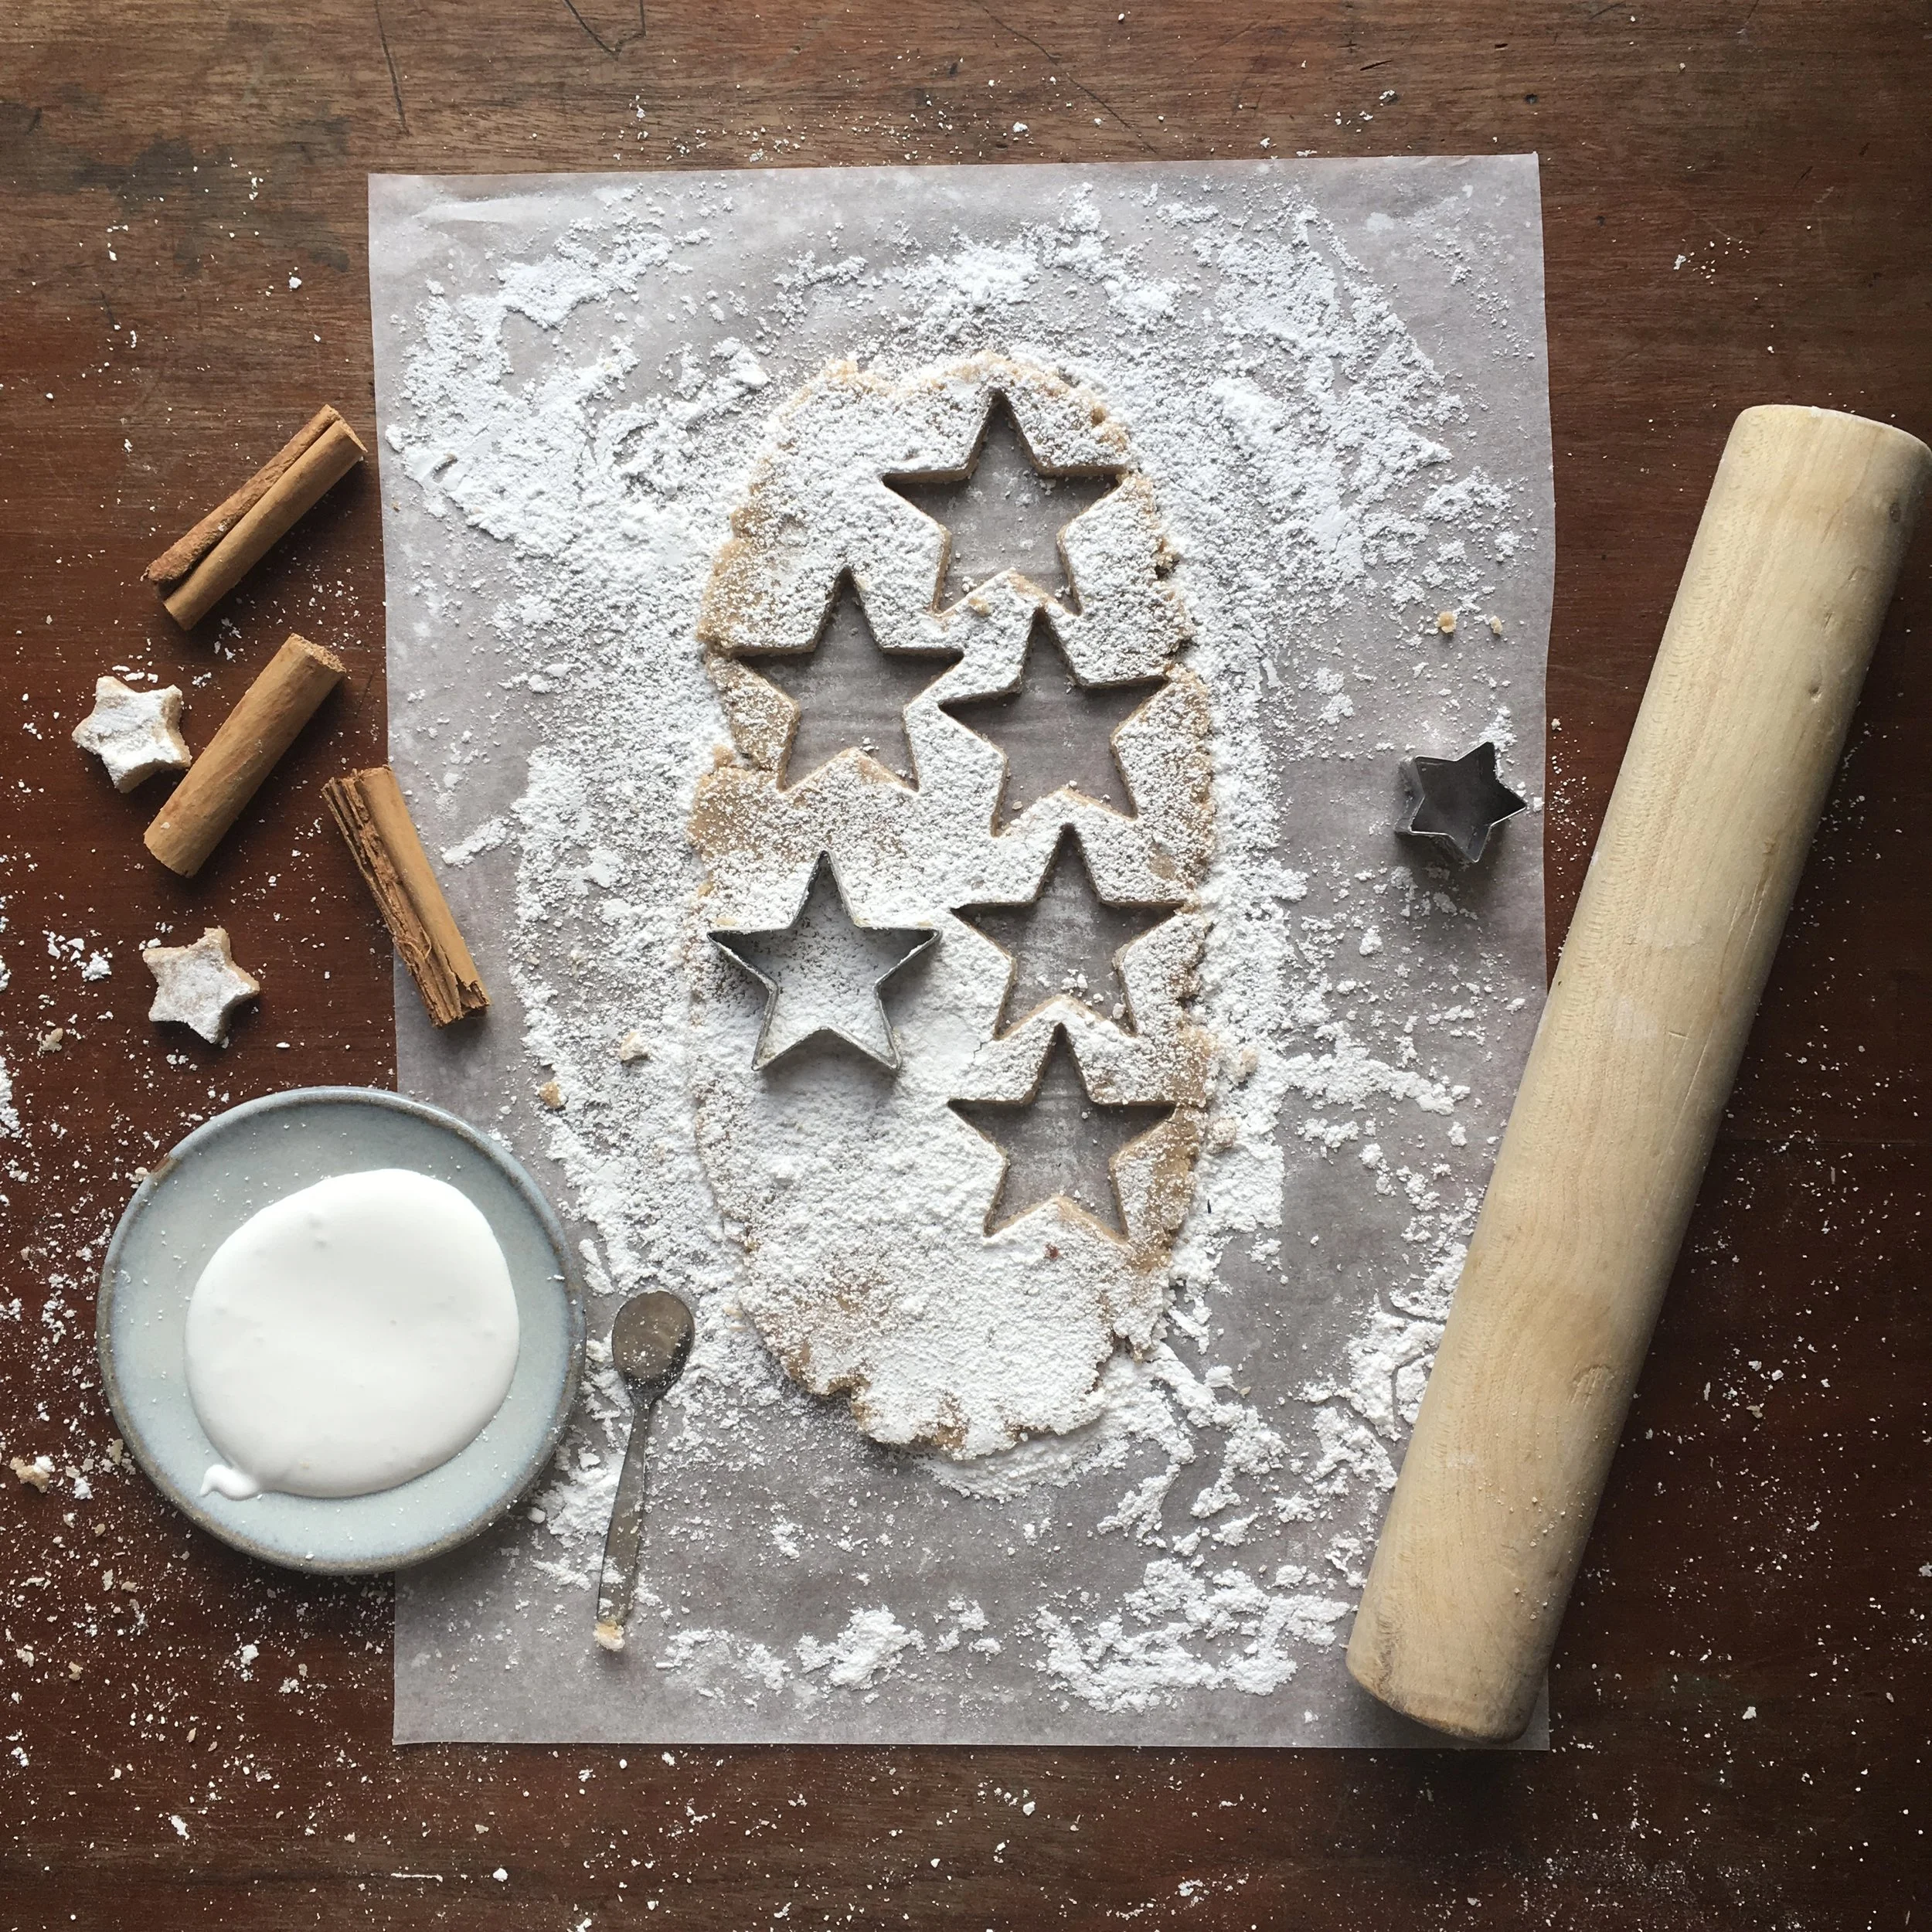
Now make your Zimtsterne dough by following the recipe on the previous post. Remember to reserve some of the meringue for painting the stalks before baking.

Roll out the gingerbread dough to a thickness of 0.5cm onto a floured surface and cut out toadstool-cap shapes using a knife. Place them onto the tray lined with baking paper.

Now roll out the Zimsterne dough and cut stalk shapes. Using a clean paintbrush, paint a thin layer of the reserved meringue onto the front of the stalks. Dab a little more onto the top of the stalk where it joins the cap and gently stick together.

Bake in the oven until the caps are just turning golden brown - about 10-15 minutes.

Allow them to cool on the tray for five minutes then move onto a cooling rack. The biscuits will get crispier as they cool.

Make the icing for the dots: Sieve the icing sugar into the egg white and beat together with a spoon. Add a few drops of lemon. You should end up with a slightly runny icing.

Once the biscuits have cooled, dip the end of a cocktail stick into the icing and make small white dots on top of the caps.

Zimtsterne

Our version of Zimtsterne - (Cinnamon Star Biscuits) are a traditional Christmas biscuit in Germany. Made with ground almonds and orange zest, these are perfect dipped in coffee or an apricot brandy.

Ingredients:

2 small egg whites

200g icing sugar plus extra for rolling

260g ground almonds

2 teaspoons cinnamon

Zest of half an orange (optional)


Heat the oven to 150C/140 fan/300F/gas 2.

Line a baking tray with baking parchment.

Whisk the egg whites in a bowl until they form soft peaks. Sieve in the icing sugar and continue whisking until peaks are formed again. Set aside about a quarter of the meringue mixture for glazing later.
Add the rest of the ingredients to the bowl and combine well with a wooden spoon. The mixture will be slightly sticky. If it’s too sticky to work with, add extra icing sugar and ground almonds until it’s manageable.

Place the dough on baking paper which has been dusted well with icing sugar. Rolling on baking paper with a little plain flour also helps prevent sticking.

Gently roll out the dough to a thickness of about 0.5cm.

Dust the top of the dough with icing sugar before cutting out star shapes. Dip the cutter into icing sugar to prevent the dough from sticking.

Place the stars on the lined baking sheet.

Use the reserved meringue to glaze the tops of the stars with a paintbrush or the back of a small spoon. Add a little water if it needs loosening up.

You only need a thin layer of meringue otherwise it will blister up instead of forming a smooth surface.

Bake for about 10-15 mins, making sure the tops don’t turn brown - keep checking them!

Once cooled the biscuits can be stored for up to 2 weeks in an airtight container.


Winterberry Felt Decorations

You will need:

Wool felt (cream and one other colour)

Dark brown, red and cream coloured embroidery threads

Gold thread

Wool fleece stuffing

Scissors

Sewing needle

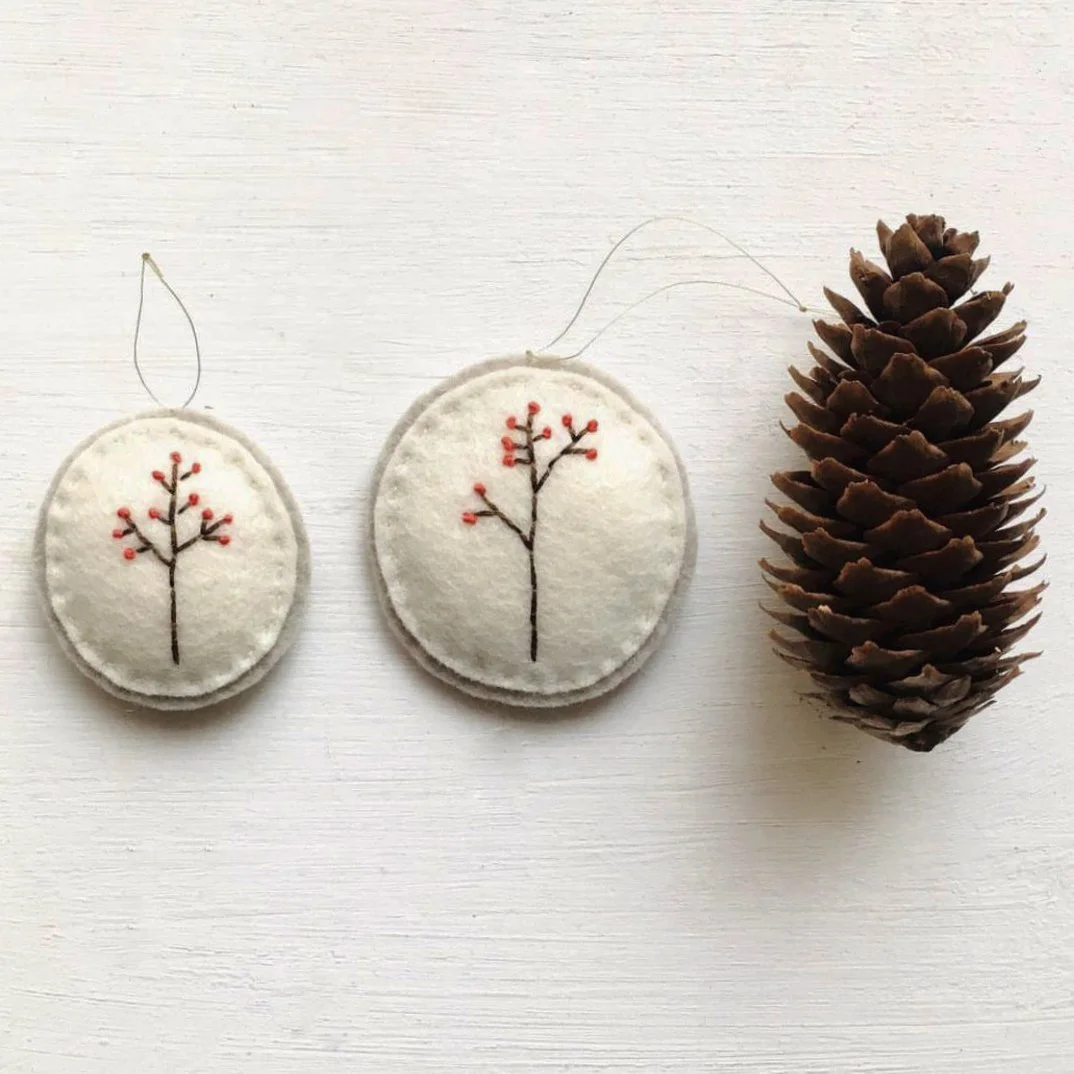
Cut out a circle from the cream coloured felt.

Now cut out a slightly bigger circle from your background coloured felt.

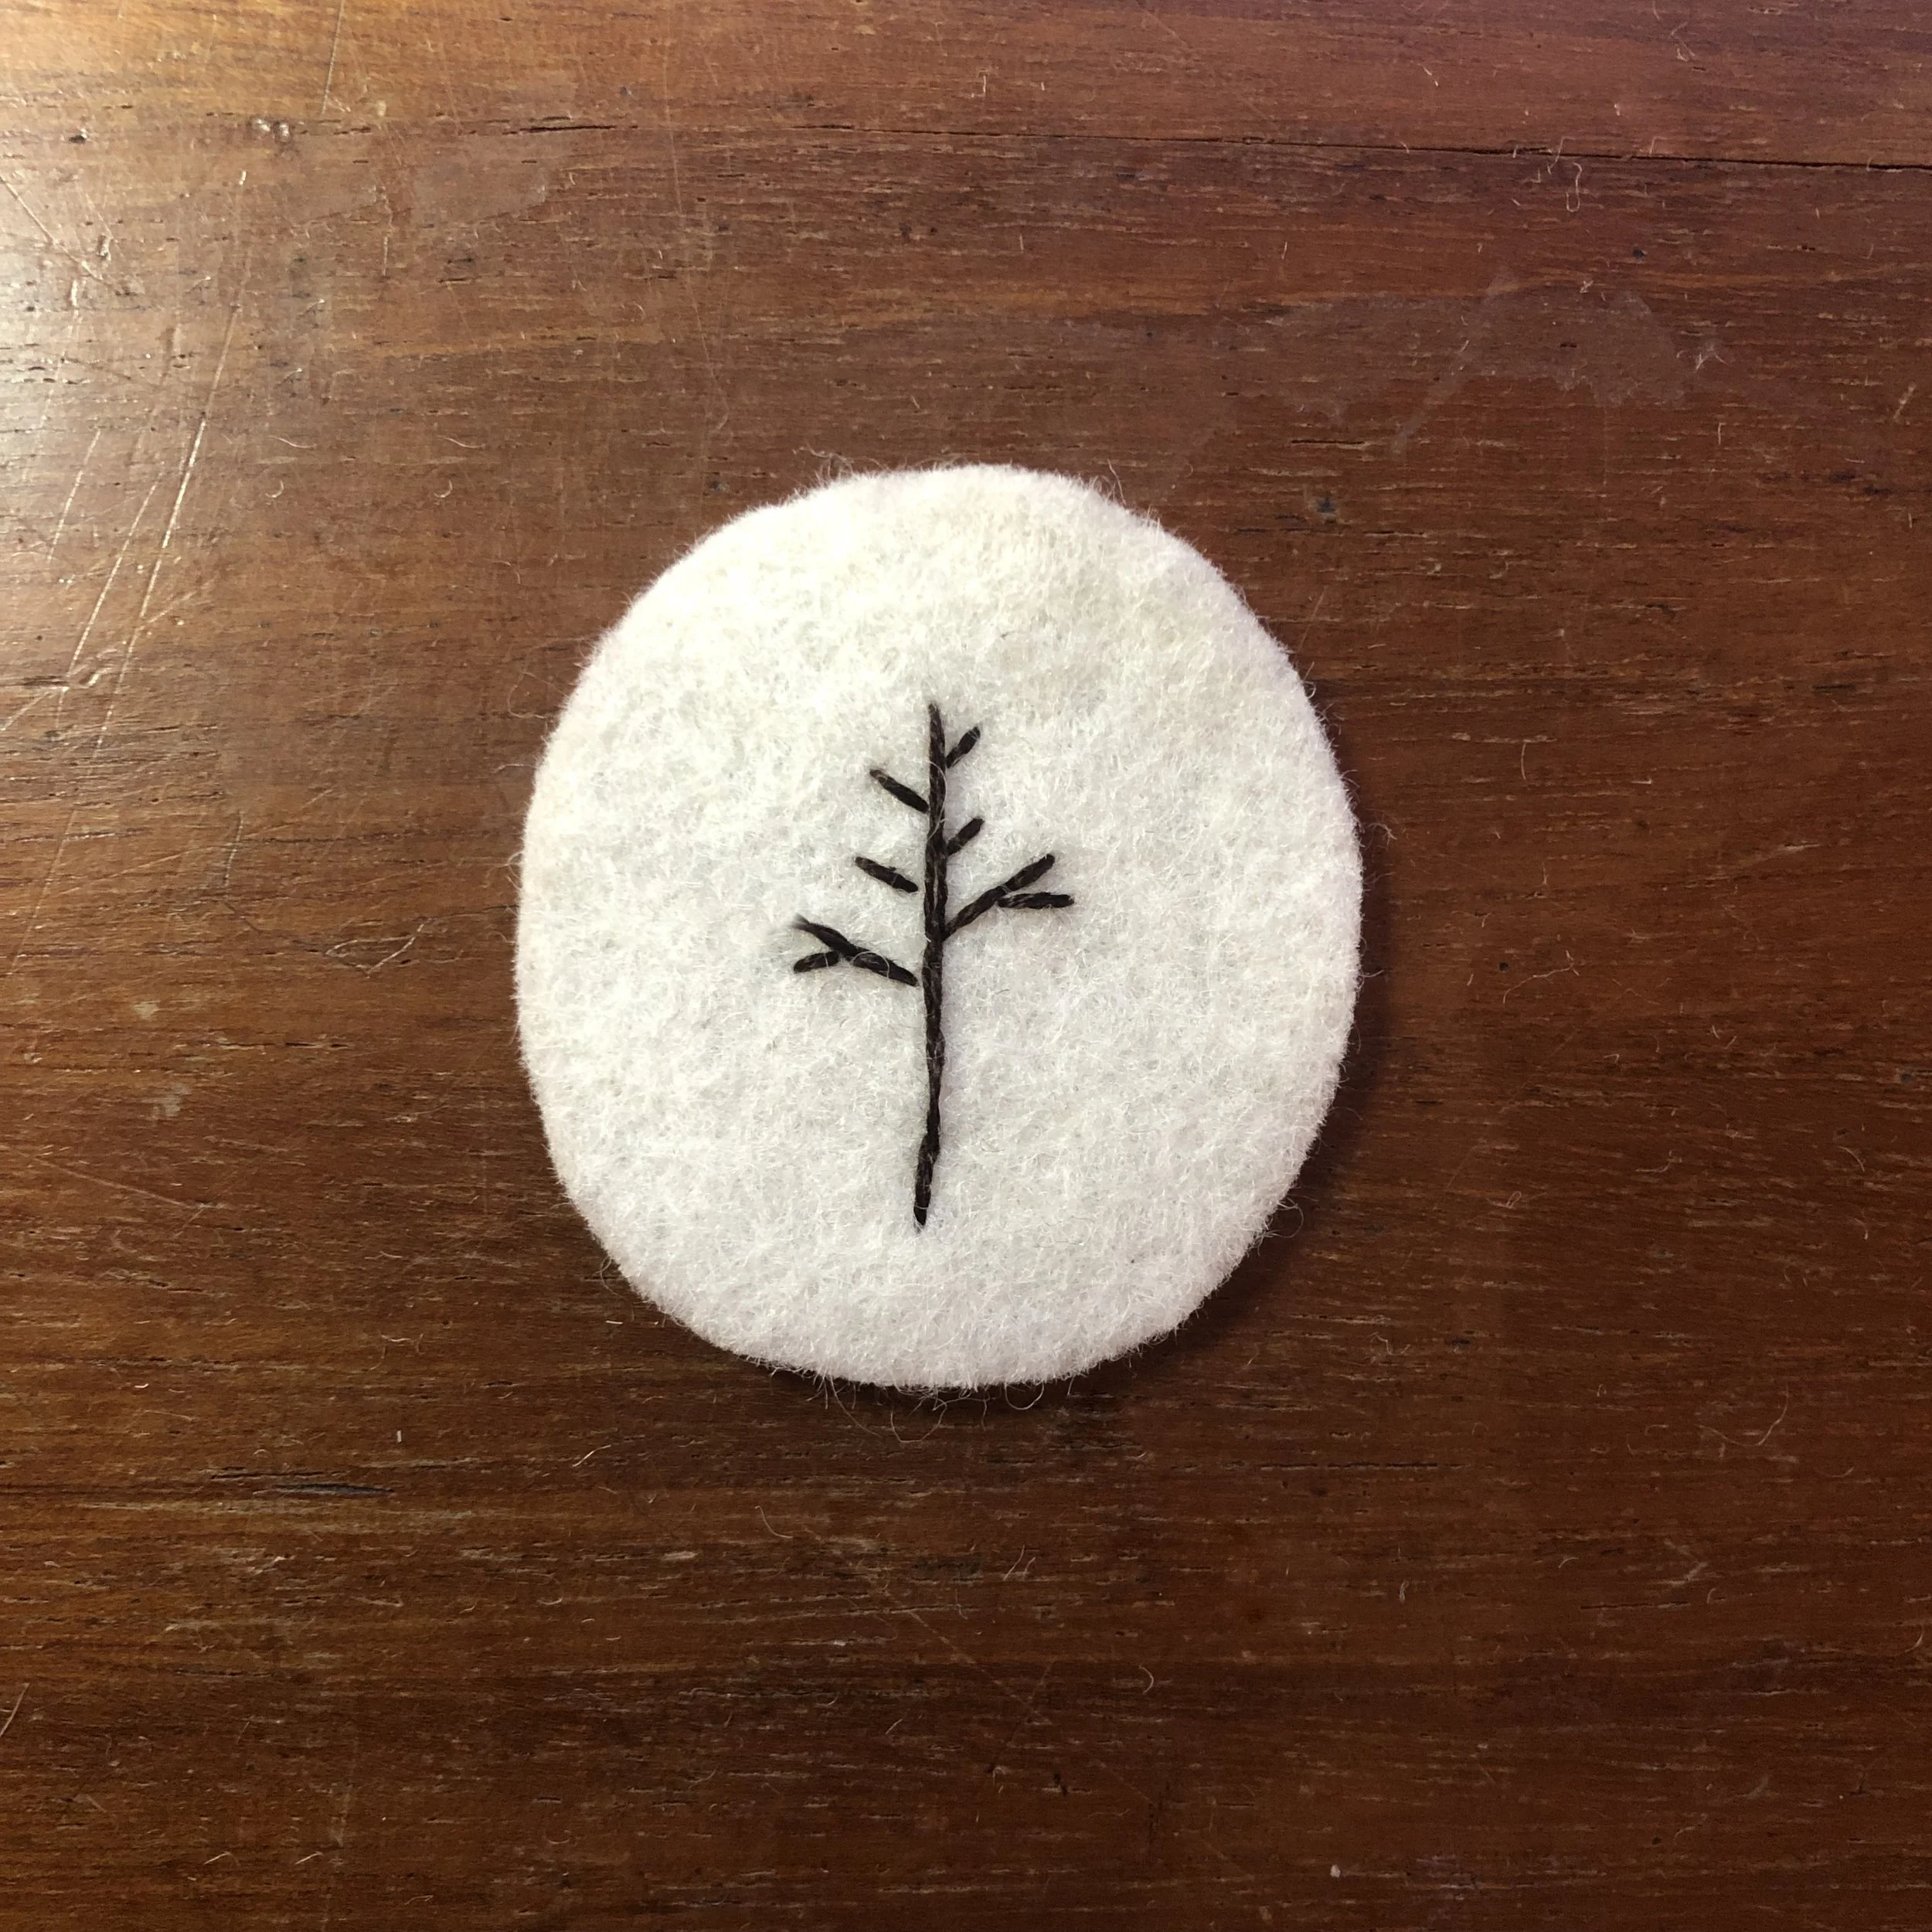
Most embroidery threads are made up of 6 strands. Use 1 or 2 strands of dark brown and backstitch to sew the branch.

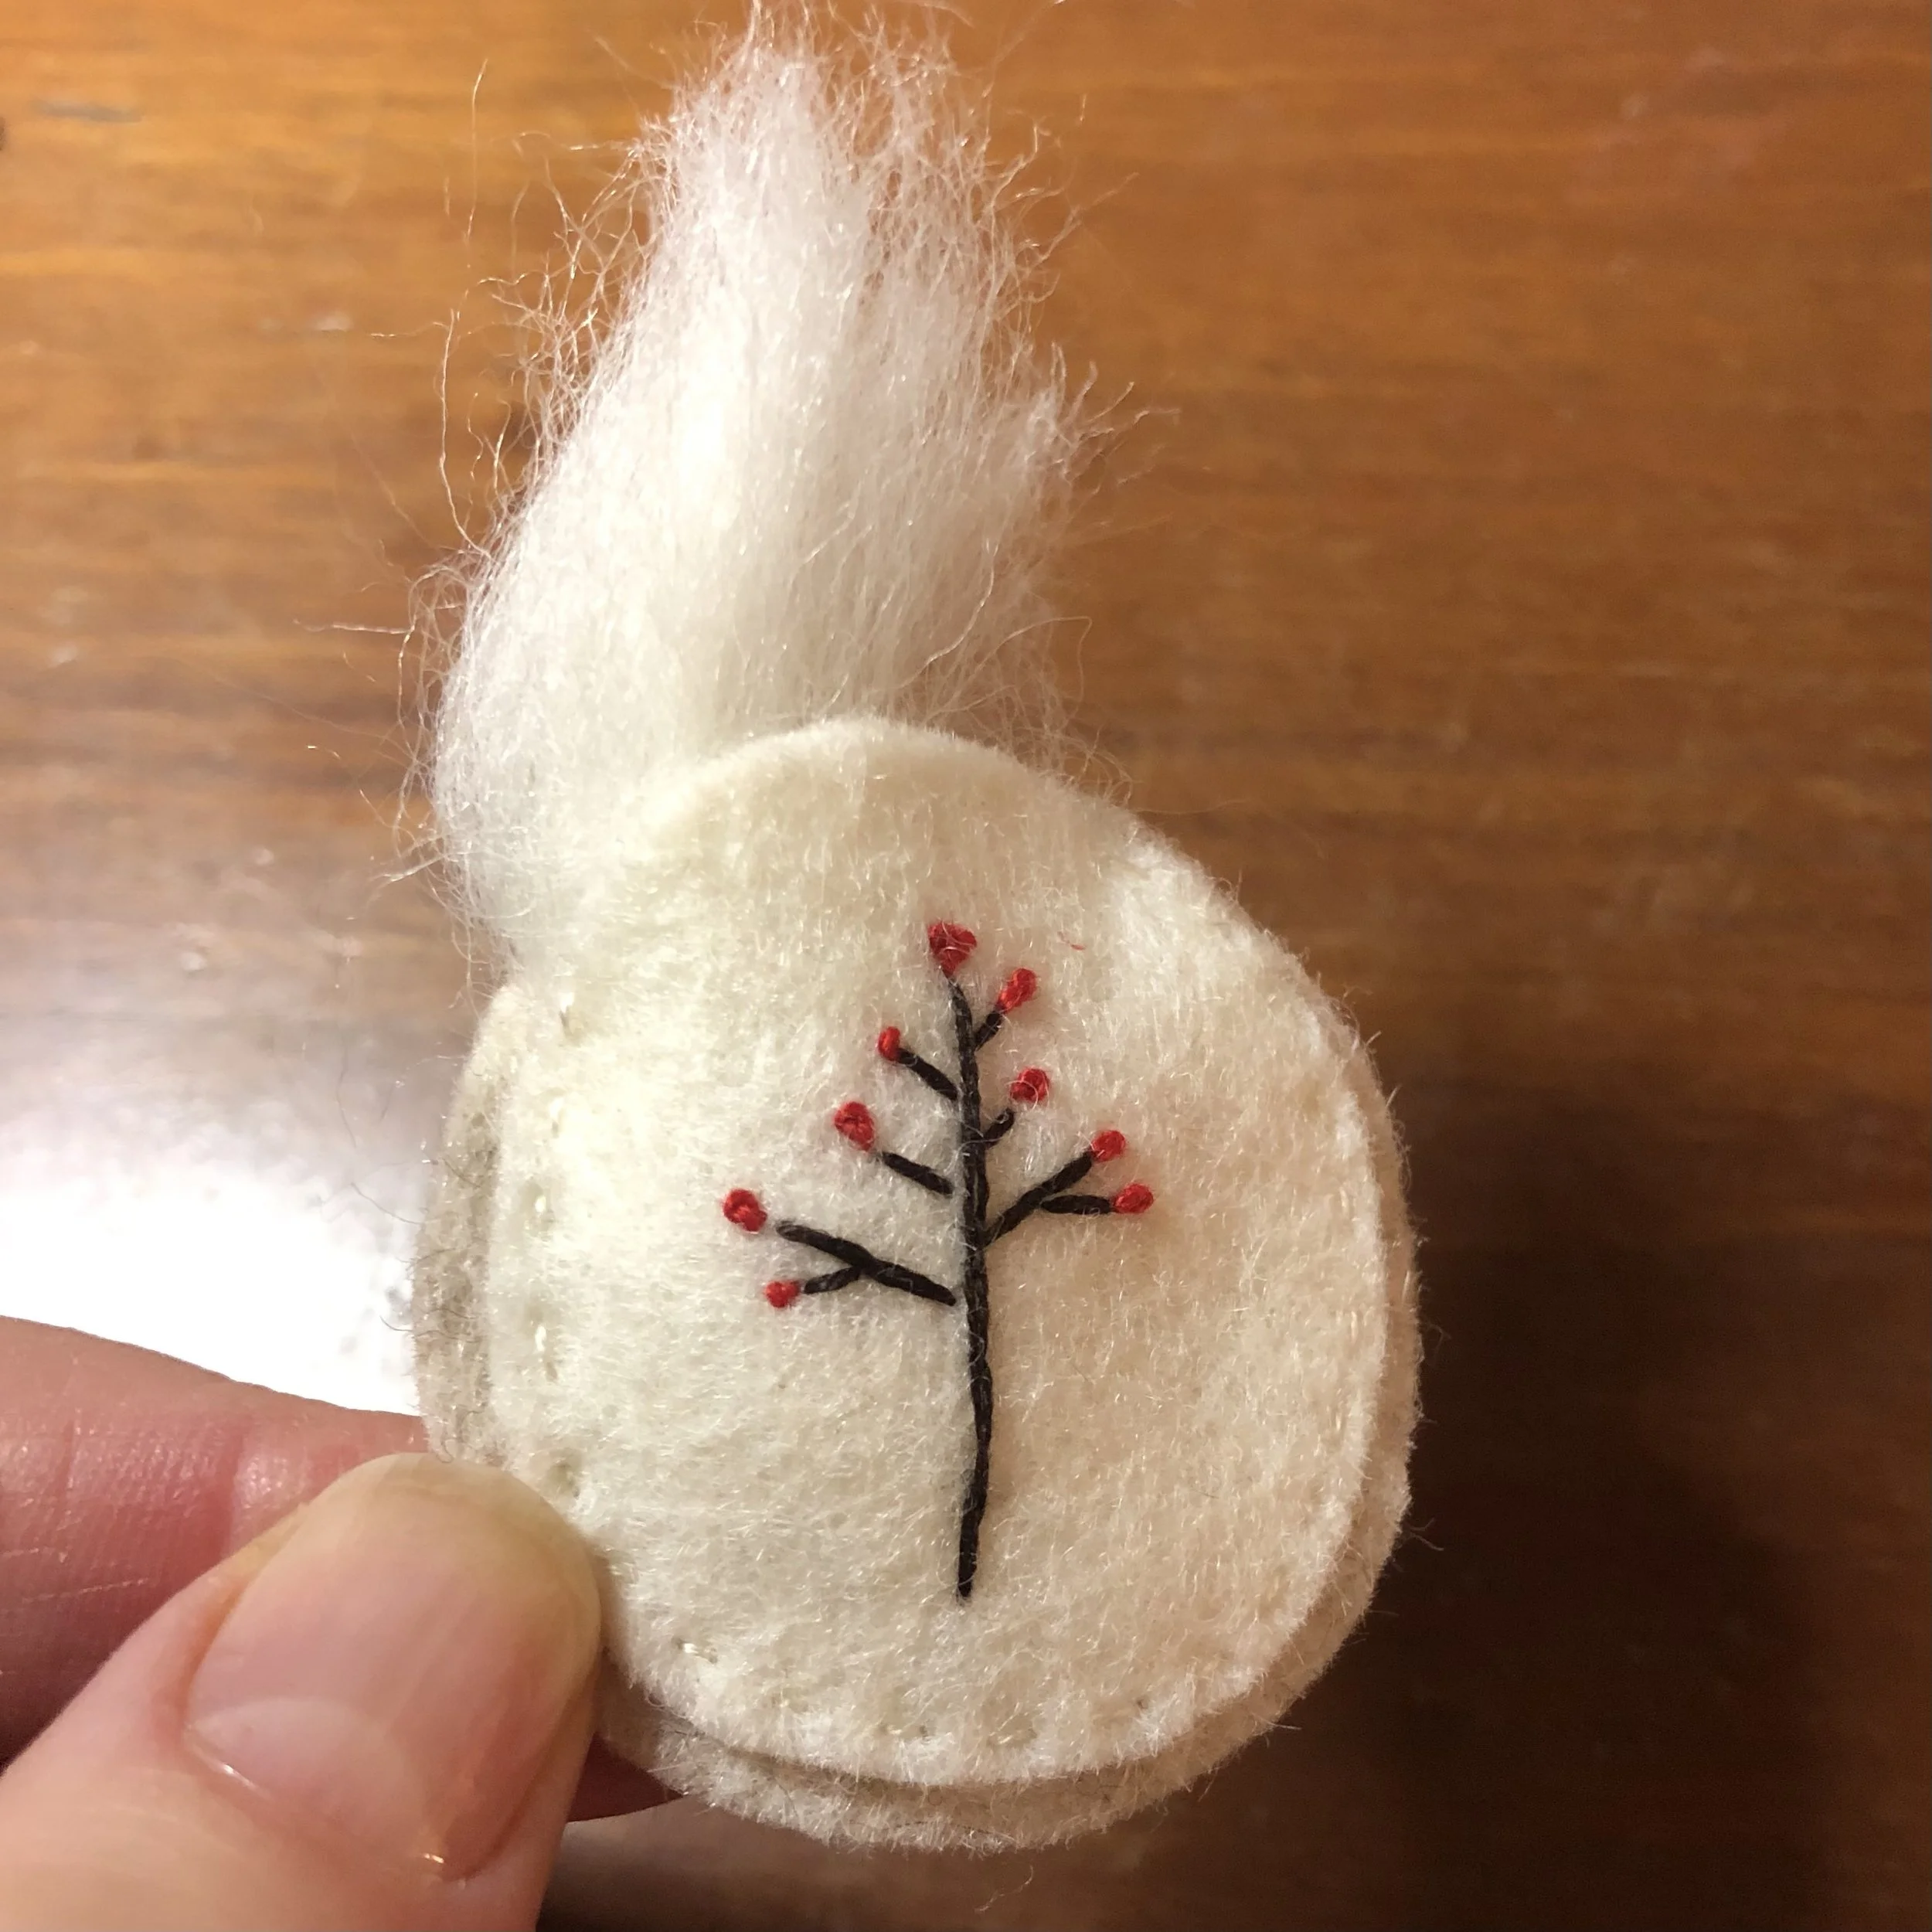
Add French knots in red at the end of each twig, to make the berries. Use two strands and wrap once or twice.

Sew the front onto the background piece of felt, using a simple running stitch, filling with wool stuffing just before sewing right up.

Sew on a length of gold thread for hanging your decoration on a tree or winter branch.

Sleepy Owl Hanging Decoration

Felt Owl

You will need:

Wool felt

Sewing thread

Wool fleece stuffing

Sewing needle

Scissors

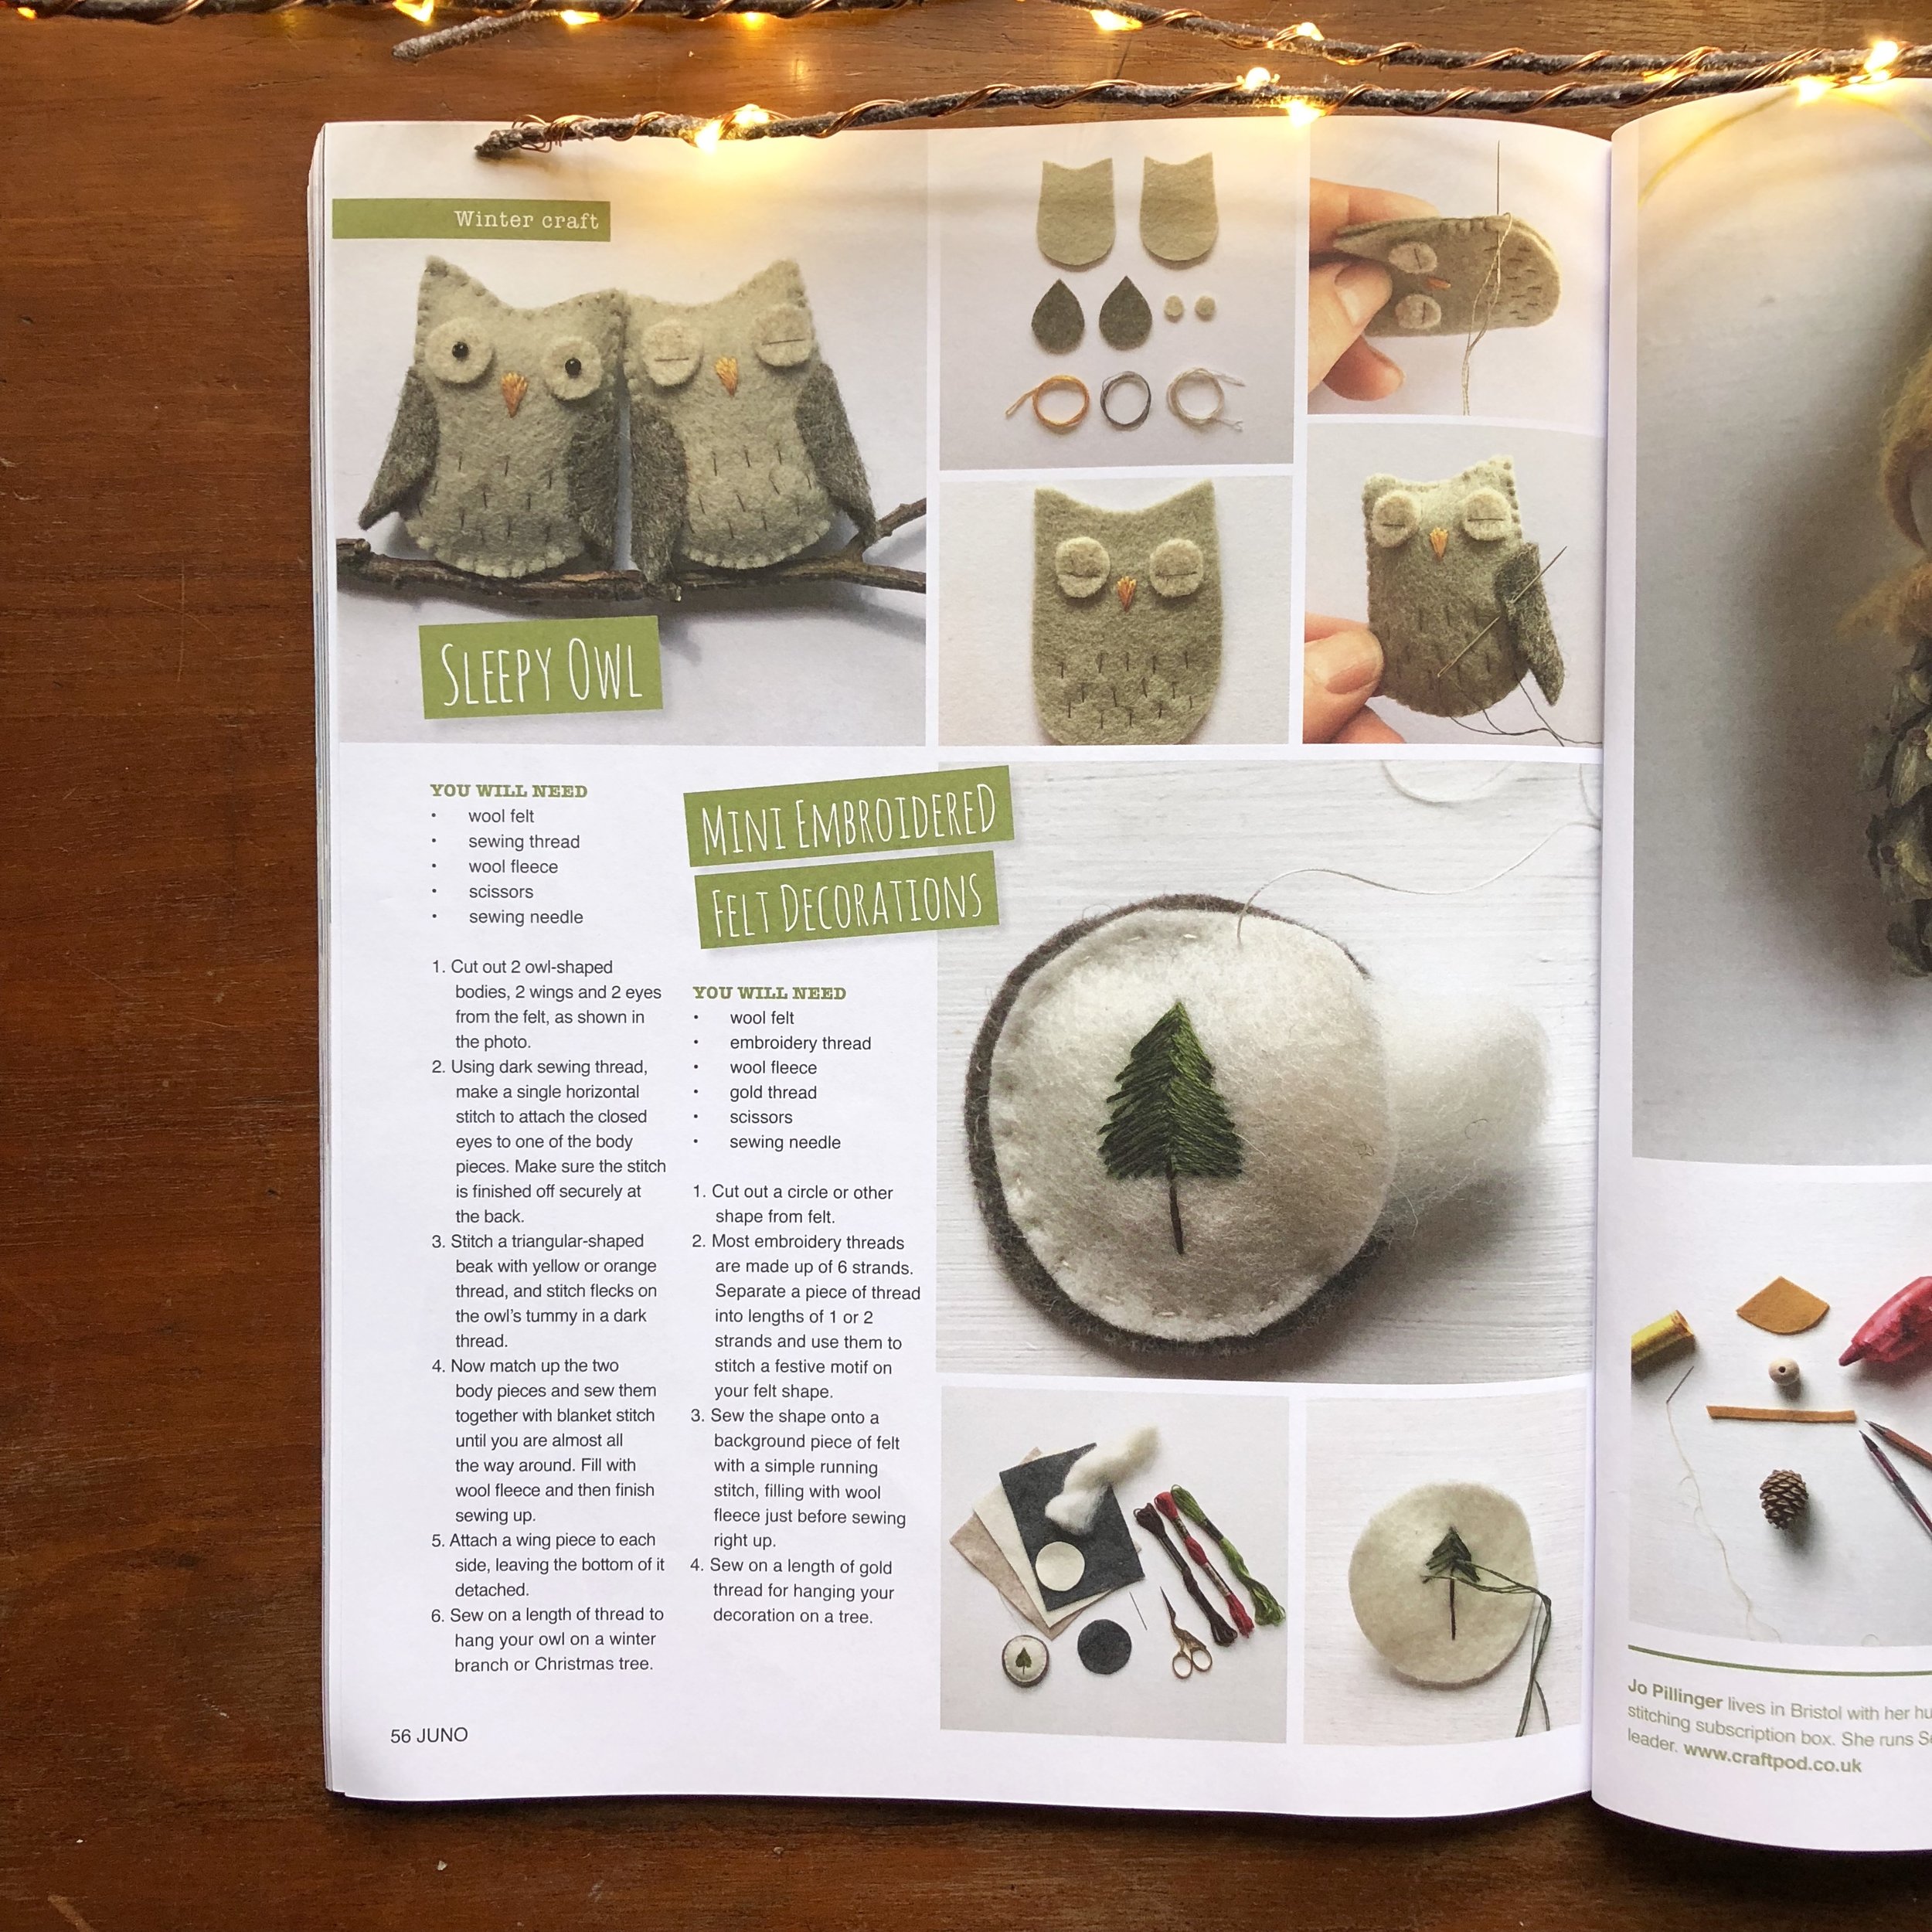
1. Cut out 2 owl shaped bodies, 2 wings and 2 eyes as shown in the photo.

2. Using dark sewing thread, make a single horizontal stitch to attach the closed eyes onto one of the body pieces. Make sure the stitch is finished off securely at the back.

3. Sew a triangular shaped beak with a yellow or orange colour thread.

Stitch flecks on the owl’s tummy in a dark thread.

4. Now match up the second body piece with the front and sew together with blanket stitch until you are almost all the way around. Fill with a little wool fleece and then finish sewing up.

5. Attach a wing piece onto each side leaving the bottom of it detached.

6. Sew on a thread to hang your owl onto a winter branch or Christmas Tree.

Crepe Paper Waterlilies

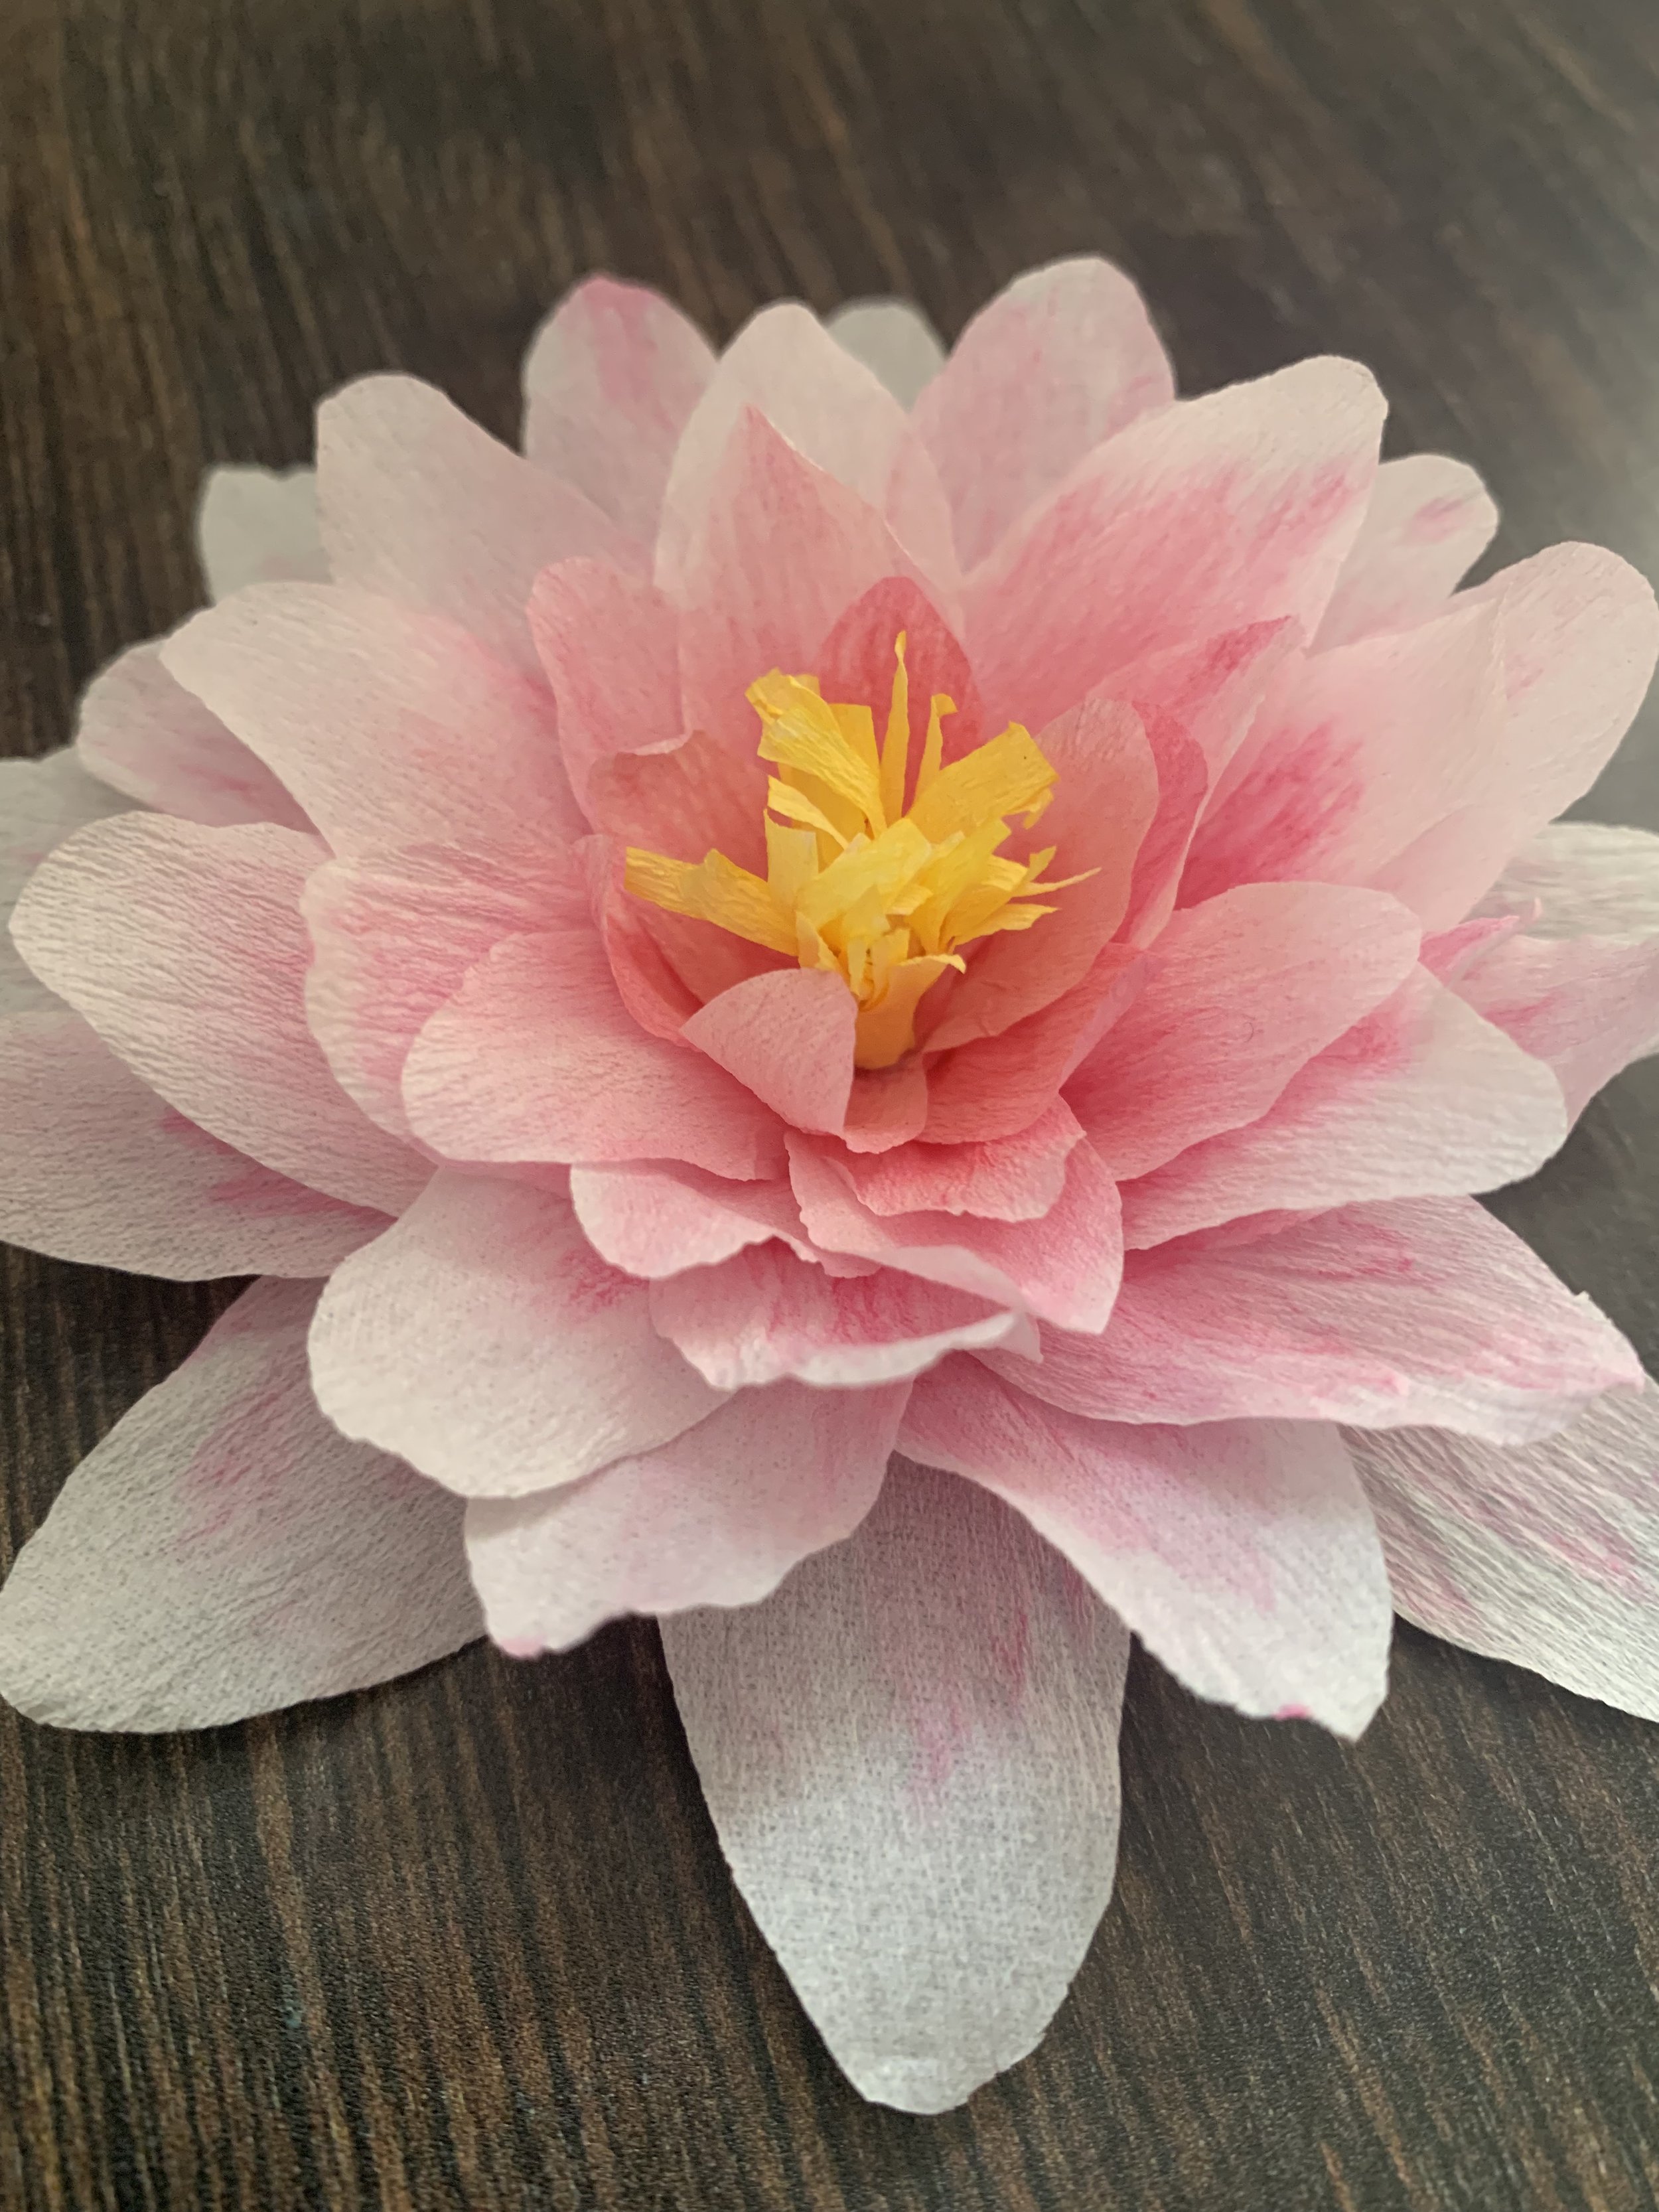
While planning the photoshoot for our Summer 2022 Craftpod, we wanted to include water lilies and lily pads. However, they weren’t quite in season so we had to improvise. We found giant ivy leaves and cut them into a lily pad shape, and for the flowers, we had to work out how to make some! We were really happy with how they turned out and so we thought we’d share it as a tutorial.

What you will need:

  • Crepe paper

  • Watercolour paints

  • Paintbrush

  • PVA glue

  • Scissors

  • A few pieces of card

  • A printer to print your pattern

Cutting out the petals

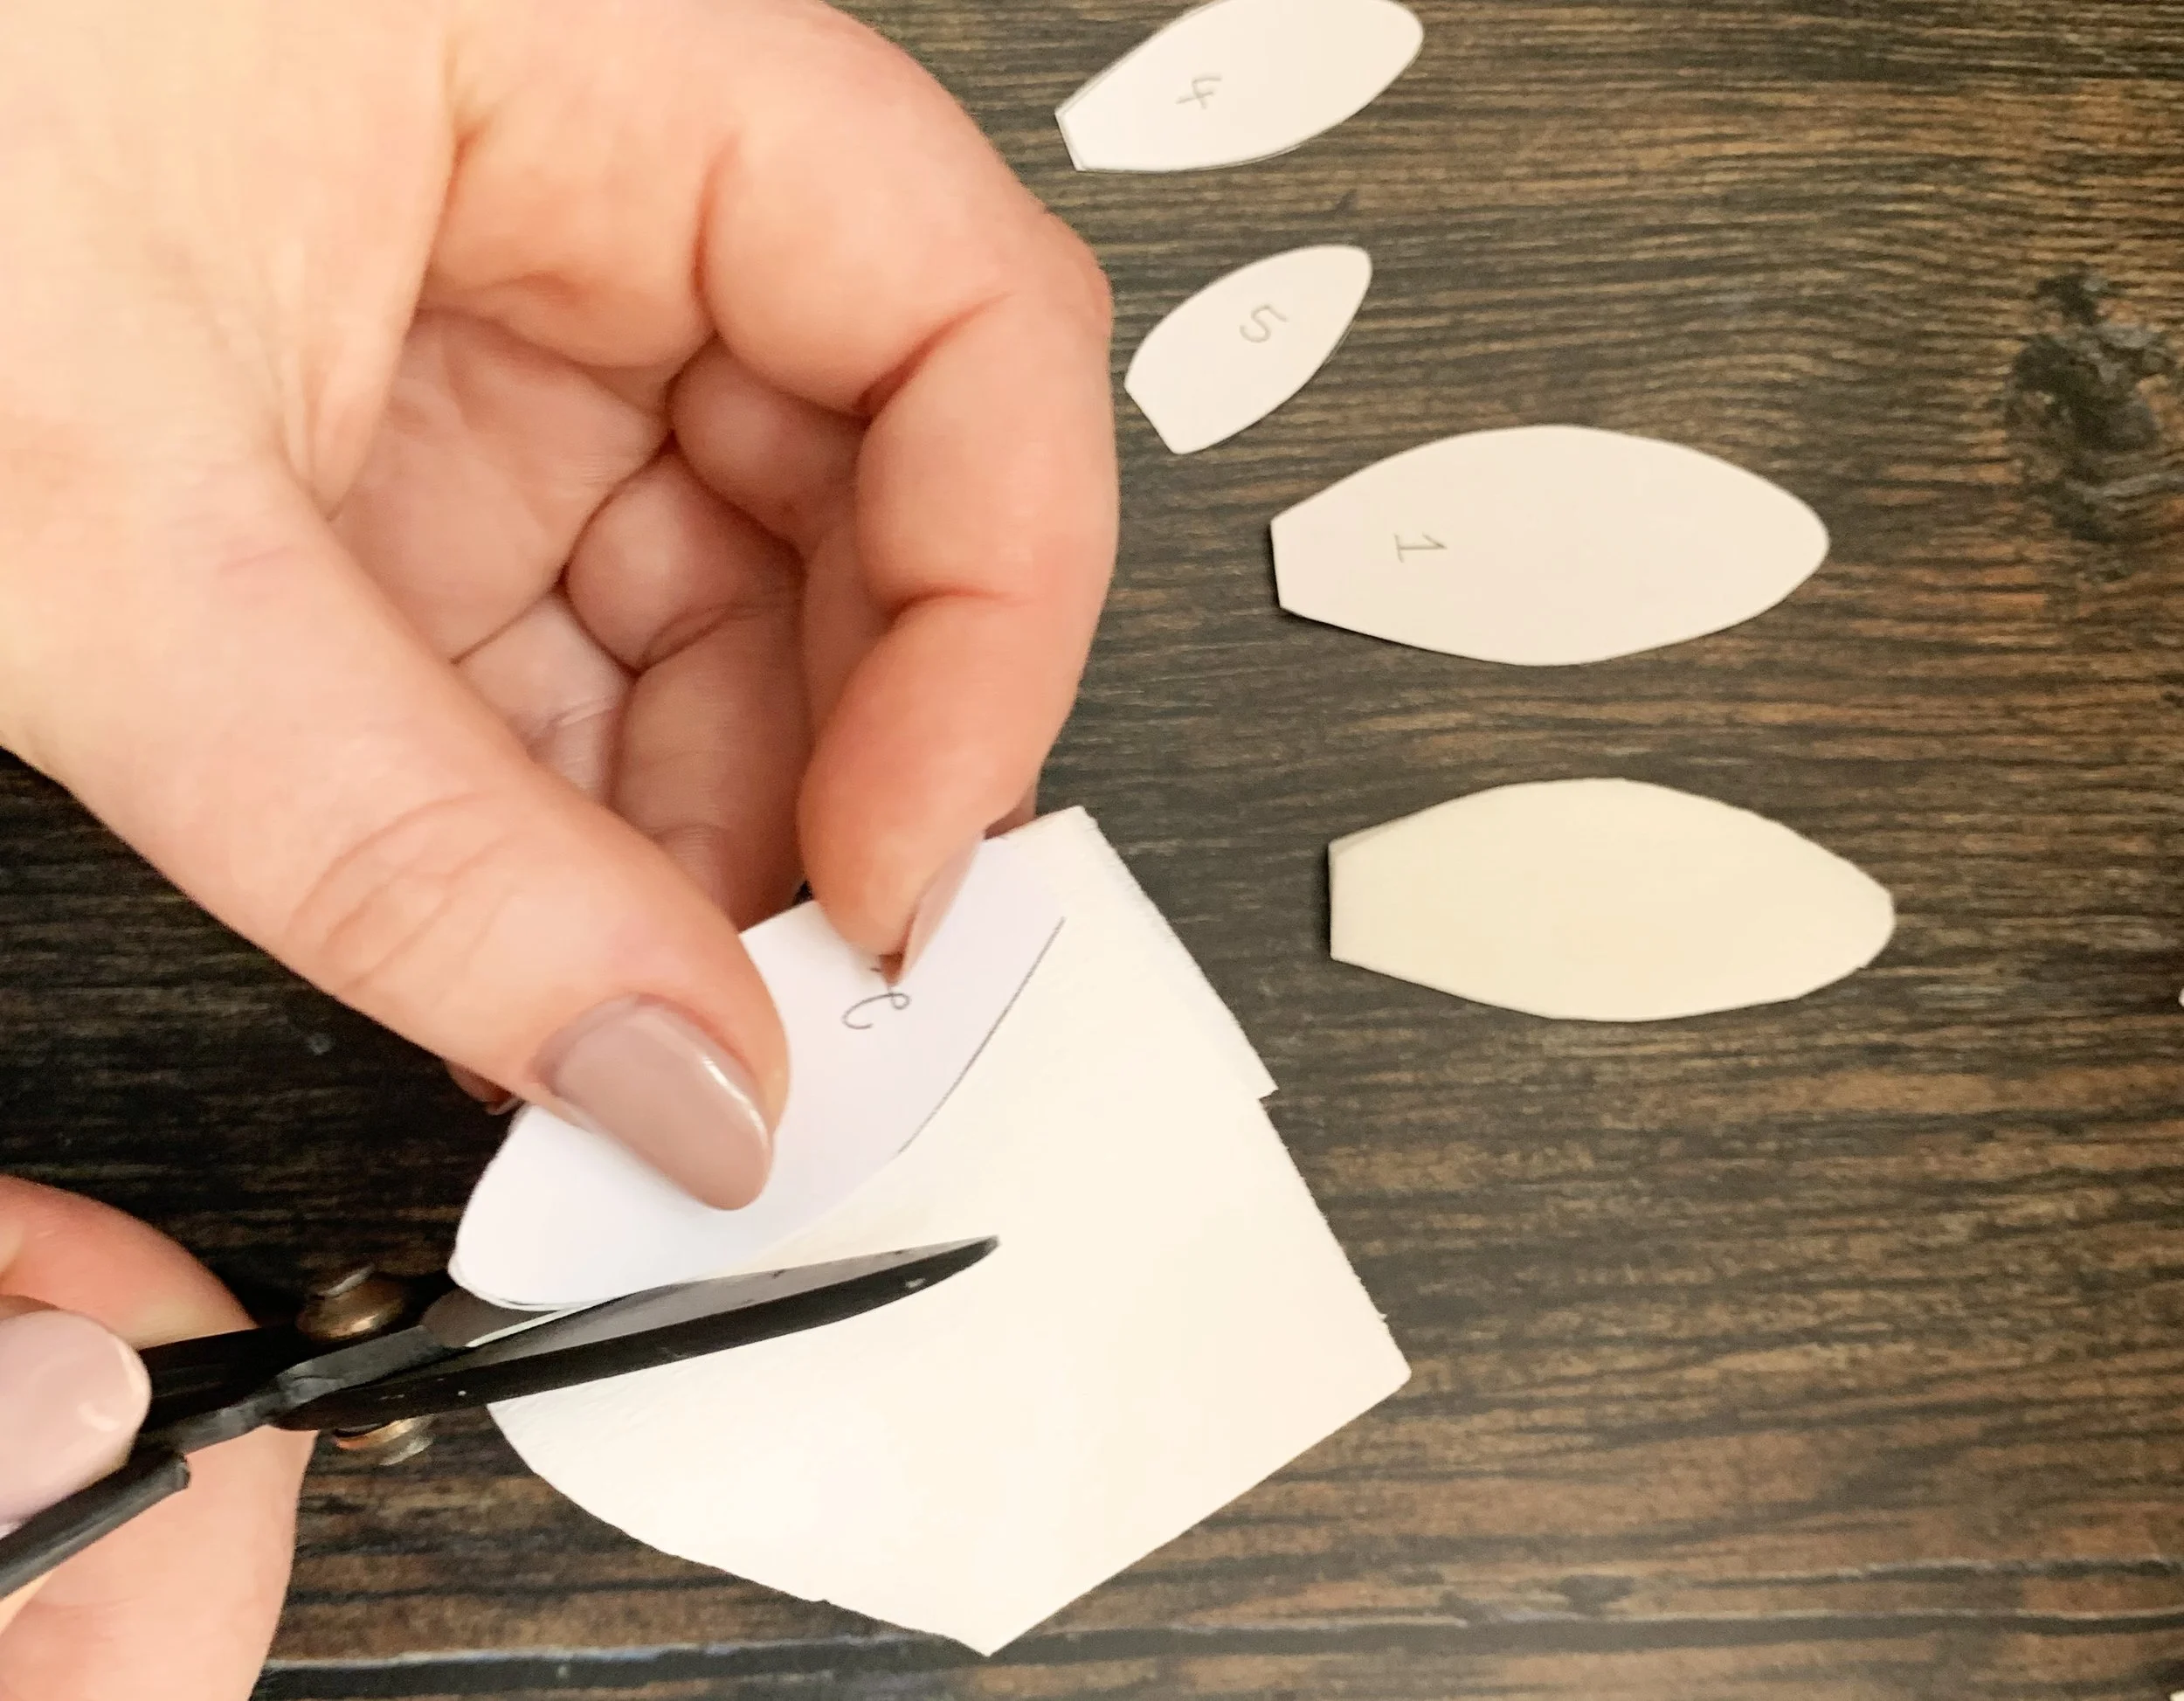
First, cut out each piece from your pattern. Then layer up your crepe paper so you can cut a few pieces at a time. Place your pattern over the folded paper and cut around it. Do this with each piece, so that you have 10 pieces cut of each size. You’ll only need 8 of each size but it’s useful to have extras in case any of them break.

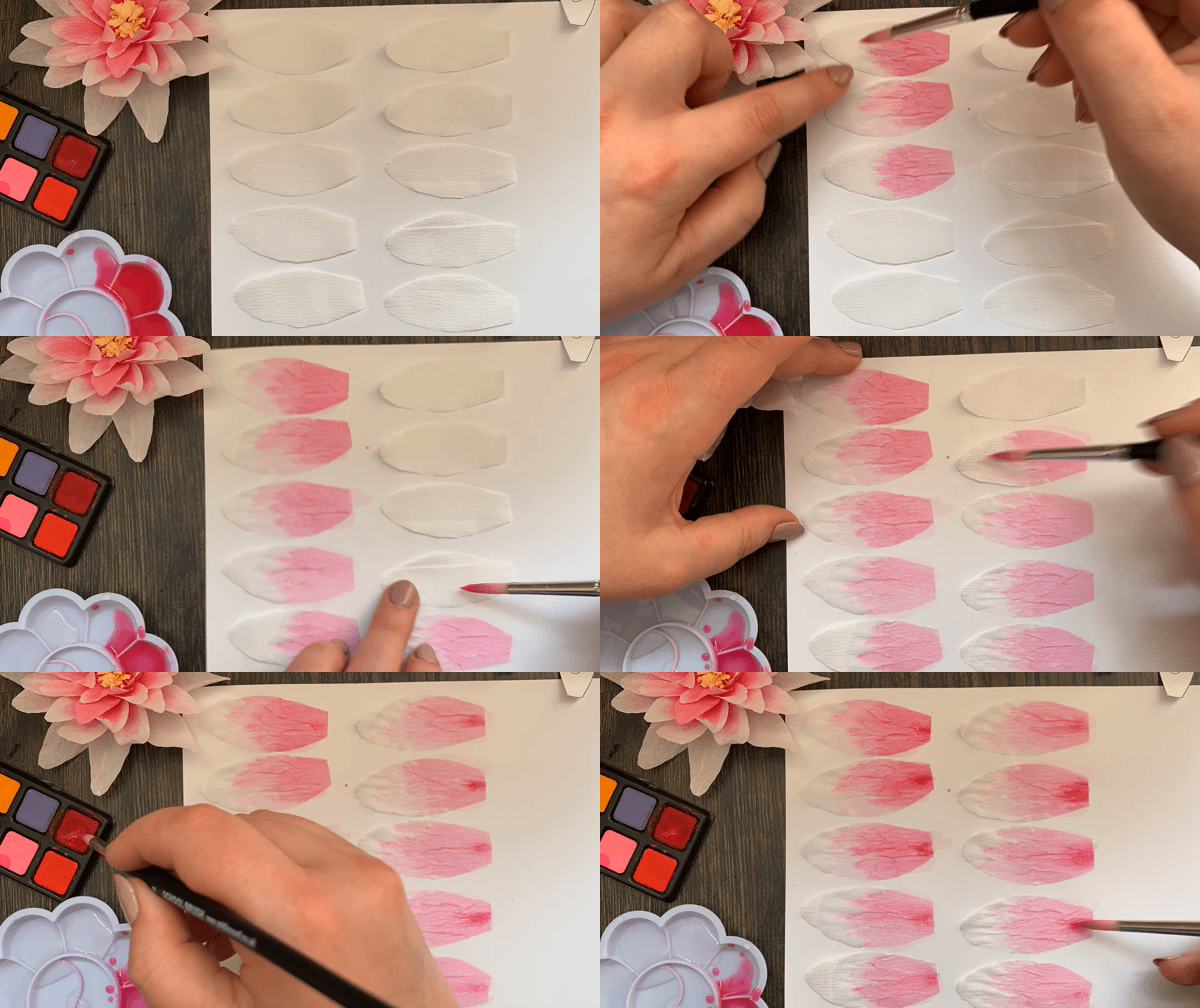
Lay each petal out on a piece of card. Add on some pink watercolour paint as shown below. Keep the paint towards the base (flat end) of each petal. For the smaller pieces, for the centre of your water lily, add a bit more paint as they tend to be darker towards the middle.

You will also need a strip of crepe paper that measures about 6cm x 3cm. Lay this out on some card and paint it yellow. This will be for the centre of your water lily.

Leave the petals to dry out a bit. Peel your petals off the card before they’re completely dry so they don’t stick. You can place them onto another piece while they finish drying.

Once your petals are completely dry, cut a small slit in the base of each one. Then put a tiny amount of glue onto one side of the cut and pull the other side of the cut over to cover it. This will give your petals shape and a natural crease towards the bottom of each one.

Next cut out a small piece of card that measures approximately 1cm x 2cm. Roll it up tight and dip one end of it into some strong pink watercolour paint.

Take your piece of yellow paper and make lots of parallel cuts about 3/4 of the way down. The more cuts you make the fluffier the centre will look. Roll the yellow paper around your rolled up card so that the fringe is free at the top. Once you get to the end of your yellow paper add a few small dabs of glue to stick it to itself. Let this dry a bit and then trim a bit of the solid base. If the fringe seems too long you can also trim it down.

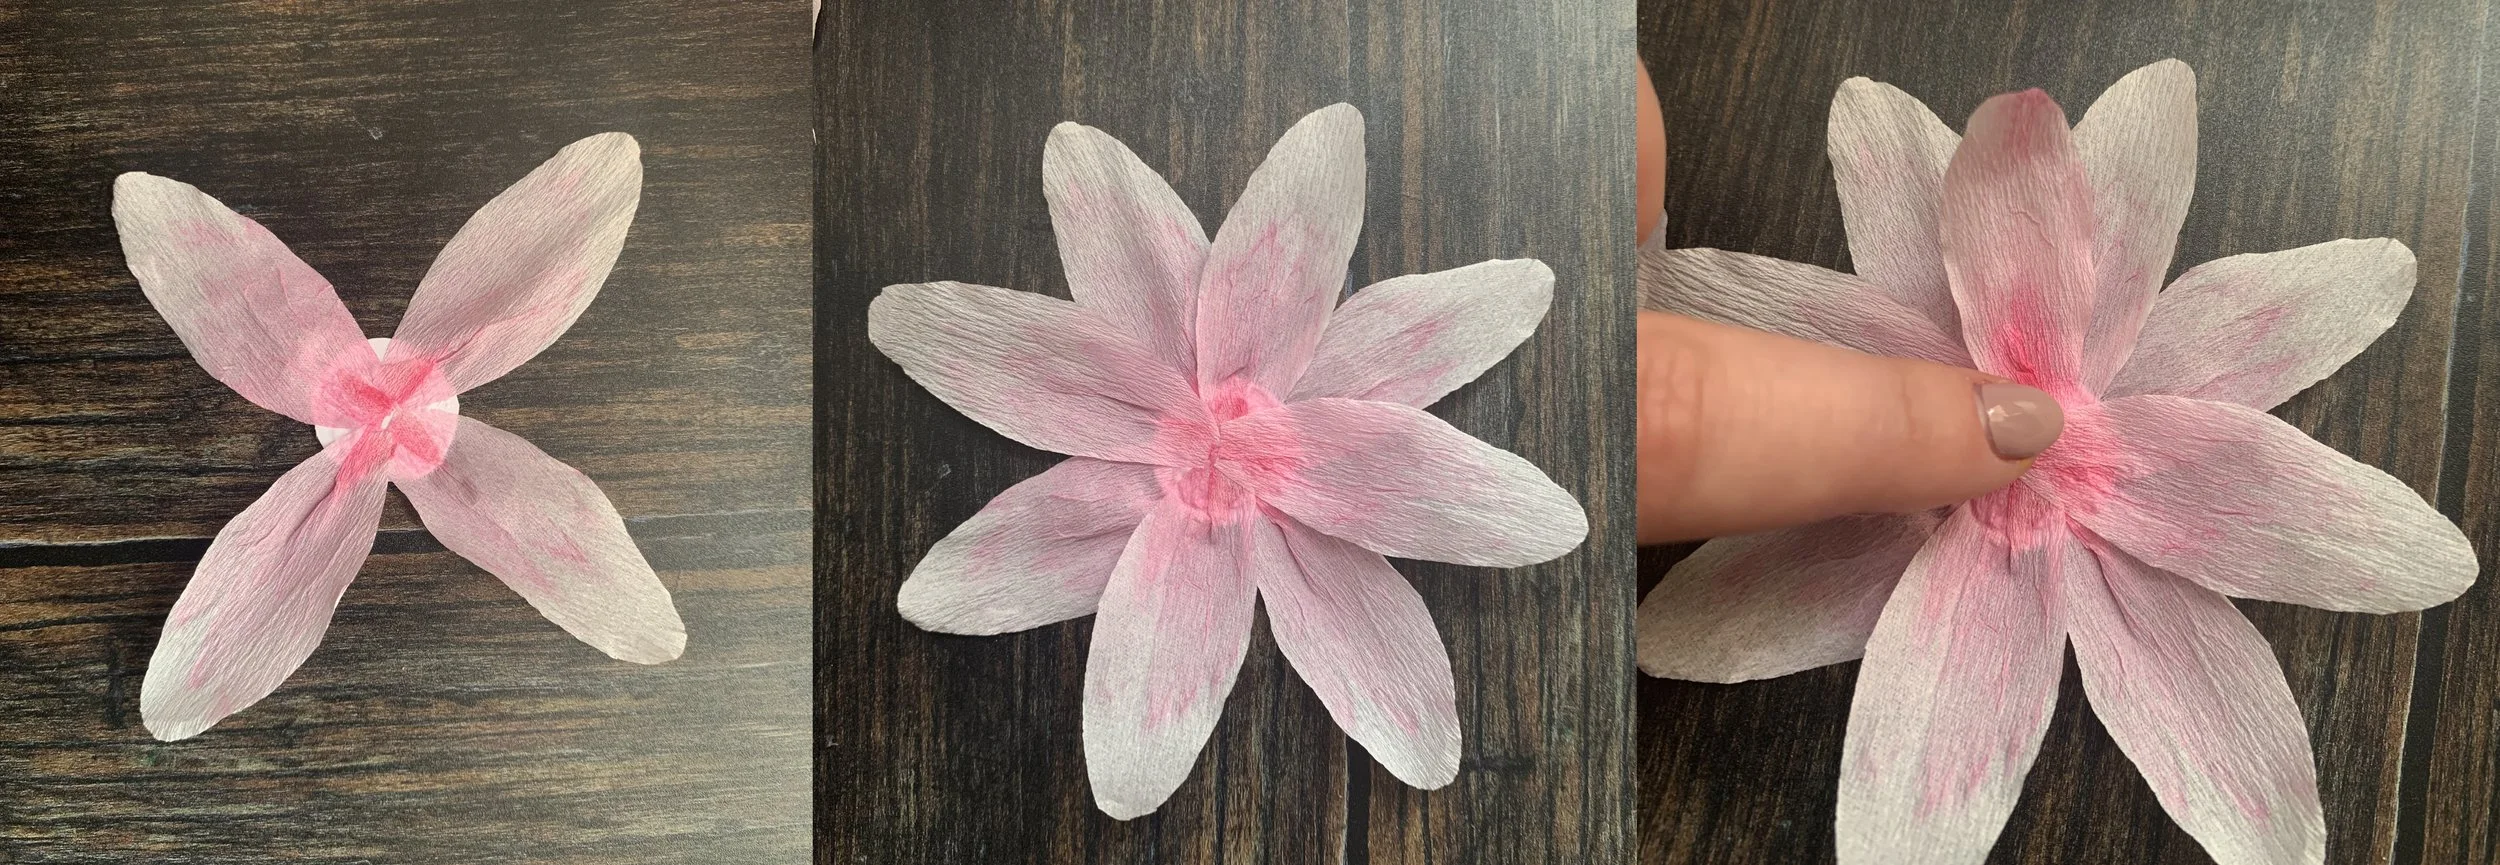
Cut out a small circle of card with a diameter of roughly 2 or 3cm. Starting with the largest petals, glue down four petals onto your circle of card as pictured below. Then glue down four more so that they sit inbetween each of the previous petals. Then move on to the next size down. Glue four more petals so they’re sitting inbetween where your previous petals were placed. Keep doing this with 8 of each petal size.

Once you've glue down all of your petals your water lily should look like this..

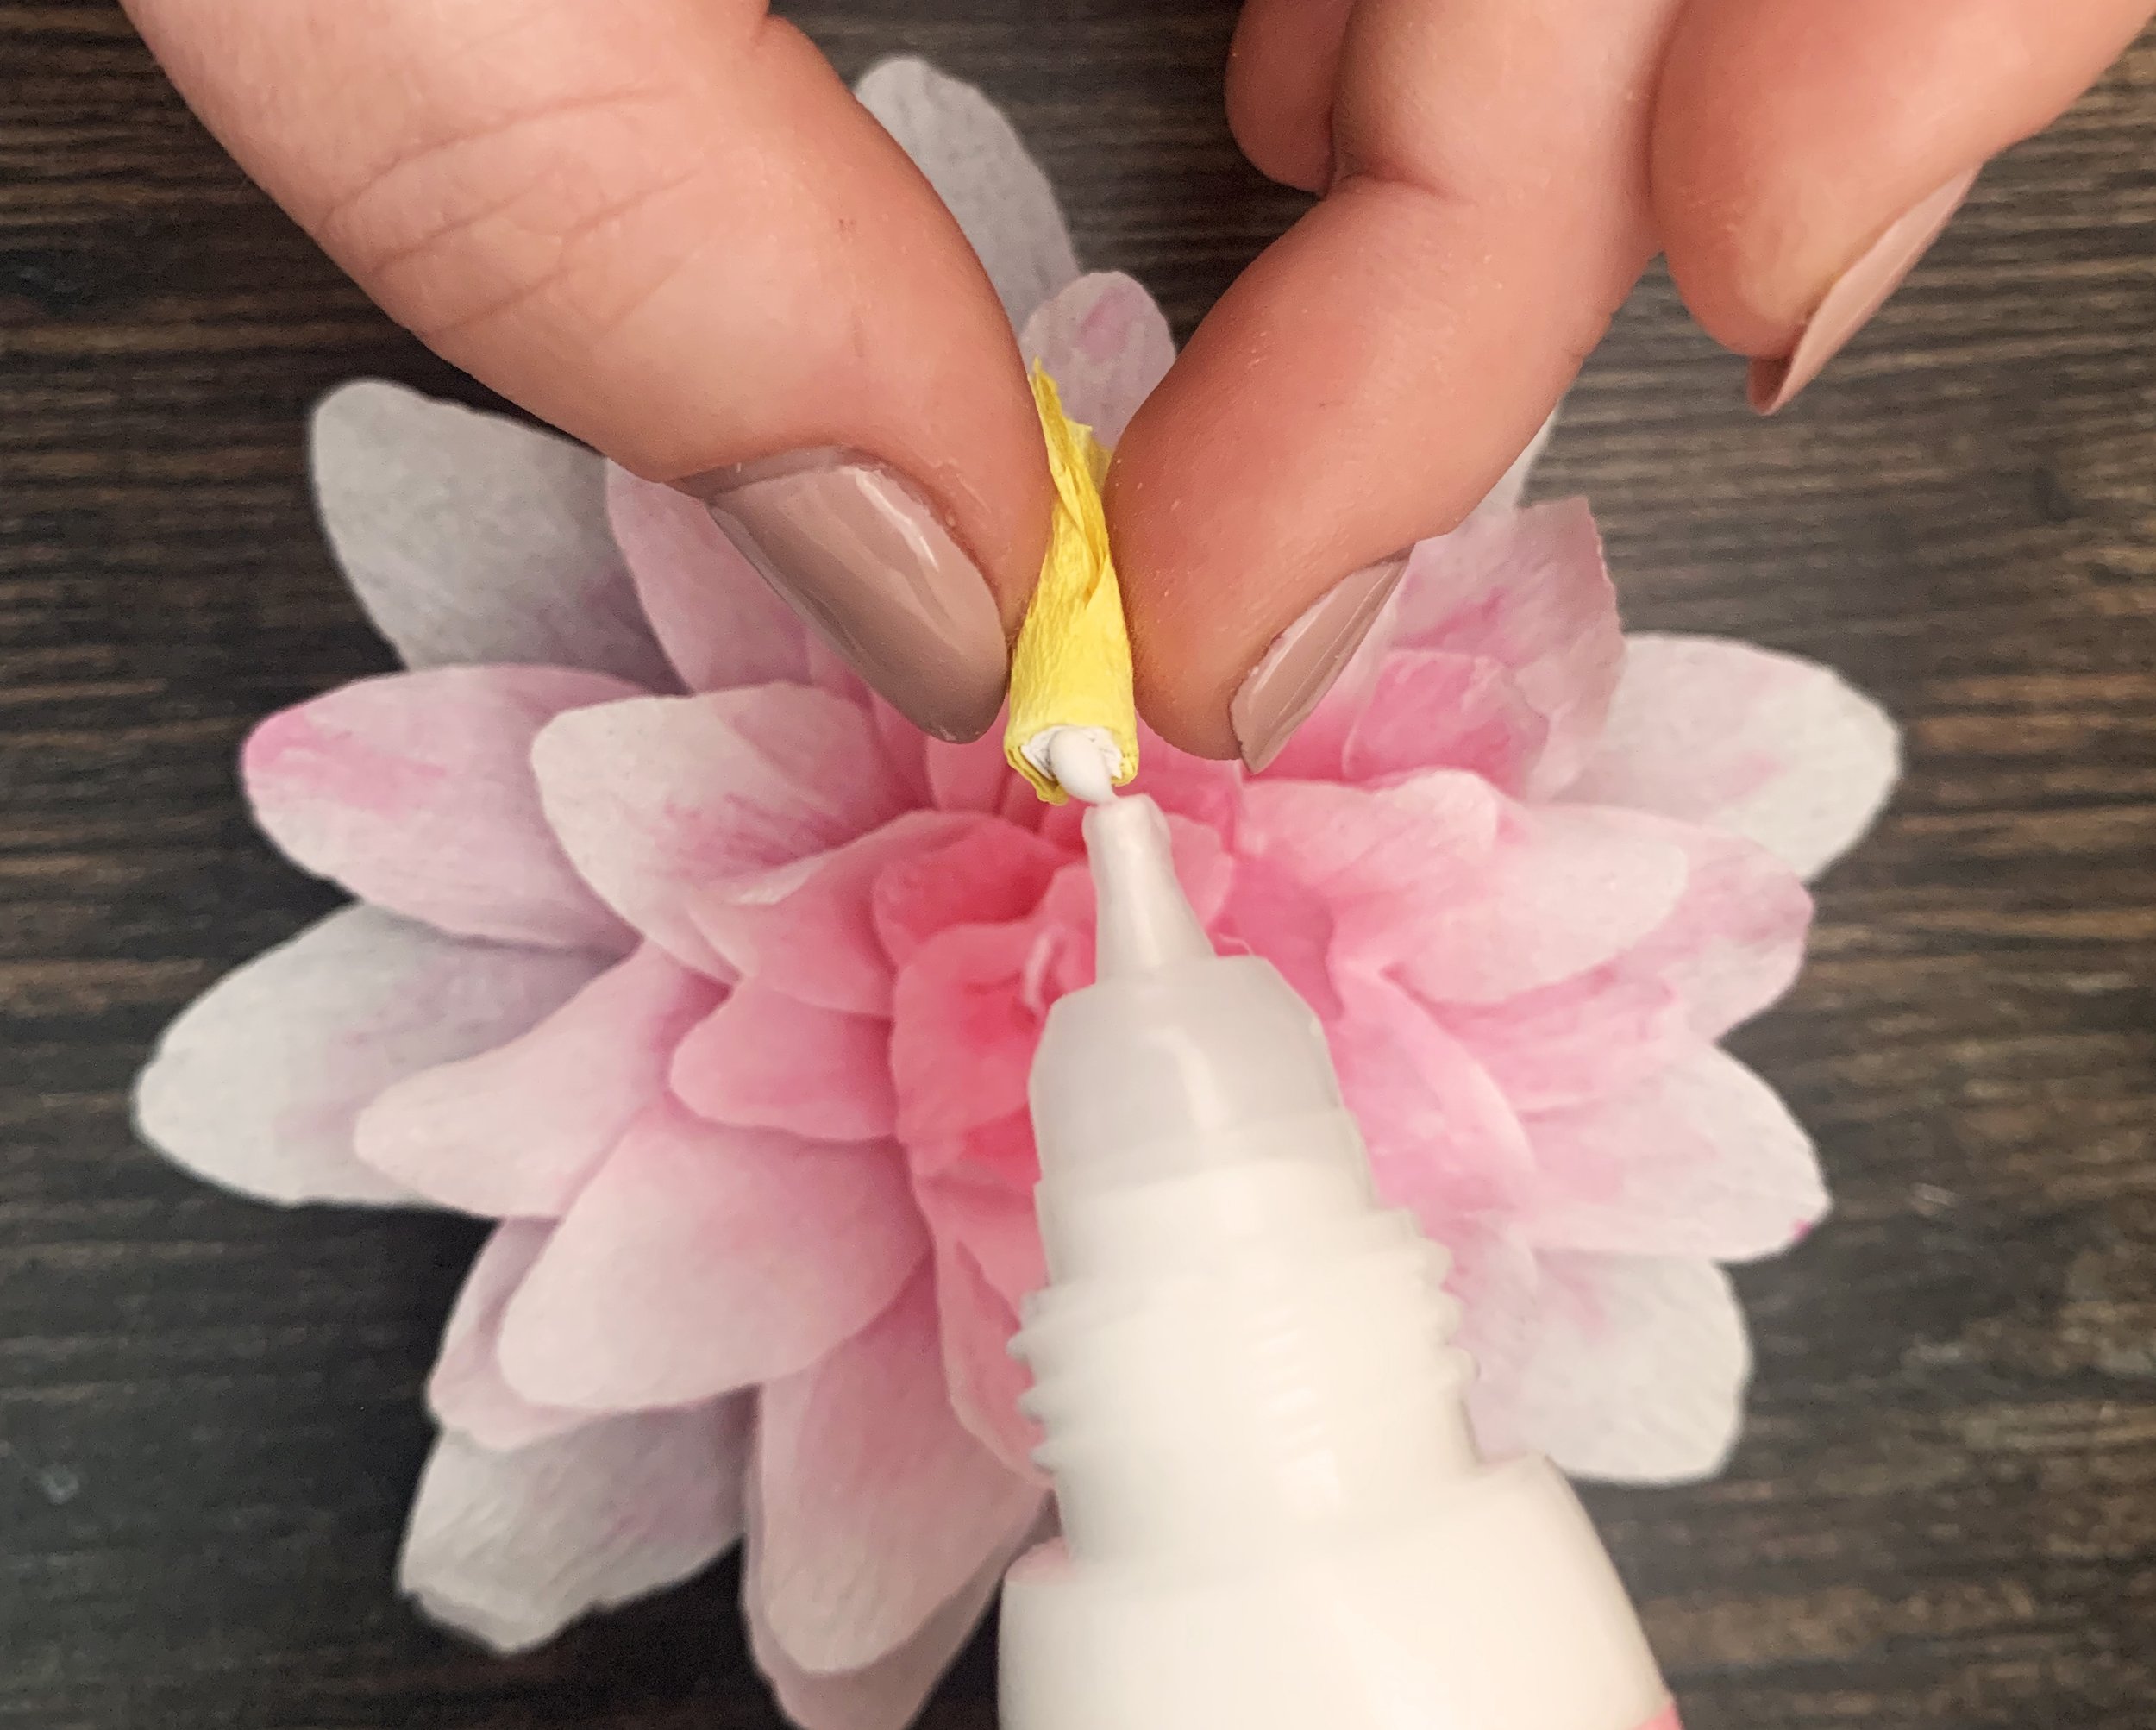
Then add a small amount of glue to the bottom of your yellow centre and stick it into the middle of your petals. Leave your water lily to dry for a few hours as the glue can stay tacky for a while.

I hope you enjoyed making these water lilies as much as we did. We love to see your finished projects so do tag us on Instagram at @craftpod_

Love, Immi & Jo x

Herb Garden Embroidery Tutorial

Hello dear Craftpodders,

We’ve put together a tutorial for the Herb Garden Embroidery pattern included in the Spring 2022 Craftpod. This pattern can either be stitched as your embroidery design for your glasses case (one of the projects from the Spring 2022 Craftpod) or you can stitch it up in a hoop.

Firstly, if you need any help with the stitches we use in this project, head to our YouTube Channel where you can find tutorials for the stitches or click on the orange highlighted links as we mention each stitch.

If you have the Spring 2022 Craftpod, you’ve already got everything you need for stitching up this design onto a glasses case. There’s no need for an embroidery hoop when transferring this design onto a case. In fact it would leave a strong indent on your linen fabric, so we purposefully don’t use one when making a glasses case.

However, if you don’t have the Spring 2022 Craftpod, and you’d like to stitch this sweet little design in a hoop, we’ve listed everything you’re going to need.

WHAT YOU WILL NEED:

  • A 5 inch Hoop (or larger)

  • Black fabric - We’ve used linen.

  • Embroidery Threads - DMC embroidery colours that we have used are: 936, 732 & 3835.

  • White Transfer Paper

  • Printer - to print your pattern

  • Size 7/8 Embroidery Needle

  • Scissors

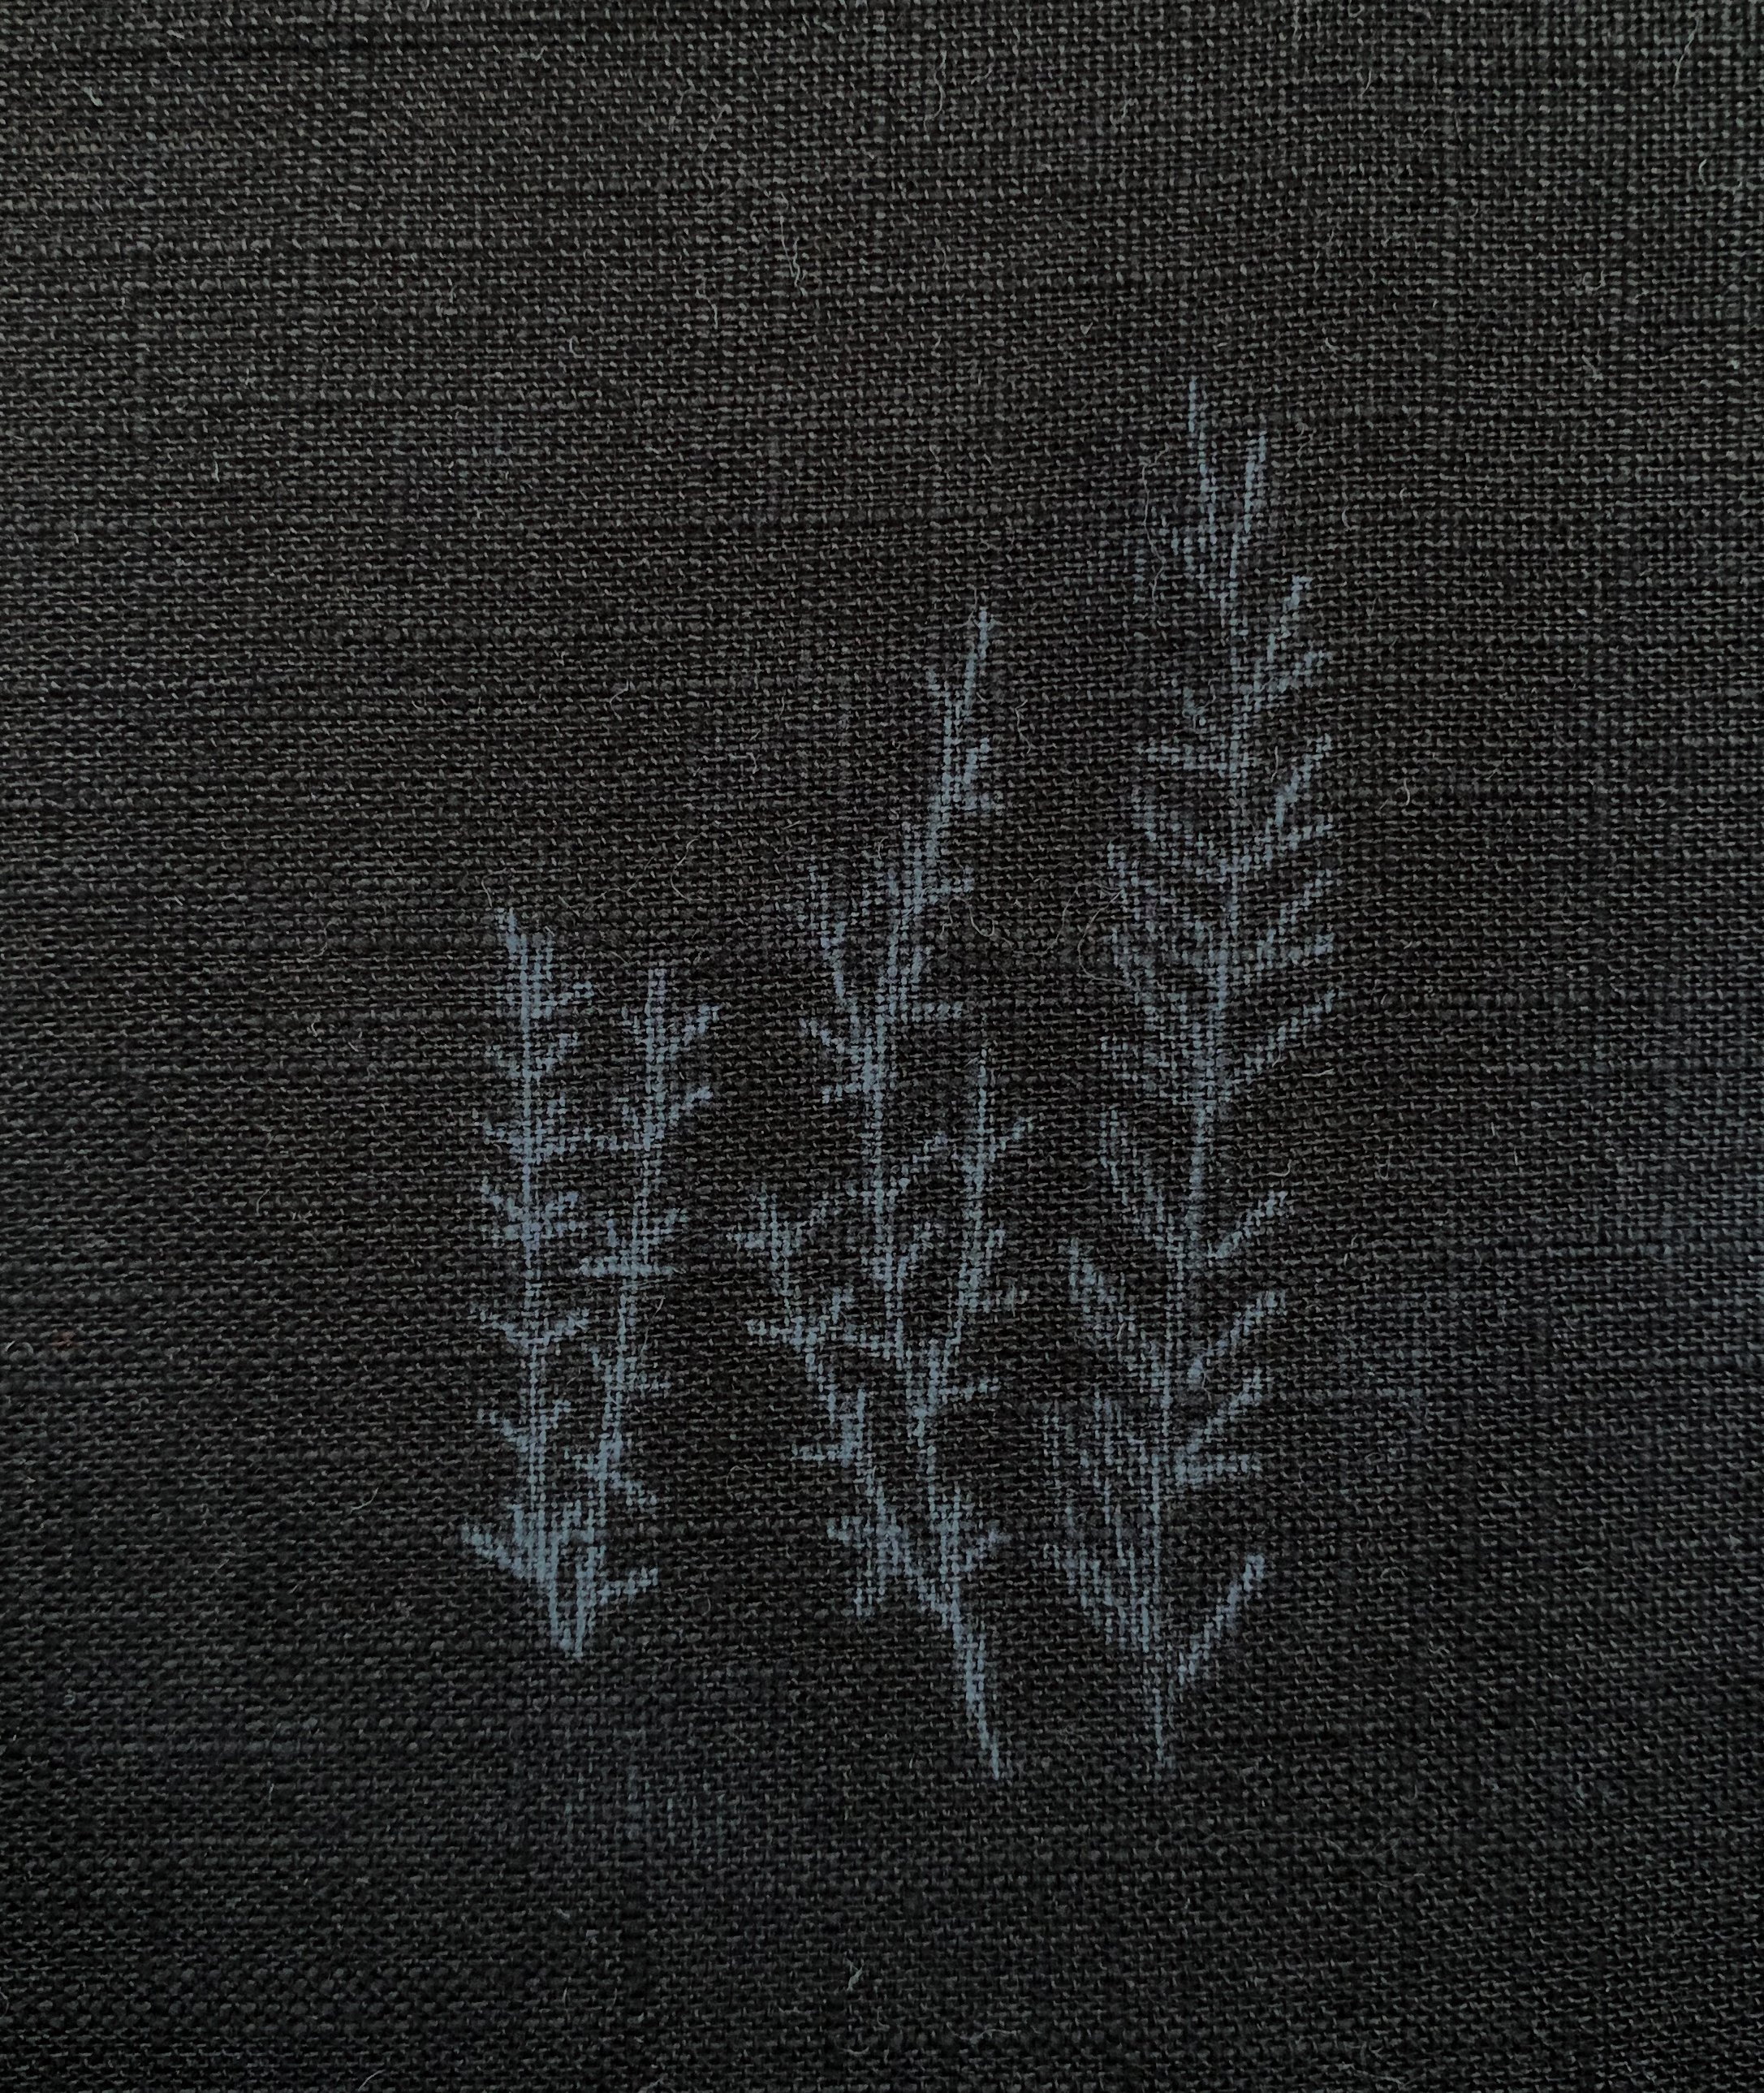
Begin by printing the pattern. Use white transfer paper and your printed pattern to transfer your design onto your fabric (it’s best to do this before you but your fabric in a hoop if you are using one). Once your design is successfully transferred onto your fabric you can begin stitching.

Use one strand of the dark green (936) and whipped back stitch, to stitch in the stalks of the lavender and the rosemary.

Now with the light green (732), use whipped back stitch to stitch in the stalk of the thyme (middle plant).

For the lavender flowers, use one strand of light purple (3835) and lazy daisy stitch to create each petal.

For the thyme leaves, use one strand of dark green (936) and lazy daisy stitch to create each leaf.

Lastly use two strands of dark green (936) to stitch in the rosemary leaves. This can just be done with straight stitches.

Happy crafting!

Jo & Immi xx

Stitching the Lavender flowers using lazy daisy stitch.

Stitching the Rosemary leaves using straight stitch.

Transferred Pattern


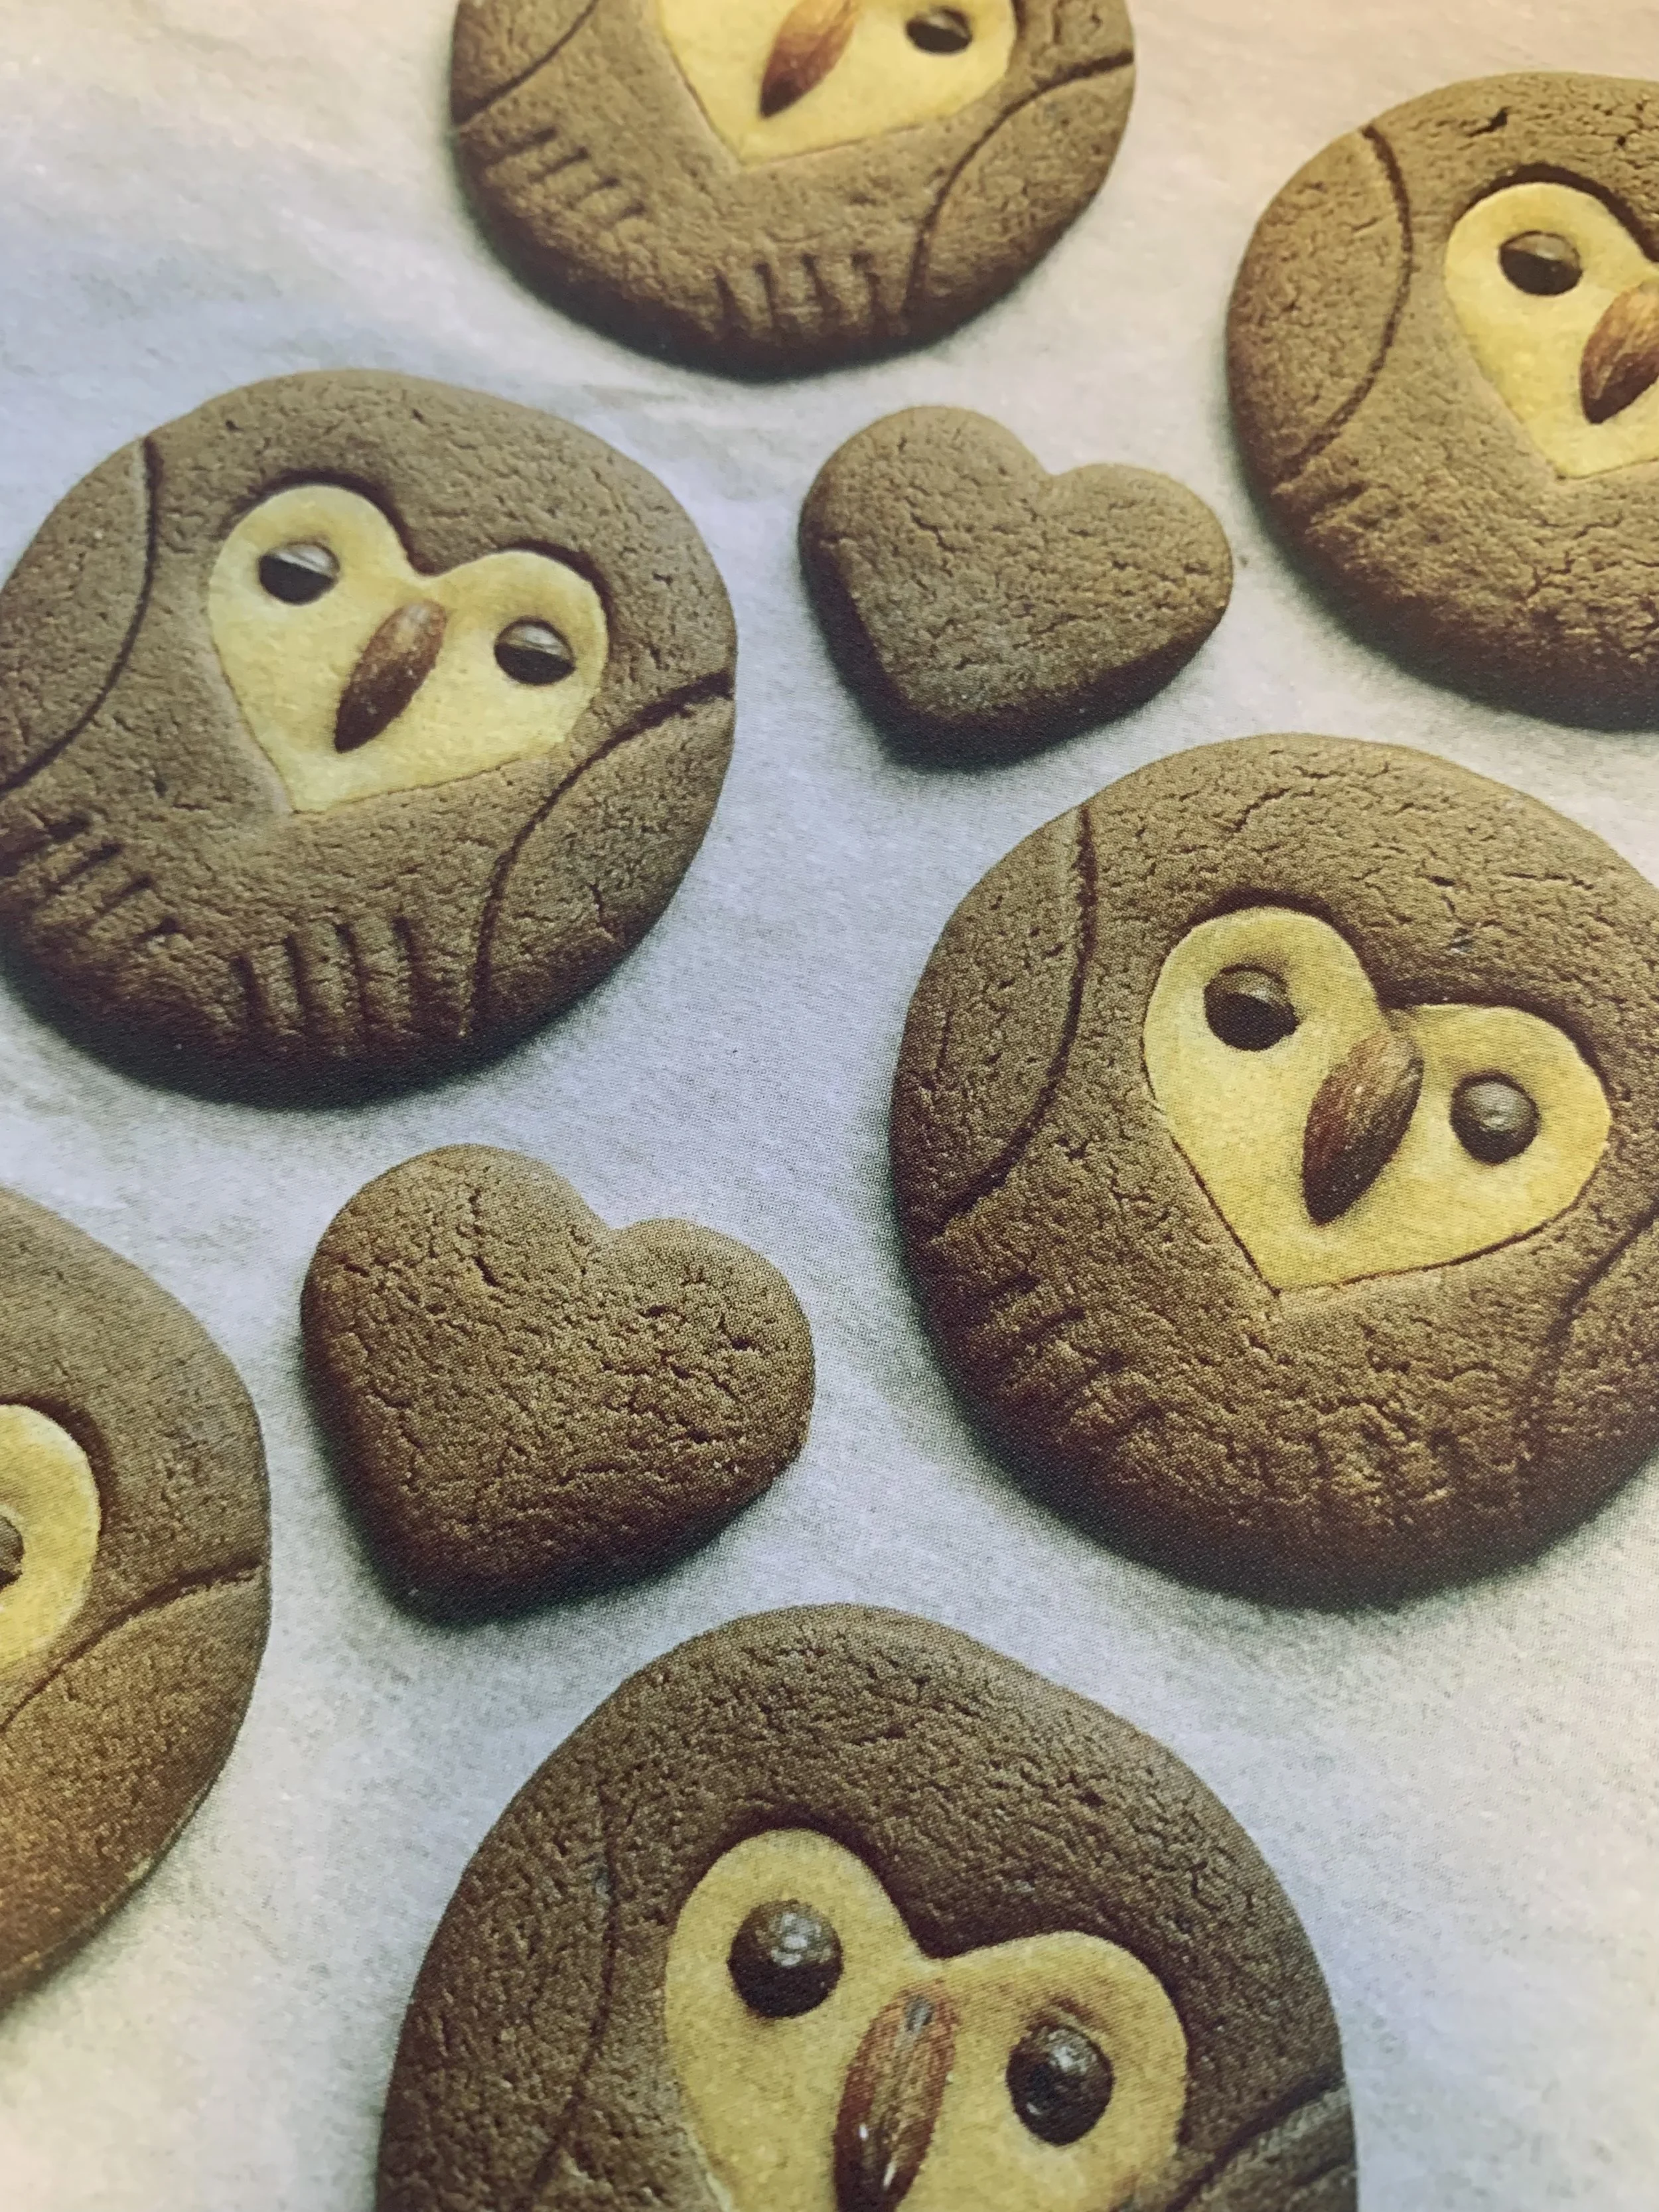
Owl Ginger Cookies

Ingredients:

  • 250g Butter

  • 500g Plain flour

  • 200g Light Muscovado sugar

  • 2tsp Bicarbonate of Soda

  • 8tbsp Ground Ginger

  • Handful of Almonds

  • 4tsp Cocoa Powder

  • Handful of Dark Chocolate chips

  • 8tbsp Golden Syrup

To make these owl cookies you’ll need to mix up two different batches of cookie dough. One batch will have cocoa powder sifted into the flour to make it darker for the owl bodies, and the other will be plain without cocoa – this is for the centre of the faces.

Pre-heat the oven to 160˚/ gas mark 3 and line a baking tray with baking paper.

First make the lighter colour dough:

In a saucepan gently melt together 125g of butter, 4 tbsp of golden syrup and 100g of light muscovado sugar. Stir well until the sugar has dissolved.

In a bowl sift together 250g of plain flour, 4 tsp of ground ginger and 1 tsp of bicarbonate of soda. Pour the melted ingredients into the bowl of dry ingredients and mix until a soft dough is formed.

To make the darker dough repeat this but this time sift the three teaspoons of cocoa powder in with dry ingredients. Wrap up each ball of dough in cling film or baking paper and chill them in the fridge for 10 - 15 minutes.

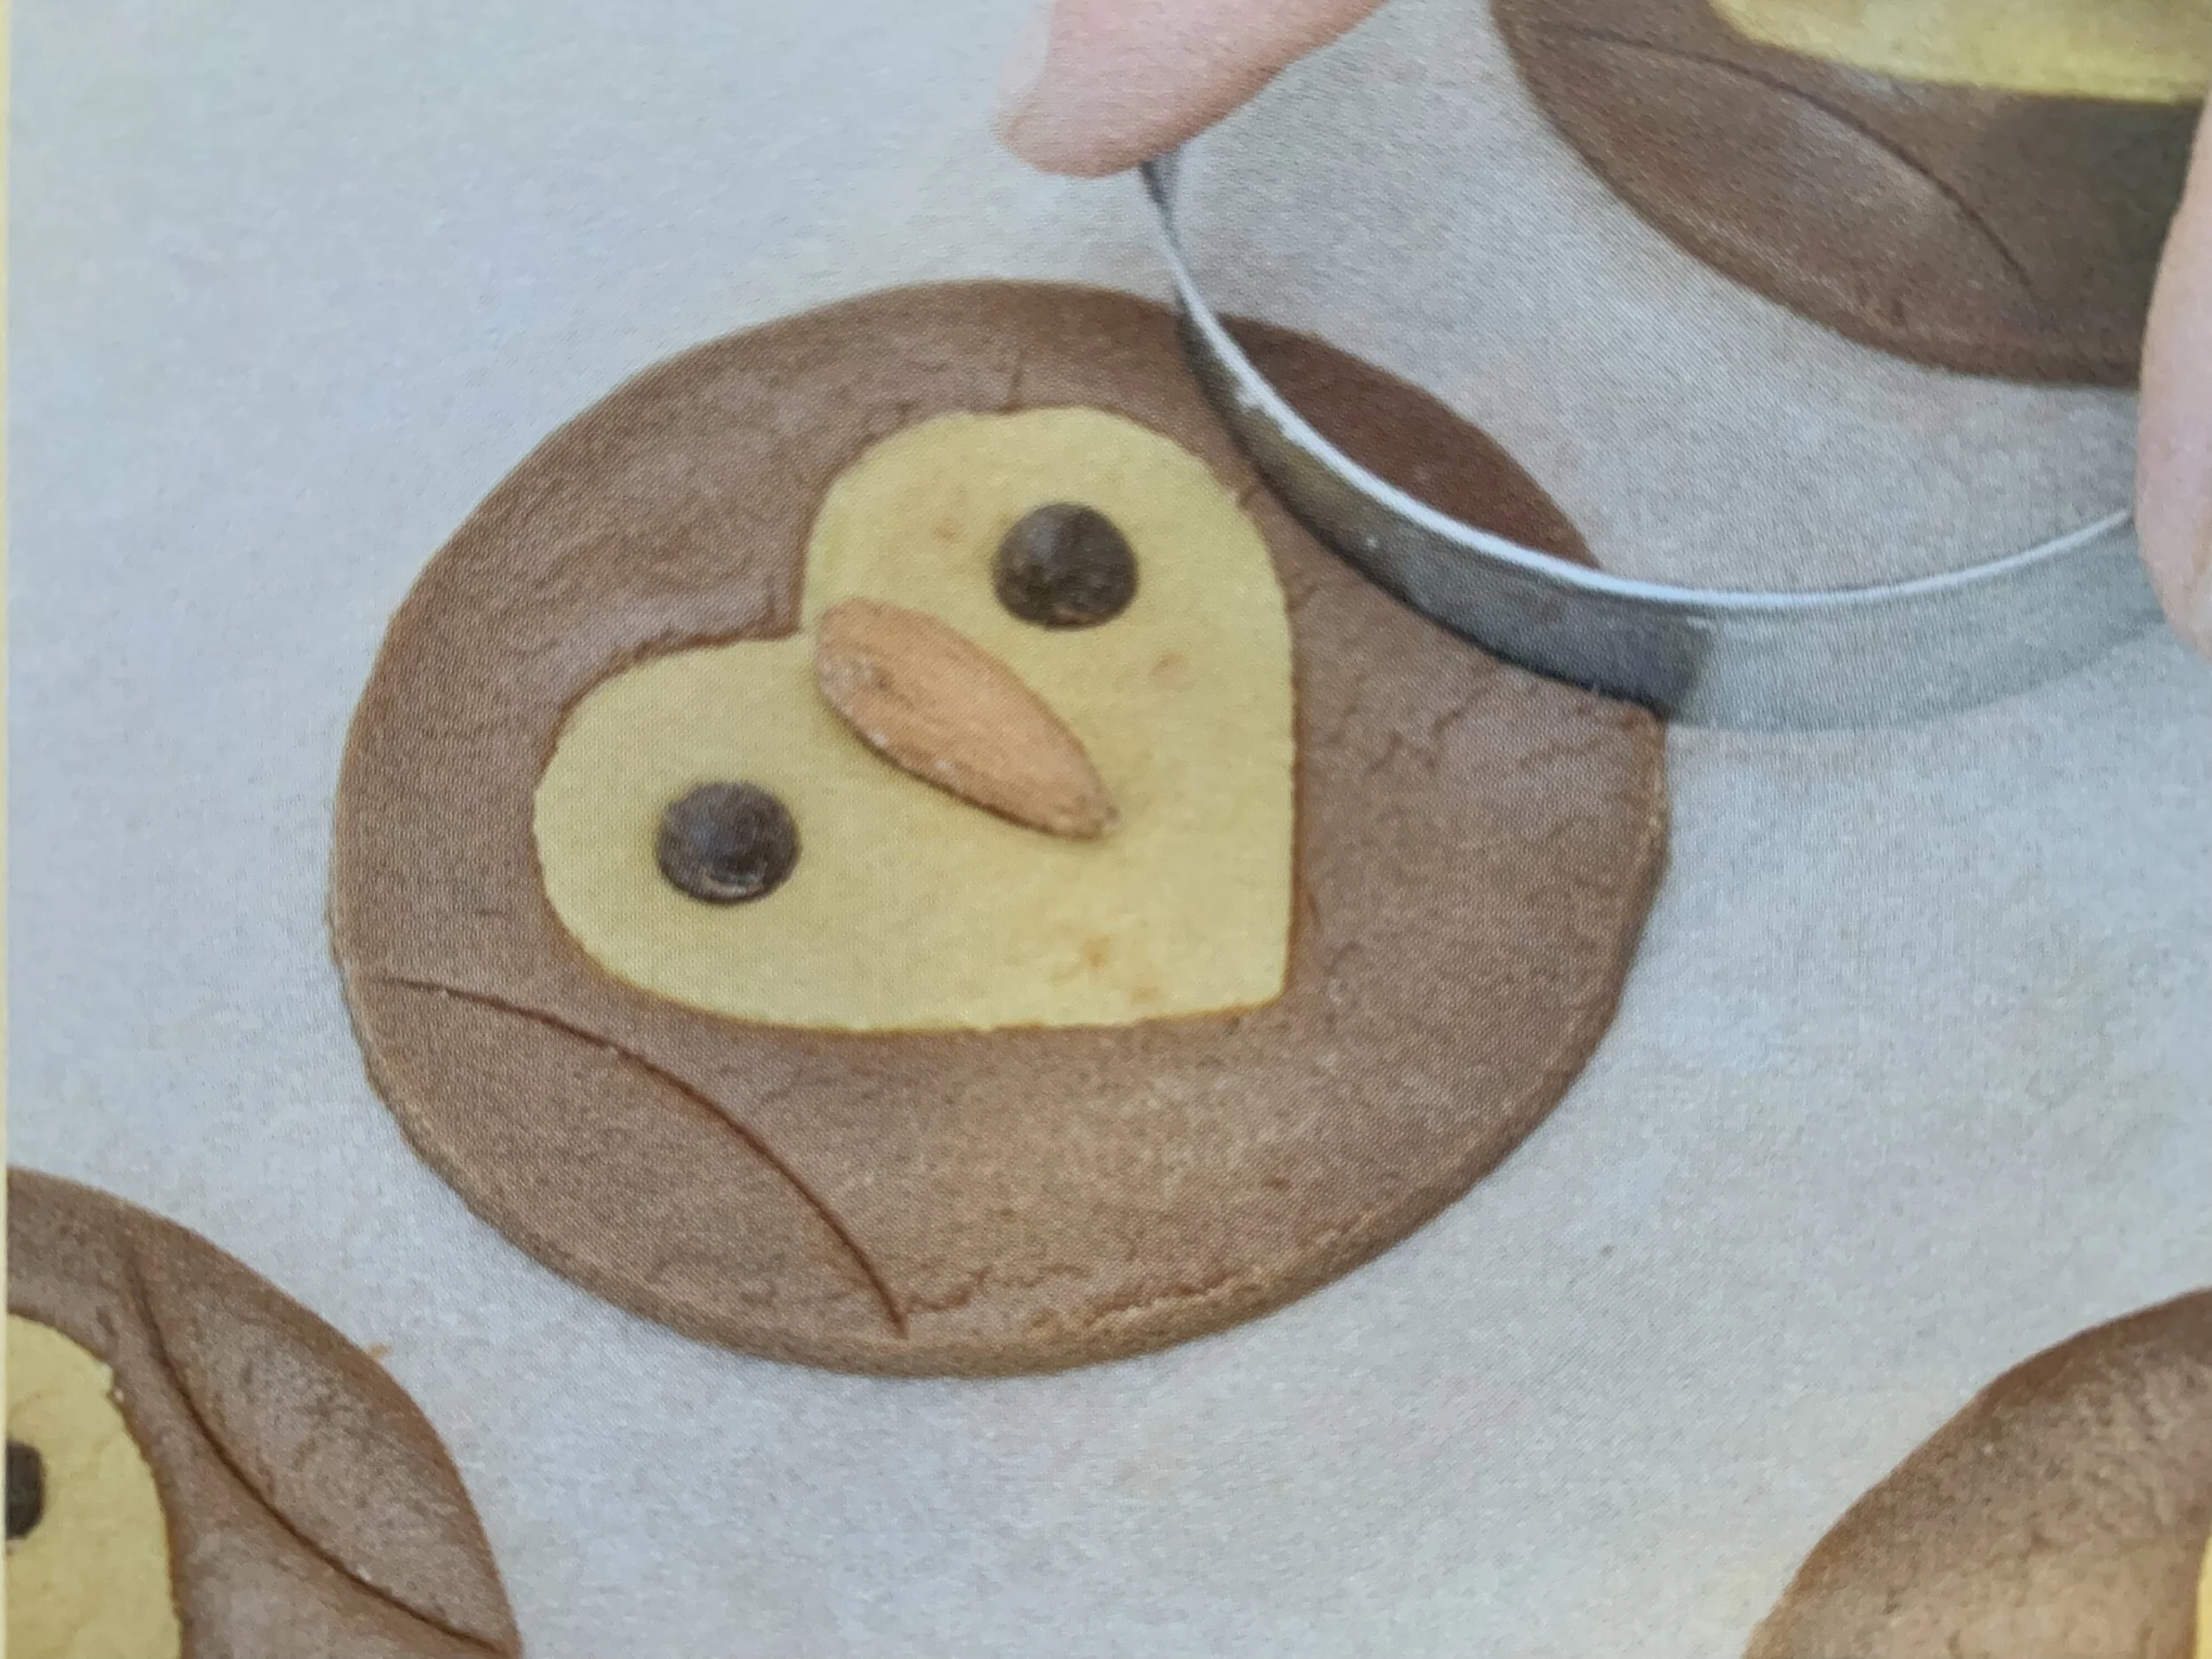
Roll out the darker dough onto a lightly flowered surface to about 0.5cm thickness. Cut out circles using the circular cookie cutter. Using a spatula, carefully lift each circle onto your baking tray use. Use the heart cutter to cut out a heart shape slightly above the centre of each circle. You might need to use a small knife to gently lift out the hearts. Keep the heart shapes to one side as they can be baked alongside your owls.

Now roll out the lighter colour dough to the same thickness and cut out the same heart shapes. Fill the gaps in the Owl bodies with these lighter colour heart shapes. Use any left-over dough to make more hearts - so there’s no wastage 

Using the edge of your round cookie cutter make the indents of the wings on each side be careful not to cut right through.

Lightly press the end of a fork into the base of each circle to make the claws as pictured below.

Add chocolate chips for eyes and an almond for the beak, you could use sunflower seeds instead if you don't want to use nuts.

Bake in the oven until just turning golden brown - about 12-15 minutes.

Allow them to cool on the tray for five minutes then move onto a cooling rack the cookies will get crispier as they cool. Enjoy with a cup of cocoa and a cosy fire!

Autumn Leaves Pumpkin Pie Recipe

This is our favourite pumpkin pie recipe. You can use pumpkins or butternut squash instead. It makes a delicious and comforting autumnal dessert.

You will need:

  • 9 or 10 inch Pie or Flan Dish

  • Cookie cutters - a few different leaf shapes

  • Baking beans / lentils

  • Baking paper

Ingredients:

For the sweet pastry:

  • 400g of plain white flour

  • 80g caster sugar

  • 1/2 tsp salt

  • 230g unsalted butter

  • 2 large eggs - beaten

  • 1 egg (for the egg wash)

For the pie filling:

  • 750g pumpkin or butternut squash - peeled and cut into small chunks

  • 140g dark muscovado sugar

  • 1/2tsp of salt

  • 2 tsp cinnamon

  • 1/2 - 1 tsp fresh grated nutmeg (or 1 tsp ground)

  • 2 eggs beaten

  • 25g melted butter

  • 100ml milk

  • 75ml double cream

Start by making your pastry. Beat the butter and sugar together until fluffy. Slowly add the 2 eggs, then add the flour and salt, and mix until a ball is formed. Don’t over mix otherwise the pastry will become hard when baked.

Flatten into a fat disc and then chill in the fridge for at least an hour to firm up.

Pre-heat your oven to 180°C. Roll out half of the dough, on a generous dusting of flour, to a thickness of about 5mm and use a rolling pin to transfer the pastry into your pie dish. If the pastry breaks up, you can just patch it up by pressing pieces of pastry with your finger tips into the dish. Try to handle it as little as possible.

Lay a piece of baking paper over the pastry shell, then fill it with baking beans or lentils (this helps it keep its shape) then bake for 15 minutes at 180°C, beat one egg for your egg wash. Remove the dish from the oven, take out the baking beans and paper, then reduce the oven temperature down to 160°C. Brush your pastry with the egg wash, make sure to leave some for later. Bake for a further 5 minutes. Leave the pastry shell to cool.

Roll out the other half of your dough (to about 5mm thick) and use the leaf cutters to cut some pastry leaves. (Use a knife and freehand if you don’t have cutters). Use a knife to create the indents of the veins. Put aside some of the leaves to go around the edges of the pie crust (about 15). Bake the rest of the leaves in the same was as you baked the shell above, including the egg wash. Bake until they start to turn brown. Allow the leaves to cool.

For the filling:

Increase the oven’s temperature back to 180°C. Meanwhile, cook the pumpkin or squash for about 20 mins in boiling water until very tender. Drain well and then allow to cool, then puree well until smooth. In a bowl mix together the dark muscovado sugar, salt, cinnamon and nutmeg. Add in the beaten eggs, melted butter, milk and cream. Then add the pumpkin puree and combine well.

Pour the mixture into the pie shell until it nearly reaches the top (you may end up with some left over).

Brush the rim of the shell with some of your egg wash once more. Then lay the reserved uncooked pastry leaves around the edge. Brush the leaves with the rest of the egg wash. Bake the pie at 180°C for 10 mins, then drop the temperature to 140°C and bake for a further 40-45 minutes until the filling has just set. Leave to cool and then decorate with the cooked pastry leaves.

Serve chilled with whipped cream.

Strawberry, Rhubarb and Vanilla mini Victoria Sandwich Cakes with Chantilly Cream

This is our take on the classic Victoria Sandwich Cake. They’re oozing with homemade Strawberry, Rhubarb and Vanilla Compote and Chantilly Cream - slightly sweetened and with a touch of vanilla.

Strawberry, Rhubarb and Vanilla MIni Victoria Sandwich Cakes.jpg

Victoria Sandwich layer:

3 large eggs

200g butter

180g caster sugar

180g self raising flour

1 tsp vanilla extract

Makes 12

Pre-heat the oven to 160 Degrees.

Cream together the butter and sugar until light and fluffy.

Add the eggs one at a time, beating them in after each addition.

Stir in the vanilla extract.

Sift in the flour and combine well, until you have a light and smooth mixture.

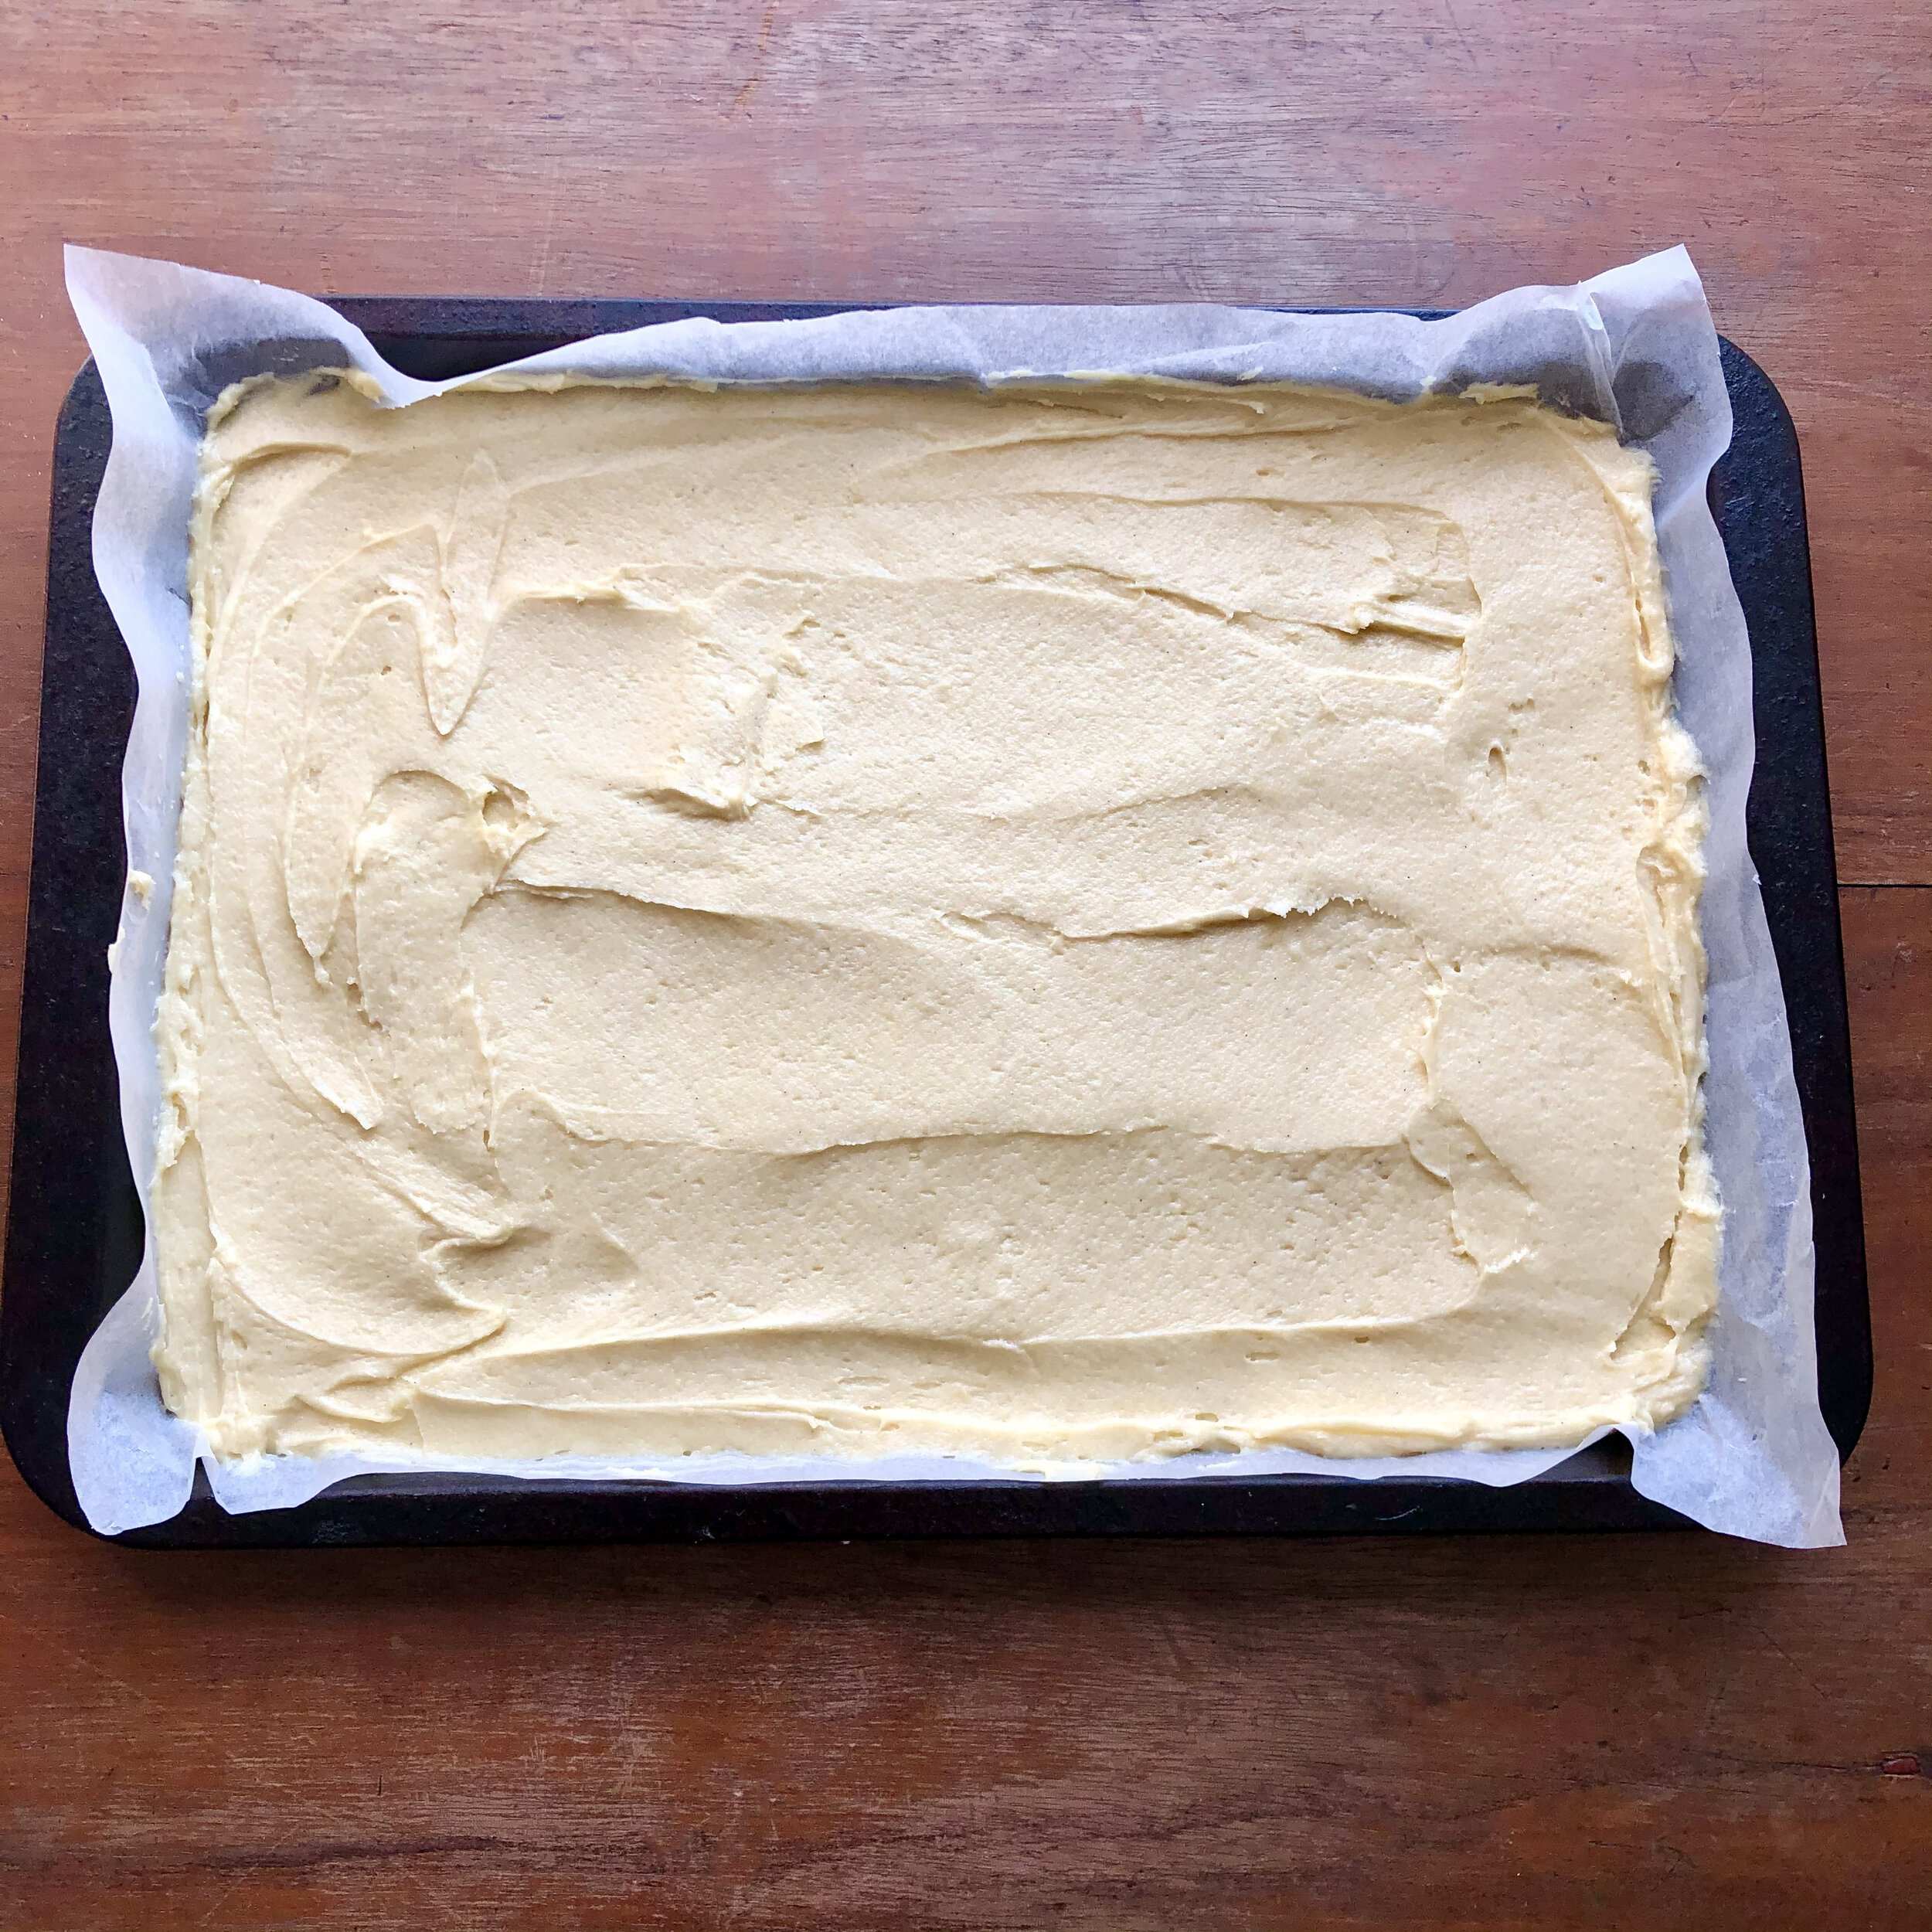
Grease and line a baking tray with baking paper.

Pour the mixture into the tray and spread evenly.

Bake for about 15 minutes, until the top is turning golden and springs back up when touched in the centre.

Allow to cool.

Use a small round biscuit cutter to cut out the circles of your mini cakes. If you don’t end up eating the leftover pieces, they can be frozen for use later on in a trifle or summer pudding.

Strawberry, Rhubarb and Vanilla Compote:

250g Strawberries

200g Rhubarb

80g Caster Sugar

1 Vanilla pod or 1 teaspoon of Vanilla extract


Chop the rhubarb into small pieces (about 1.5cm cubes) and place in a saucepan.

Add the sugar and the seeds from the vanilla pod, and gently simmer this mixture for about 10 minutes, stirring occasionally.

Mash the strawberries into the mixture, then cook for a further 10 minutes to reduce.

Allow to cool and chill in the fridge before using.

Chantilly Cream:

300ml of Double Cream

1 teaspoon of Vanilla extract or the seeds from a Vanilla pod

2 tablespoons of Icing Sugar

Pour the cream into a bowl.

Sift the icing sugar into the cream.

Add the vanilla.

Gently whisk until the cream has thickened. Stop as soon as you notice it going thick. Beware of warm weather! This can make it curdle if you over whip. Piping can also send it past the whipped stage, so give yourself a little bit of leeway by stopping whisking just when you see the texture beginning to change.

Spoon the cream into a piping bag fitted with a small star nozzle.

Assembling the cakes:

Slice each round horizontally through the middle to make a top and bottom piece.

Pipe the cream in stars around the edge of the bottom piece and then in the centre. Now spoon about two teaspoons of compote on top. Then sandwich with the top piece.

Keep your mini cakes chilled in the fridge. Bring out 15 minutes before serving.

To serve: Sieve icing sugar over the top and then serve with half a fresh strawberry on top as shown.

Pine Cone Ginger Biscuits

Crispy, tasty, spiced biscuits in a pretty winter pine cone shape….

Pine cone ginger biscuits.jpg

Ingredients:

65g butter

3 tbsp golden syrup

50g light brown sugar

140g plain flour

1 tbsp ground ginger


Method:

1. In a pan, melt the butter, golden syrup and brown sugar on a low heat while stirring occasionally until the sugar dissolves.

2. Sieve the flour and ginger into a mixing bowl.
Add the melted butter, golden syrup and sugar mixture to the bowl of flour, and mix with a wooden spoon until it’s smooth and forms a dough.

3. Wrap the mixture in baking paper and leave in the freezer for 30 minutes.

Remove the dough from the freezer and take it out of the baking paper.

Preheat your oven to 175°C

4. Place the dough between two sheets of baking paper and roll it through the paper until it is about 1cm thick. Make sure the thickness is consistent all the way through.

Pine Cone biscuits rolling.jpg

5. On a piece of baking paper, draw a pine cone shape and cut it out to use as a template.

Pine cone cutting shape.jpg

6. Using a sharp knife, cut out as many pine cones as you can, following your template. Re-roll the remaining dough to cut out more.

When moving your pine cones, it helps to use a flour dusted pallet knife or spatula.

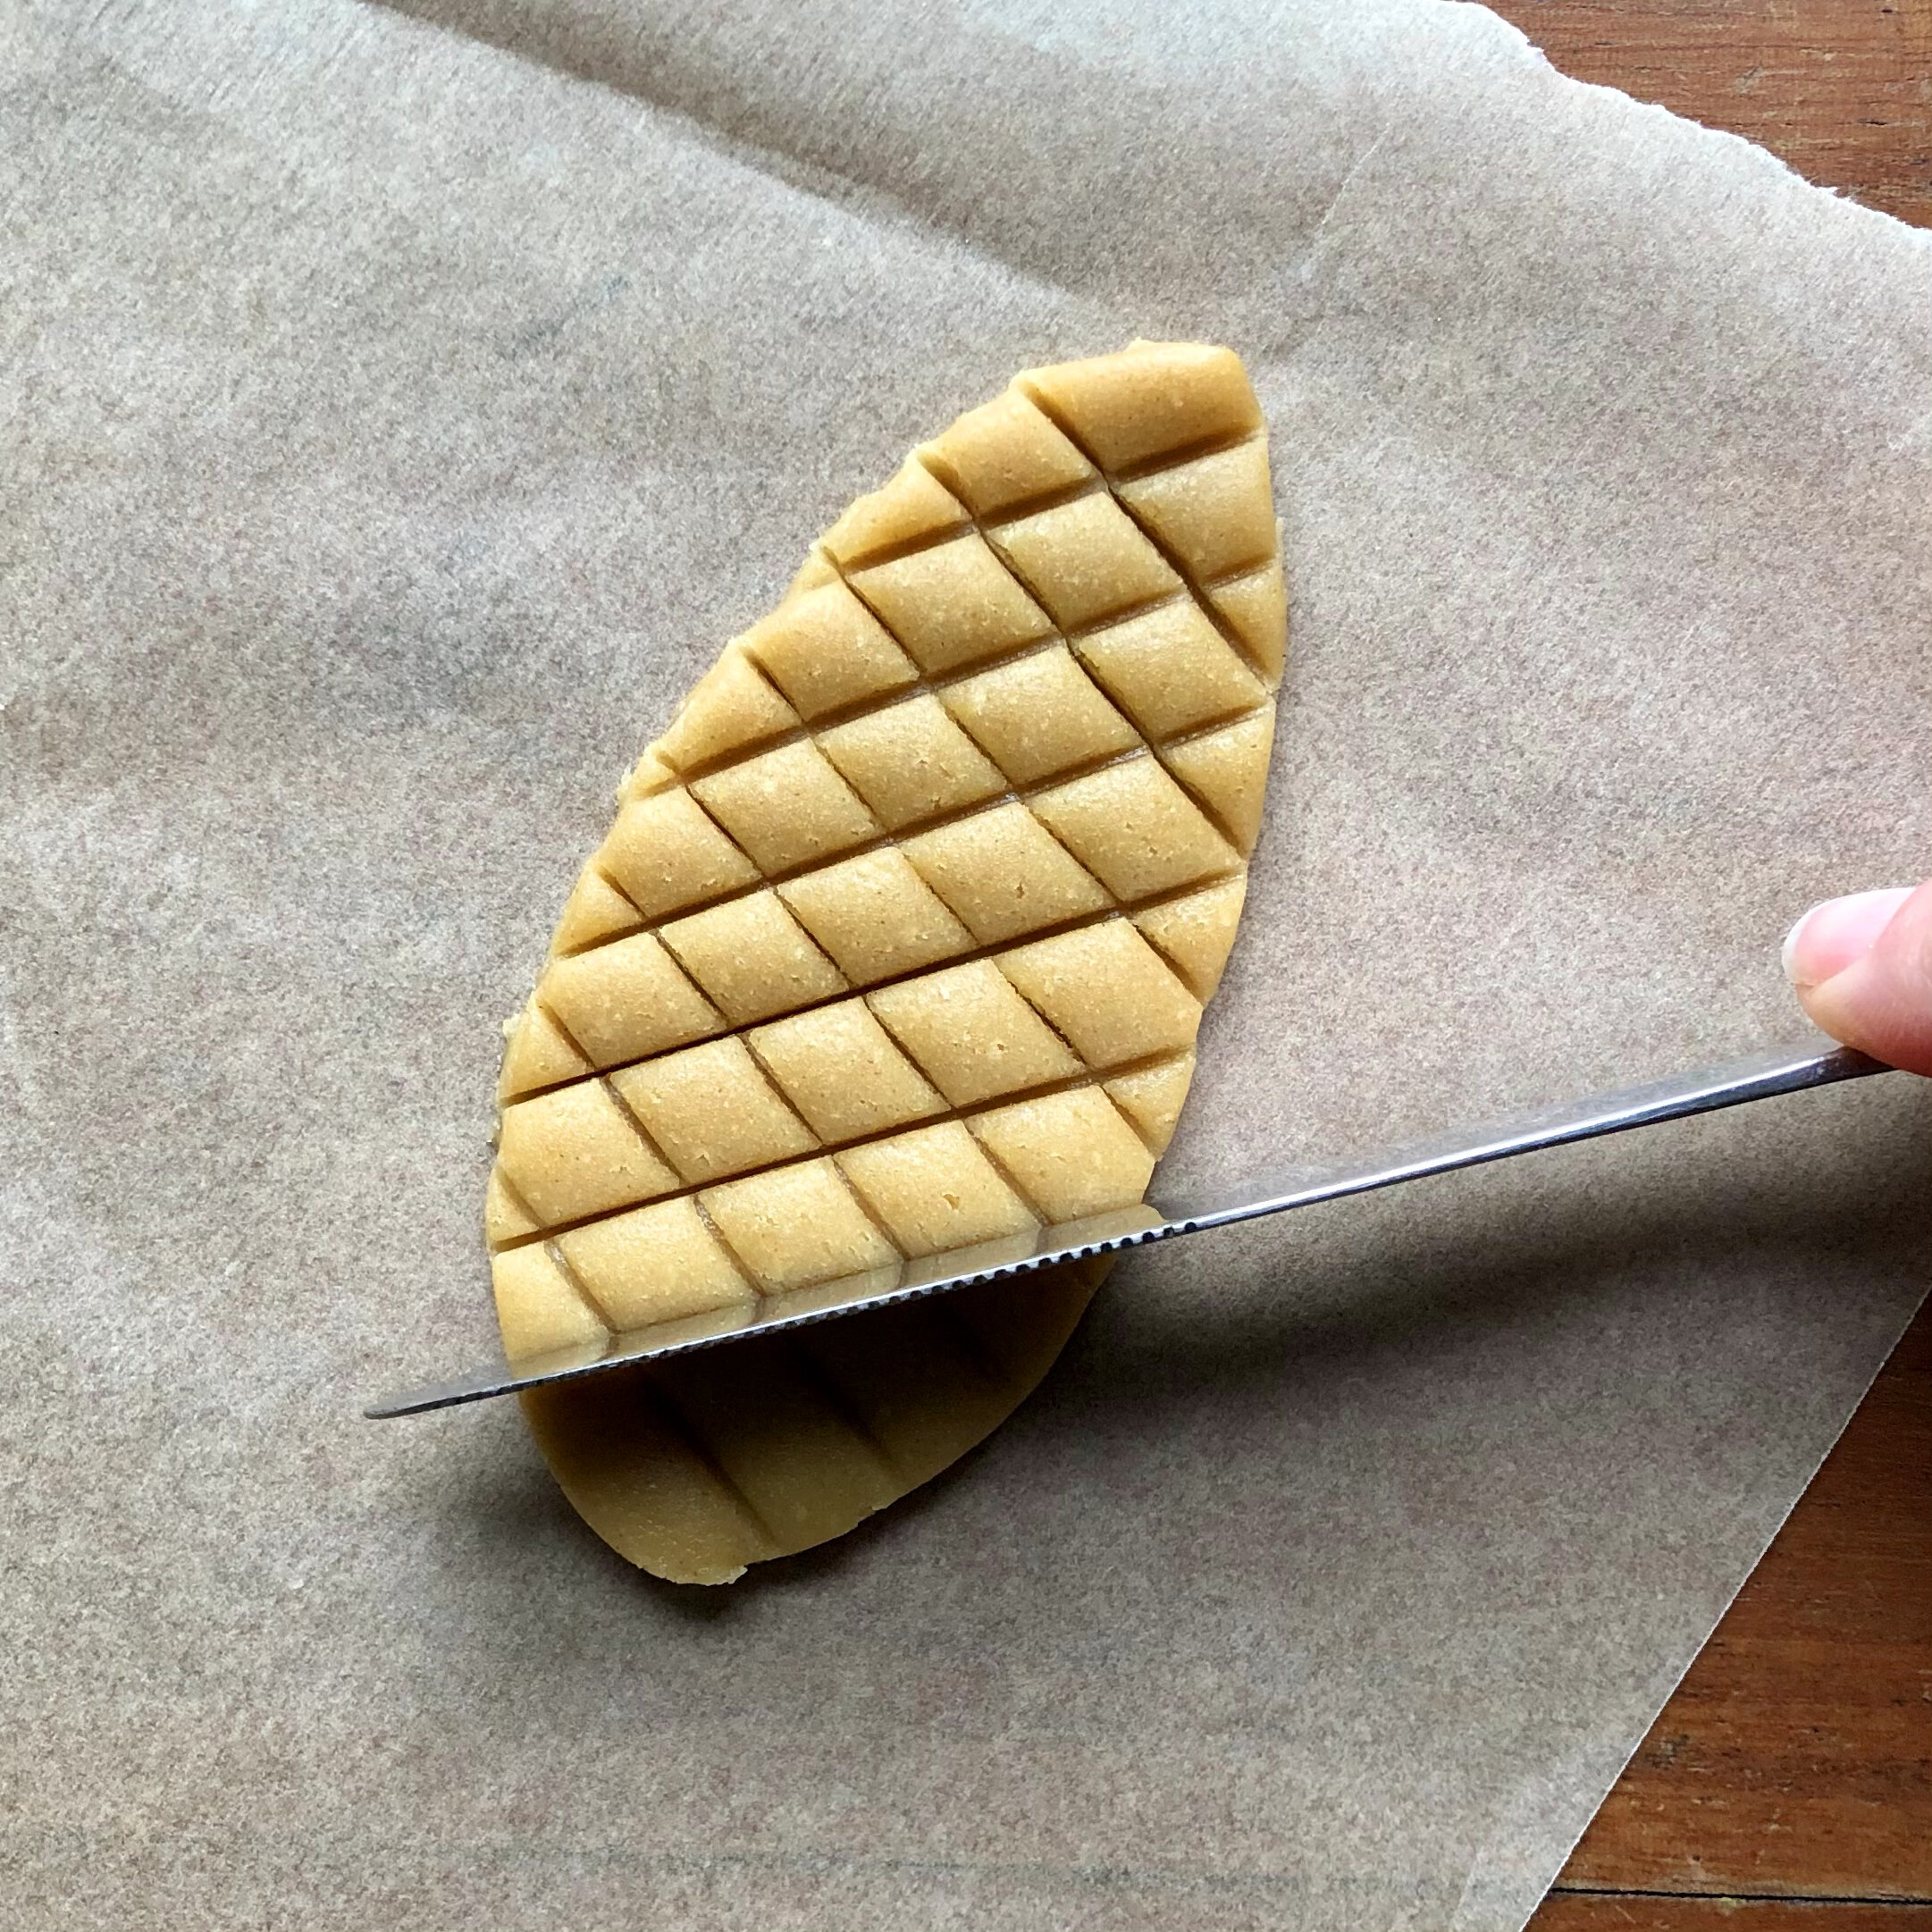
7. Using the blunt edge of a knife press diagonal lines into the pine cone shapes, then press diagonal lines in the opposite direction (See image above). Press through the dough as far down as you can without actually cutting through it. If you do, you can push it back together and it will bond during baking.

Pine Cone pattern.jpg

8. Place your pine cones evenly on a baking tray lined with baking paper.

9. Bake for 8-10 minutes, depending on your oven and the thickness of your biscuits. Keep checking after 8 minutes. Bake until just browning at the edges.

10. Remove from the oven and leave to cool on the tray for 5 minutes as they will be very soft at first. Then transfer them to a wire rack and leave to cool completely.

Store in an airtight container.

Spring 2020 Craftpod stitch tutorials

This is a little video showing you how to do French knots - a stitch used in both of the crafting projects in the Spring 2020 Craftpod. Happy Crafting! www.c...

This is a little video showing how to create miniature weaving with a needle and thread - a technique used in a project in the Spring 2020 Craftpod. Happy Cr...

This video is a little tutorial showing how to create the Ribbed Spider Web Stitch - a stitching technique used in the Spring 2020 Craftpod. Happy Crafting! ...

Chinese Lantern (Ornamental Physalis) Fairy Lights

Add a cosy botanical glow to your home with this easy and enchanting autumn craft! Ornamental Physalis are available in most florists in the autumn.

Physalis 8.jpg

To make Chinese Lantern Fairy lights, you’ll need:

A string of LED fairy lights.

Ornamental Physalis (not the edible type)

Hot glue gun

Craft knife or small, sharp embroidery scissors

Physalis 1.jpg

Carefully cut a circle into the top of the physalis just big enough to enable you to pull the fruit out. Keep the stalk in tact.

Physalis 2a.jpg

Gently pull the fruit out of the hole.

physalis+3.jpg

Cut the fruit away and keep the stalk with the little circle attached.

physalis 4.jpg

Now add a blob of glue to the top edge of the physalis and then position the fairy light inside so it attaches to one side.

Physalis 5.jpg

Apply a little more glue and position the circle with the stalk back on top. Once dry, this should keep everything secure.

Physalis 6.jpg

Repeat with the other individual lights and then you’re done!

Physalis 7.jpg

Spring Bunny Finger Puppet

bunny 7 Juno.jpg

To make a Spring Bunny Finger Puppet you’ll need:

 White felt

White sewing thread

Black embroidery thread

Pink embroidery thread

Green embroidery thread

Small white pom-pom

Scissors

Needle

Paper and pencil

Bunny 1 Juno.jpg

Draw the outline of the bunny shape onto paper by using the above photo as a guide or tracing over the photo.

Cut out two bunny shapes from felt.

Decorate on opposite sides, using one or two strands of embroidery thread. 

Stitch on small eyes using black embroidery thread. One or two stitches using 2 strands of thread will give your bunny a friendly look!

bunny 2 Juno.jpg

Blanket stitch the two pieces together with white cotton, starting with a few strong ‘over and over’ stitches at the base to strengthen.

bunny 3 Juno.jpg

When you reach the ears, leave them loose and just make a few tiny stitches across the head until you reach the other side of the body. Continue to stitch down the bunny’s back, then again, make a few strong ‘over and over’ stitches to secure at the base.

bunny 4 Juno.jpg
bunny 5 Juno.jpg

Stitch on the pom-pom tail.


Stitch on a pink nose and whiskers.

bunny 7 Juno.jpg

Toadstool Tealight

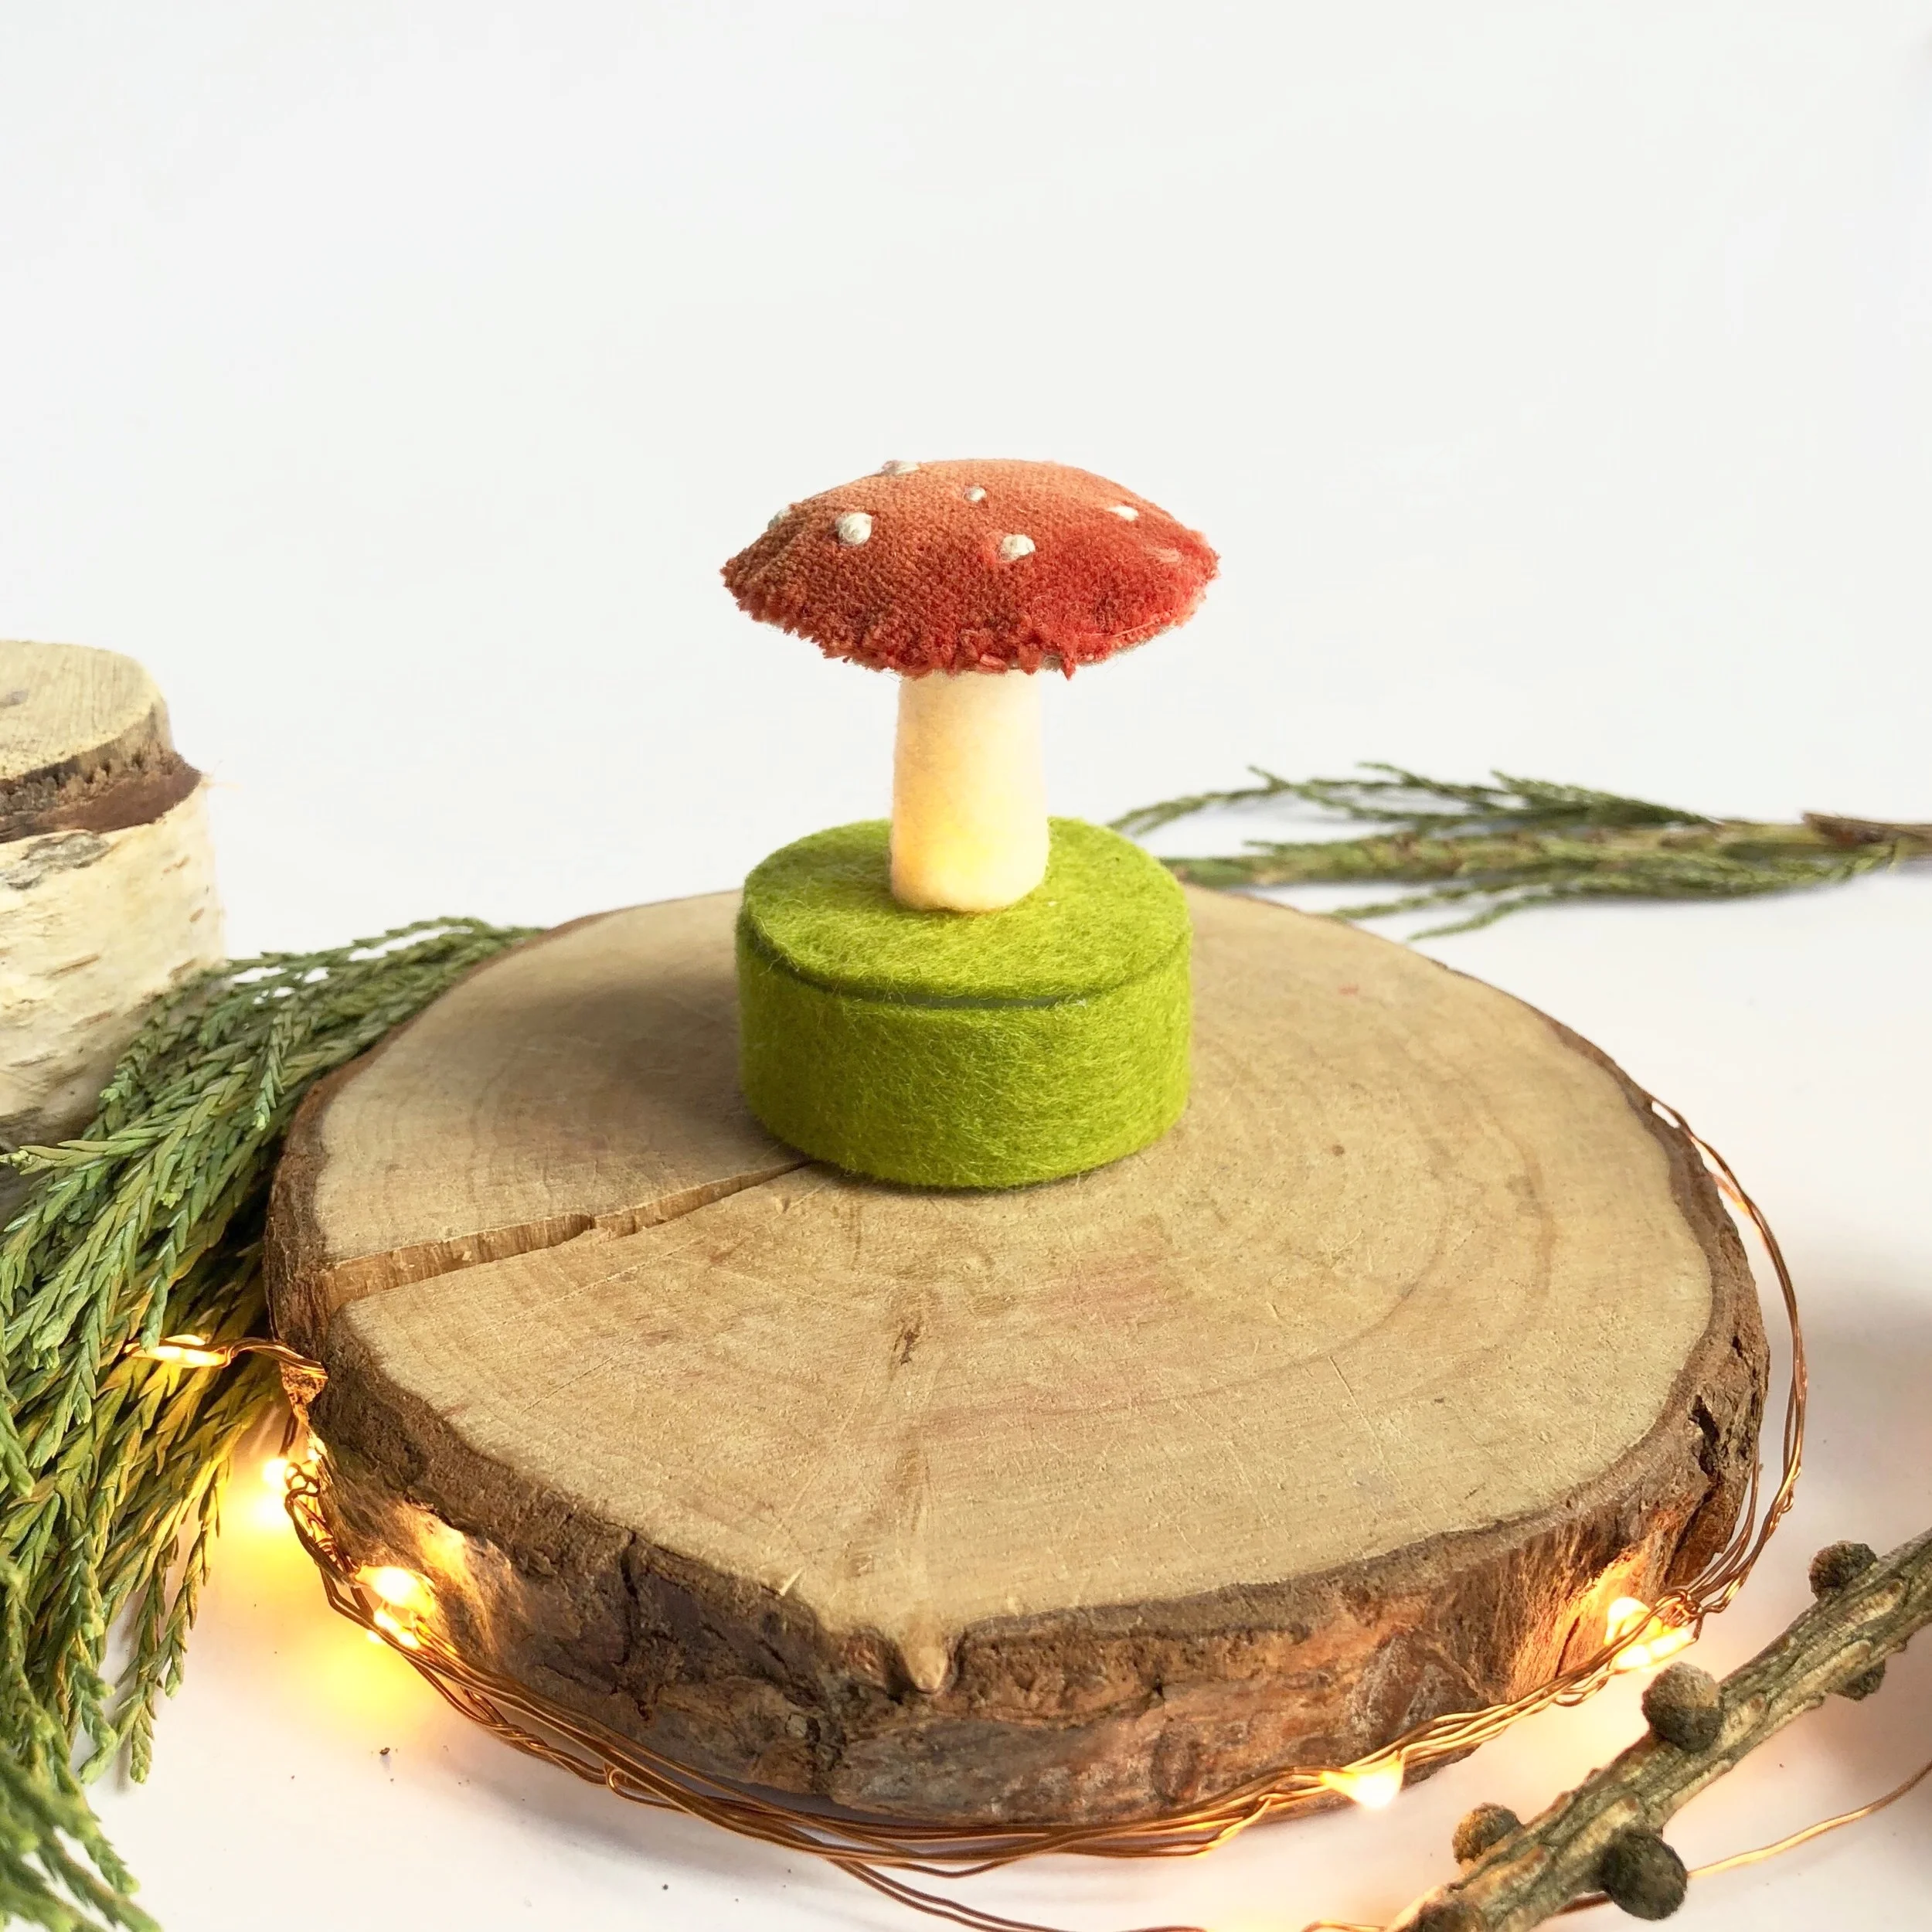
These little glowing mushroom battery tea lights make magical stocking fillers and are easy to make if you have a glue gun to hand.

Toadstool tea light main.JPG

You’ll need:

A glue gun

A battery powered tea light

Green felt

White felt

Grey/brown felt

Red velvet or other fabric

White embroidery thread

Red cotton thread

The size of your pieces will depend on the size of your tea light, and how tall/wide you’d like your toadstool to be.

Draw around the base of your tea light for the green felt circle.

toadstool 1 jpg.jpg

Stitch white French knots or dots onto the red velvet top using embroidery thread.

Toadstool 2 .jpg

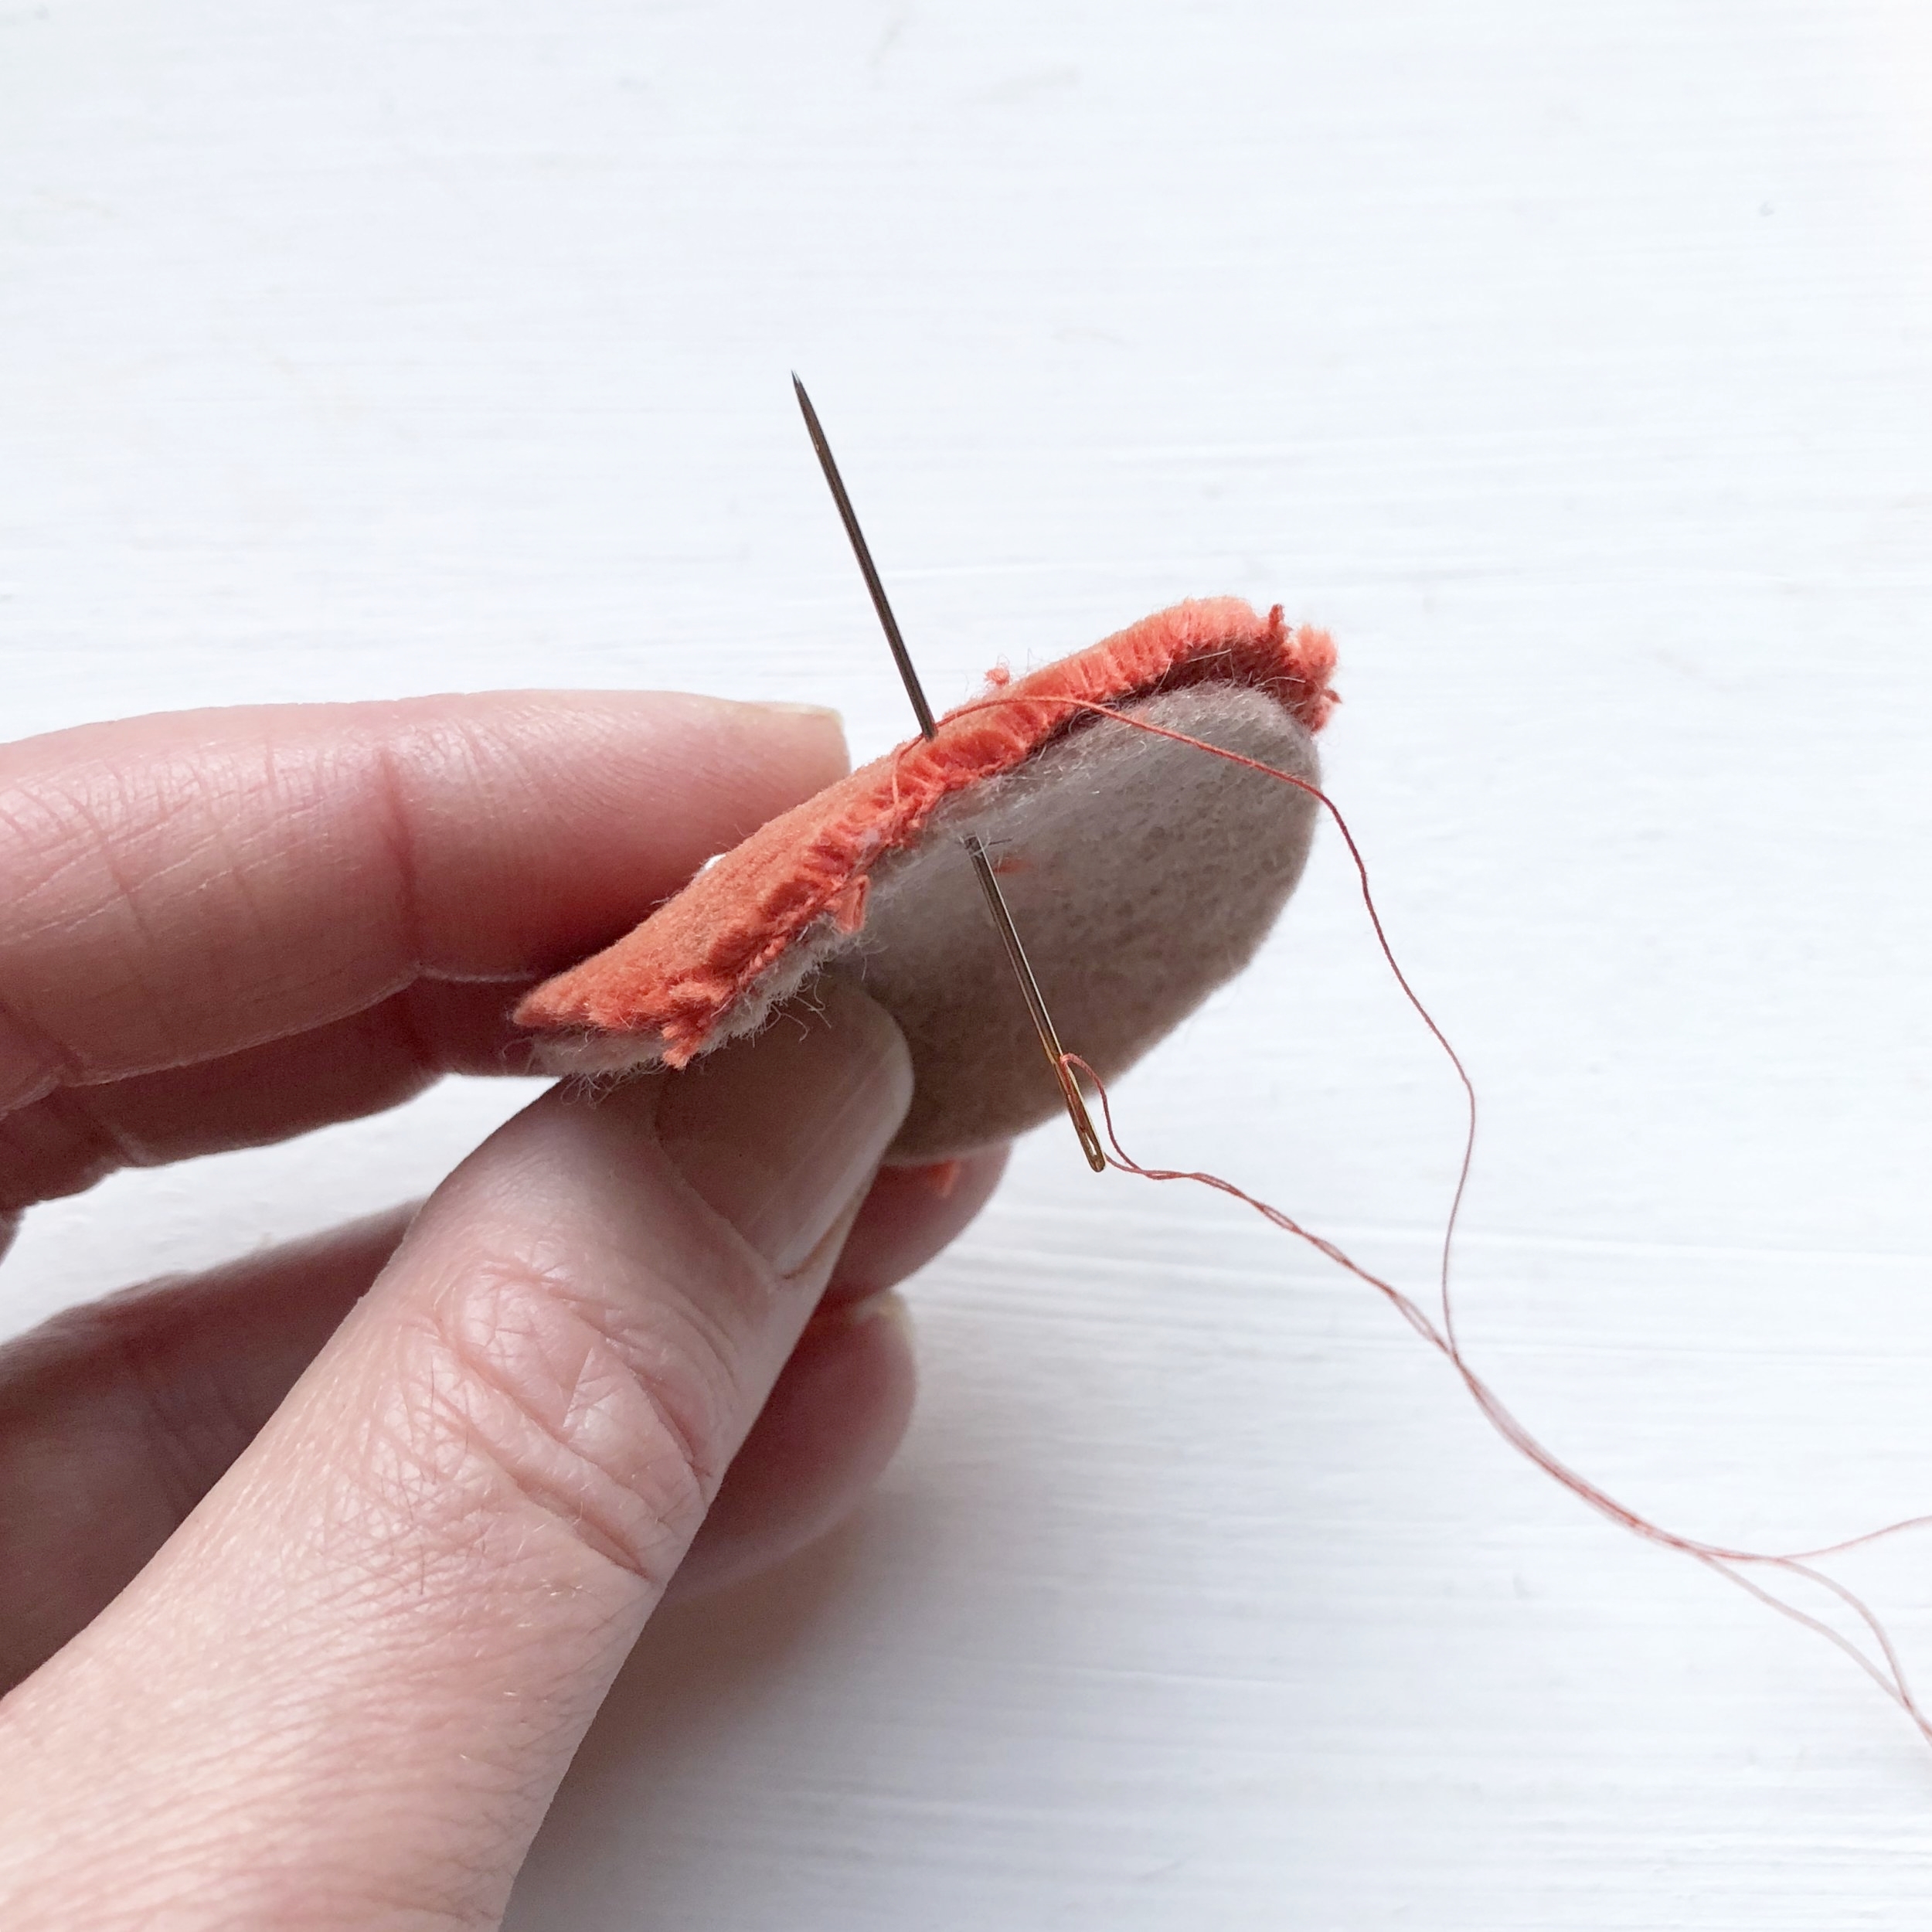
Once you’ve finished the white spots, add on the underside of the cap using blanket stitch. A subsequent running stitch drawn together and then secured with a finishing off stitch will give the cap more of a hat shape.

Toadstool 3.jpg

Blanket stitch the sides of the stalk together.

Toadstool 5 copy.jpg

Cover the edge of the tea light with the green felt, adding a little glue as you go around.

Green strip copy.jpg

Position the green felt circle onto the tea light and then secure with a little glue.

toadstool 4 copy.jpg

Now you’re ready to assemble the toadstool pieces together.

Put a little glue onto the flame part of your candle and then swiftly add the stalk on before the glue dries.

ready to glue white stalk on.jpg

Place a blob of glue in the middle of your cap and position on top of the stalk.

glue top onto stalk copy.jpg
last copy.jpg

Little Bee

When I worked at the Steiner Kindergarten in Bristol, we used to make these busy little bees every summer with the children. It was one of their favourite craft activities and their parents always loved it too. I thought it would be a fun little extra kit to pop into the Summer Craftpod. If you don't have this kit though you can still make one - you will need.....

an alder cone

some yellow fleece

white cotton thread

white tissue paper, baking paper or glassine bag

DSC_0225.JPG

Use a very small amount of yellow fleece (less is more in this case!) and twizzle it a bit to make it almost like thin yarn.

Wrap the fleece around the alder cone, 3 or 4 times to make the stripes of the bee.

Fold a single piece of white tissue paper or glassine bag in half and cut out a wing shape leaving the fold in the middle. Open out the wings and place over the top of the bee body on a bit of an angle. Tie around the body and carefully make a knot.

Once the wings are secure, twist them gently so that they lie horizontally across the bee body.

Leave the thread attached as you can now use this to dangle your bee from - you might want to trim off one end to tidy it up.

.....tie your bee to a stick or hang it on a plant or from a flower!


Tissue paper Cherry Blossoms and Hanami

There's almost nothing lovelier than the sight of spring cherry blossoms. The pink, delicate cascades just seem to bring joy everywhere they appear. In Japan, they have special picnics and festivals held under cherry trees called 'Hanami', which translates as 'flower viewing'. These traditional celebrations give the chance to fully appreciate the beauty of the blossoms. The fact that the Japanese have this word devoted to the experience, shows just how important cherry blossom time is for them.

I've also recently come across the Japanese saying; 'Mono no aware'. One translation of this is the 'ahh-ness of things, love and life'.  The awareness of the impermanence of things heightens the beauty of them. There is a gentle sadness at it's passing, knowing that without this impermanence the beauty would never have existed. With it's short lived bloom time, the ephemeral cherry blossom has become a poignant symbol of this awareness.

So next time you see a cherry tree in blossom, stop and be grateful for a moment longer than usual, the next time you walk by the petals may have all blown away!

Here's a simple paper craft to create your own cherry blossom...

You will need:

2 different tones of pink tissue paper

A small bare branch

A glue stick

Scissors

Cut circles from two or three different colours of tissue paper. 

Layer up two or three circles together and then fold the pile in half.

Place the semi circles behind an area on the branch and then add glue. Twist and pinch the tissue paper together around the branch, so that the glued area wraps around and sticks together. Use smaller circles at the ends of the branches, to look like unopened blossom buds.