craftpod

Crepe Paper Waterlilies

While planning the photoshoot for our Summer 2022 Craftpod, we wanted to include water lilies and lily pads. However, they weren’t quite in season so we had to improvise. We found giant ivy leaves and cut them into a lily pad shape, and for the flowers, we had to work out how to make some! We were really happy with how they turned out and so we thought we’d share it as a tutorial.
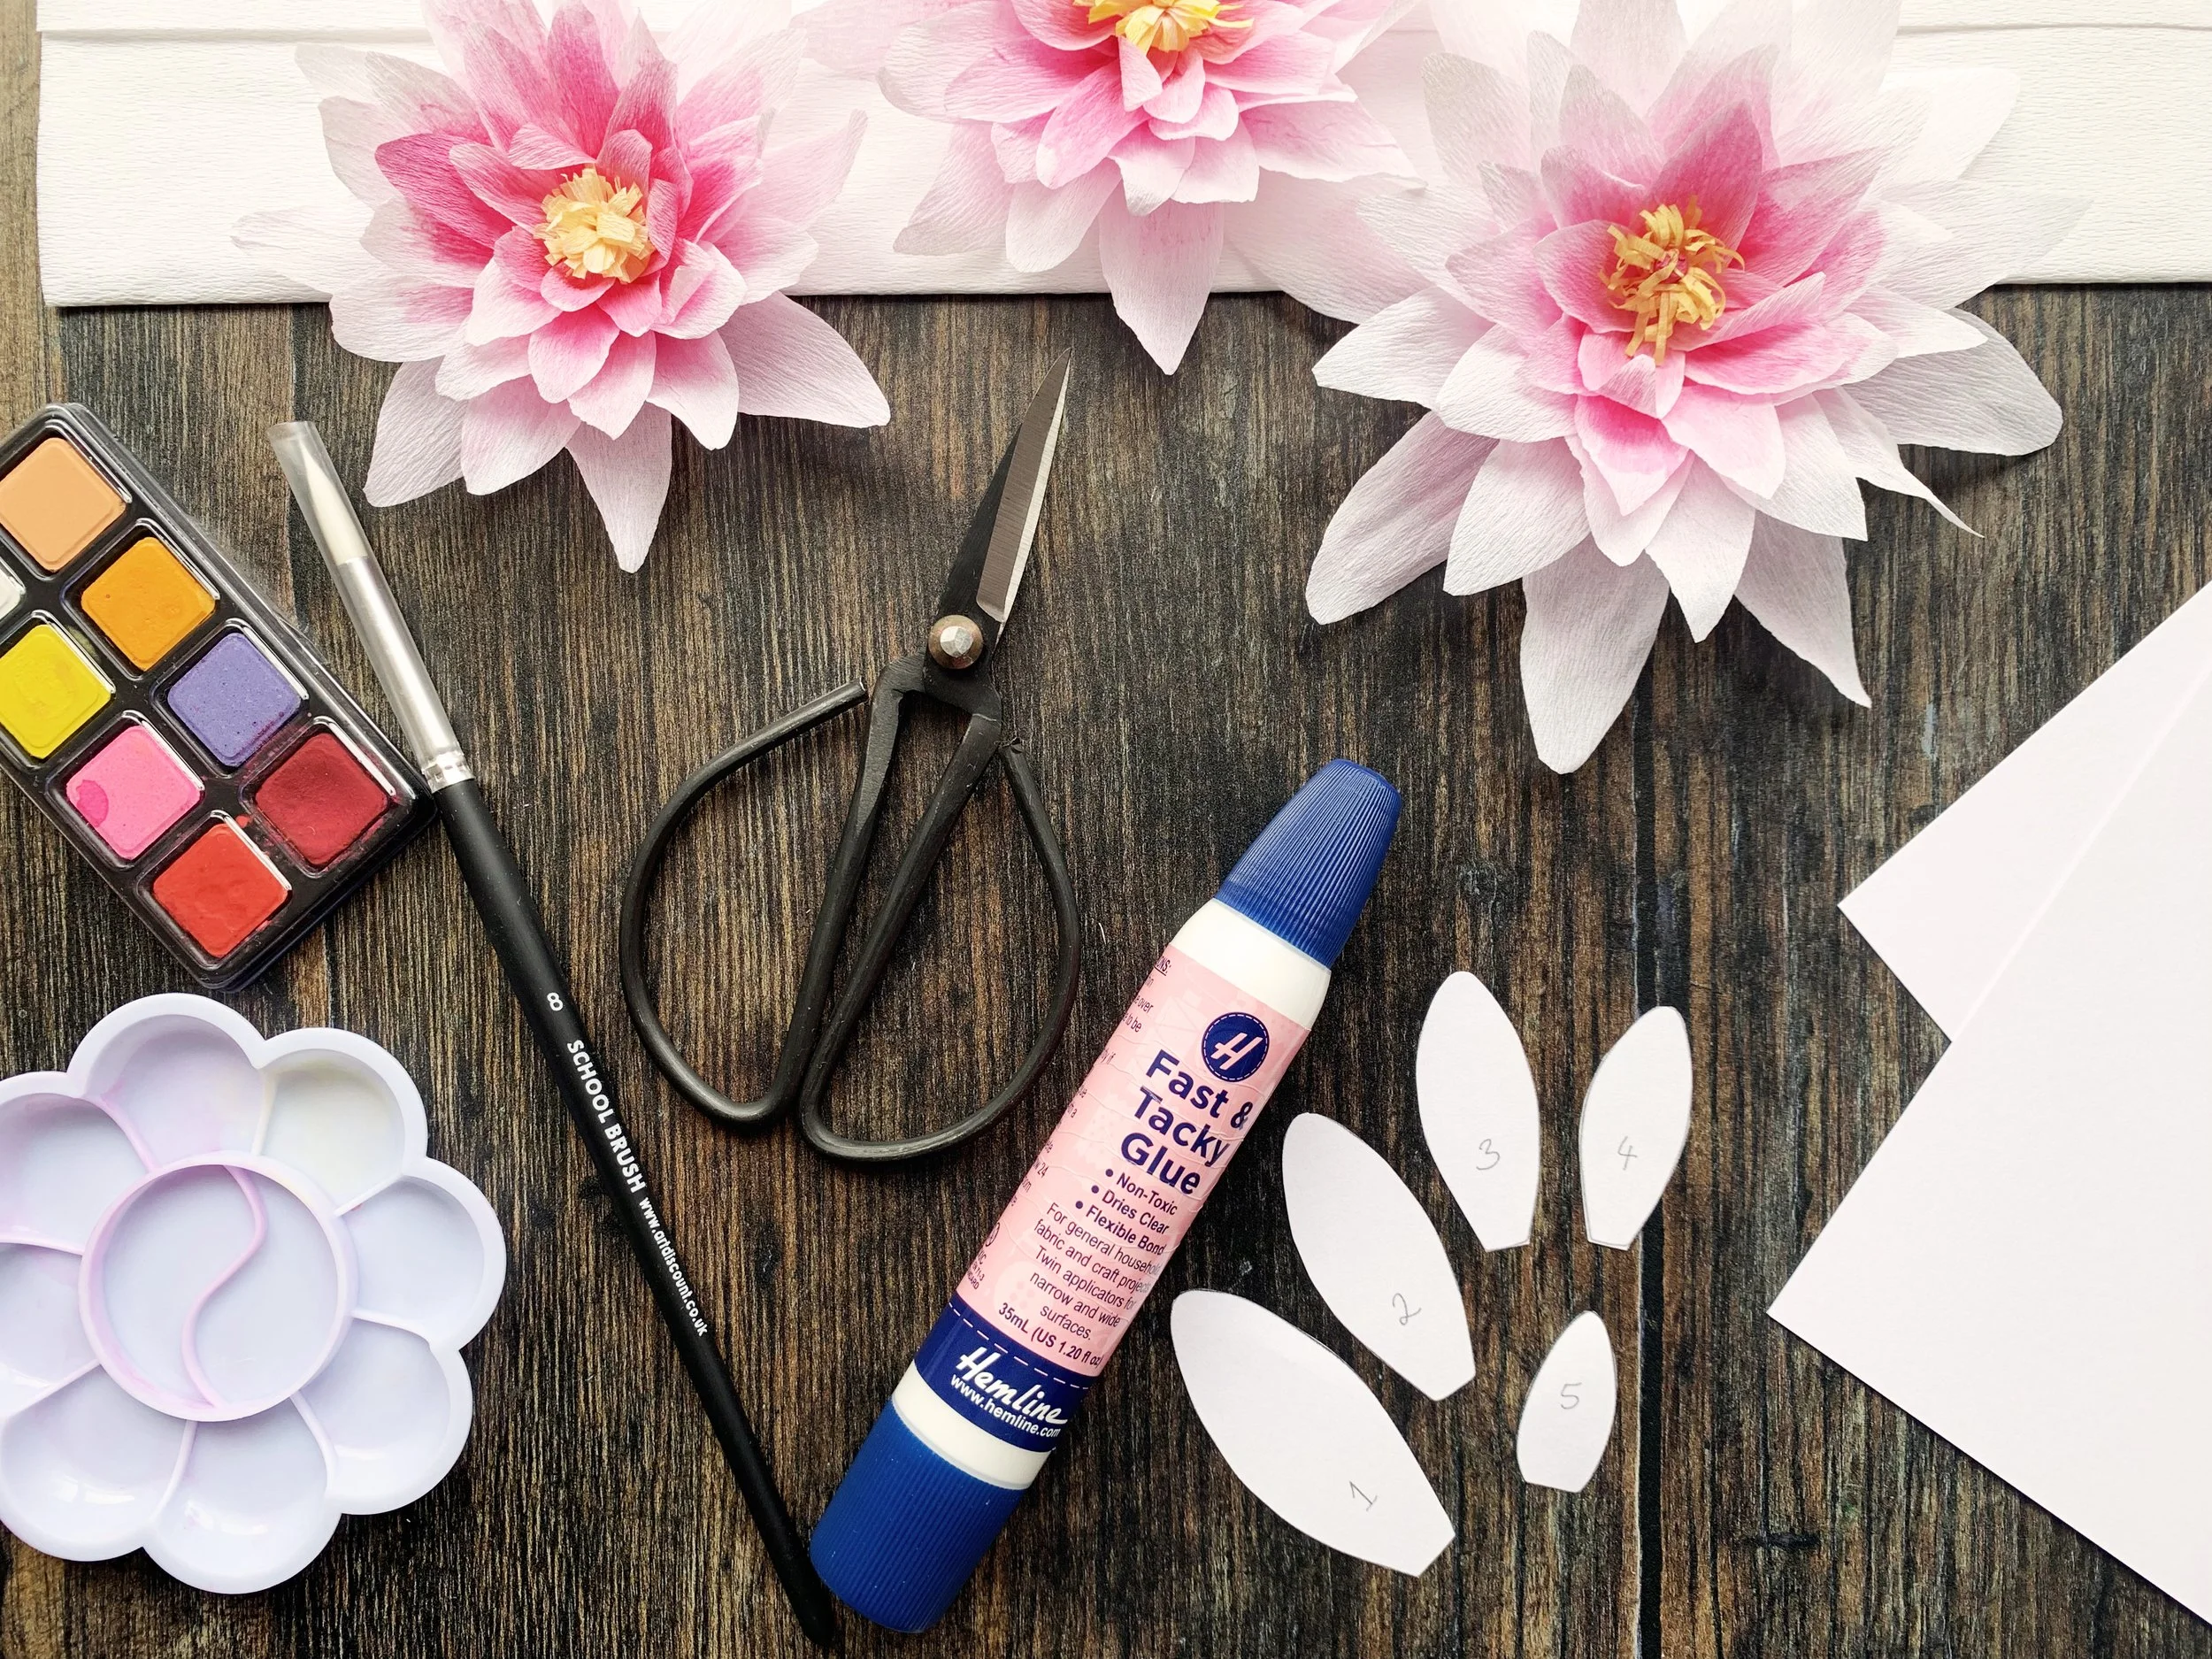
What you will need:

  • Crepe paper

  • Watercolour paints

  • Paintbrush

  • PVA glue

  • Scissors

  • A few pieces of card

  • A printer to print your pattern

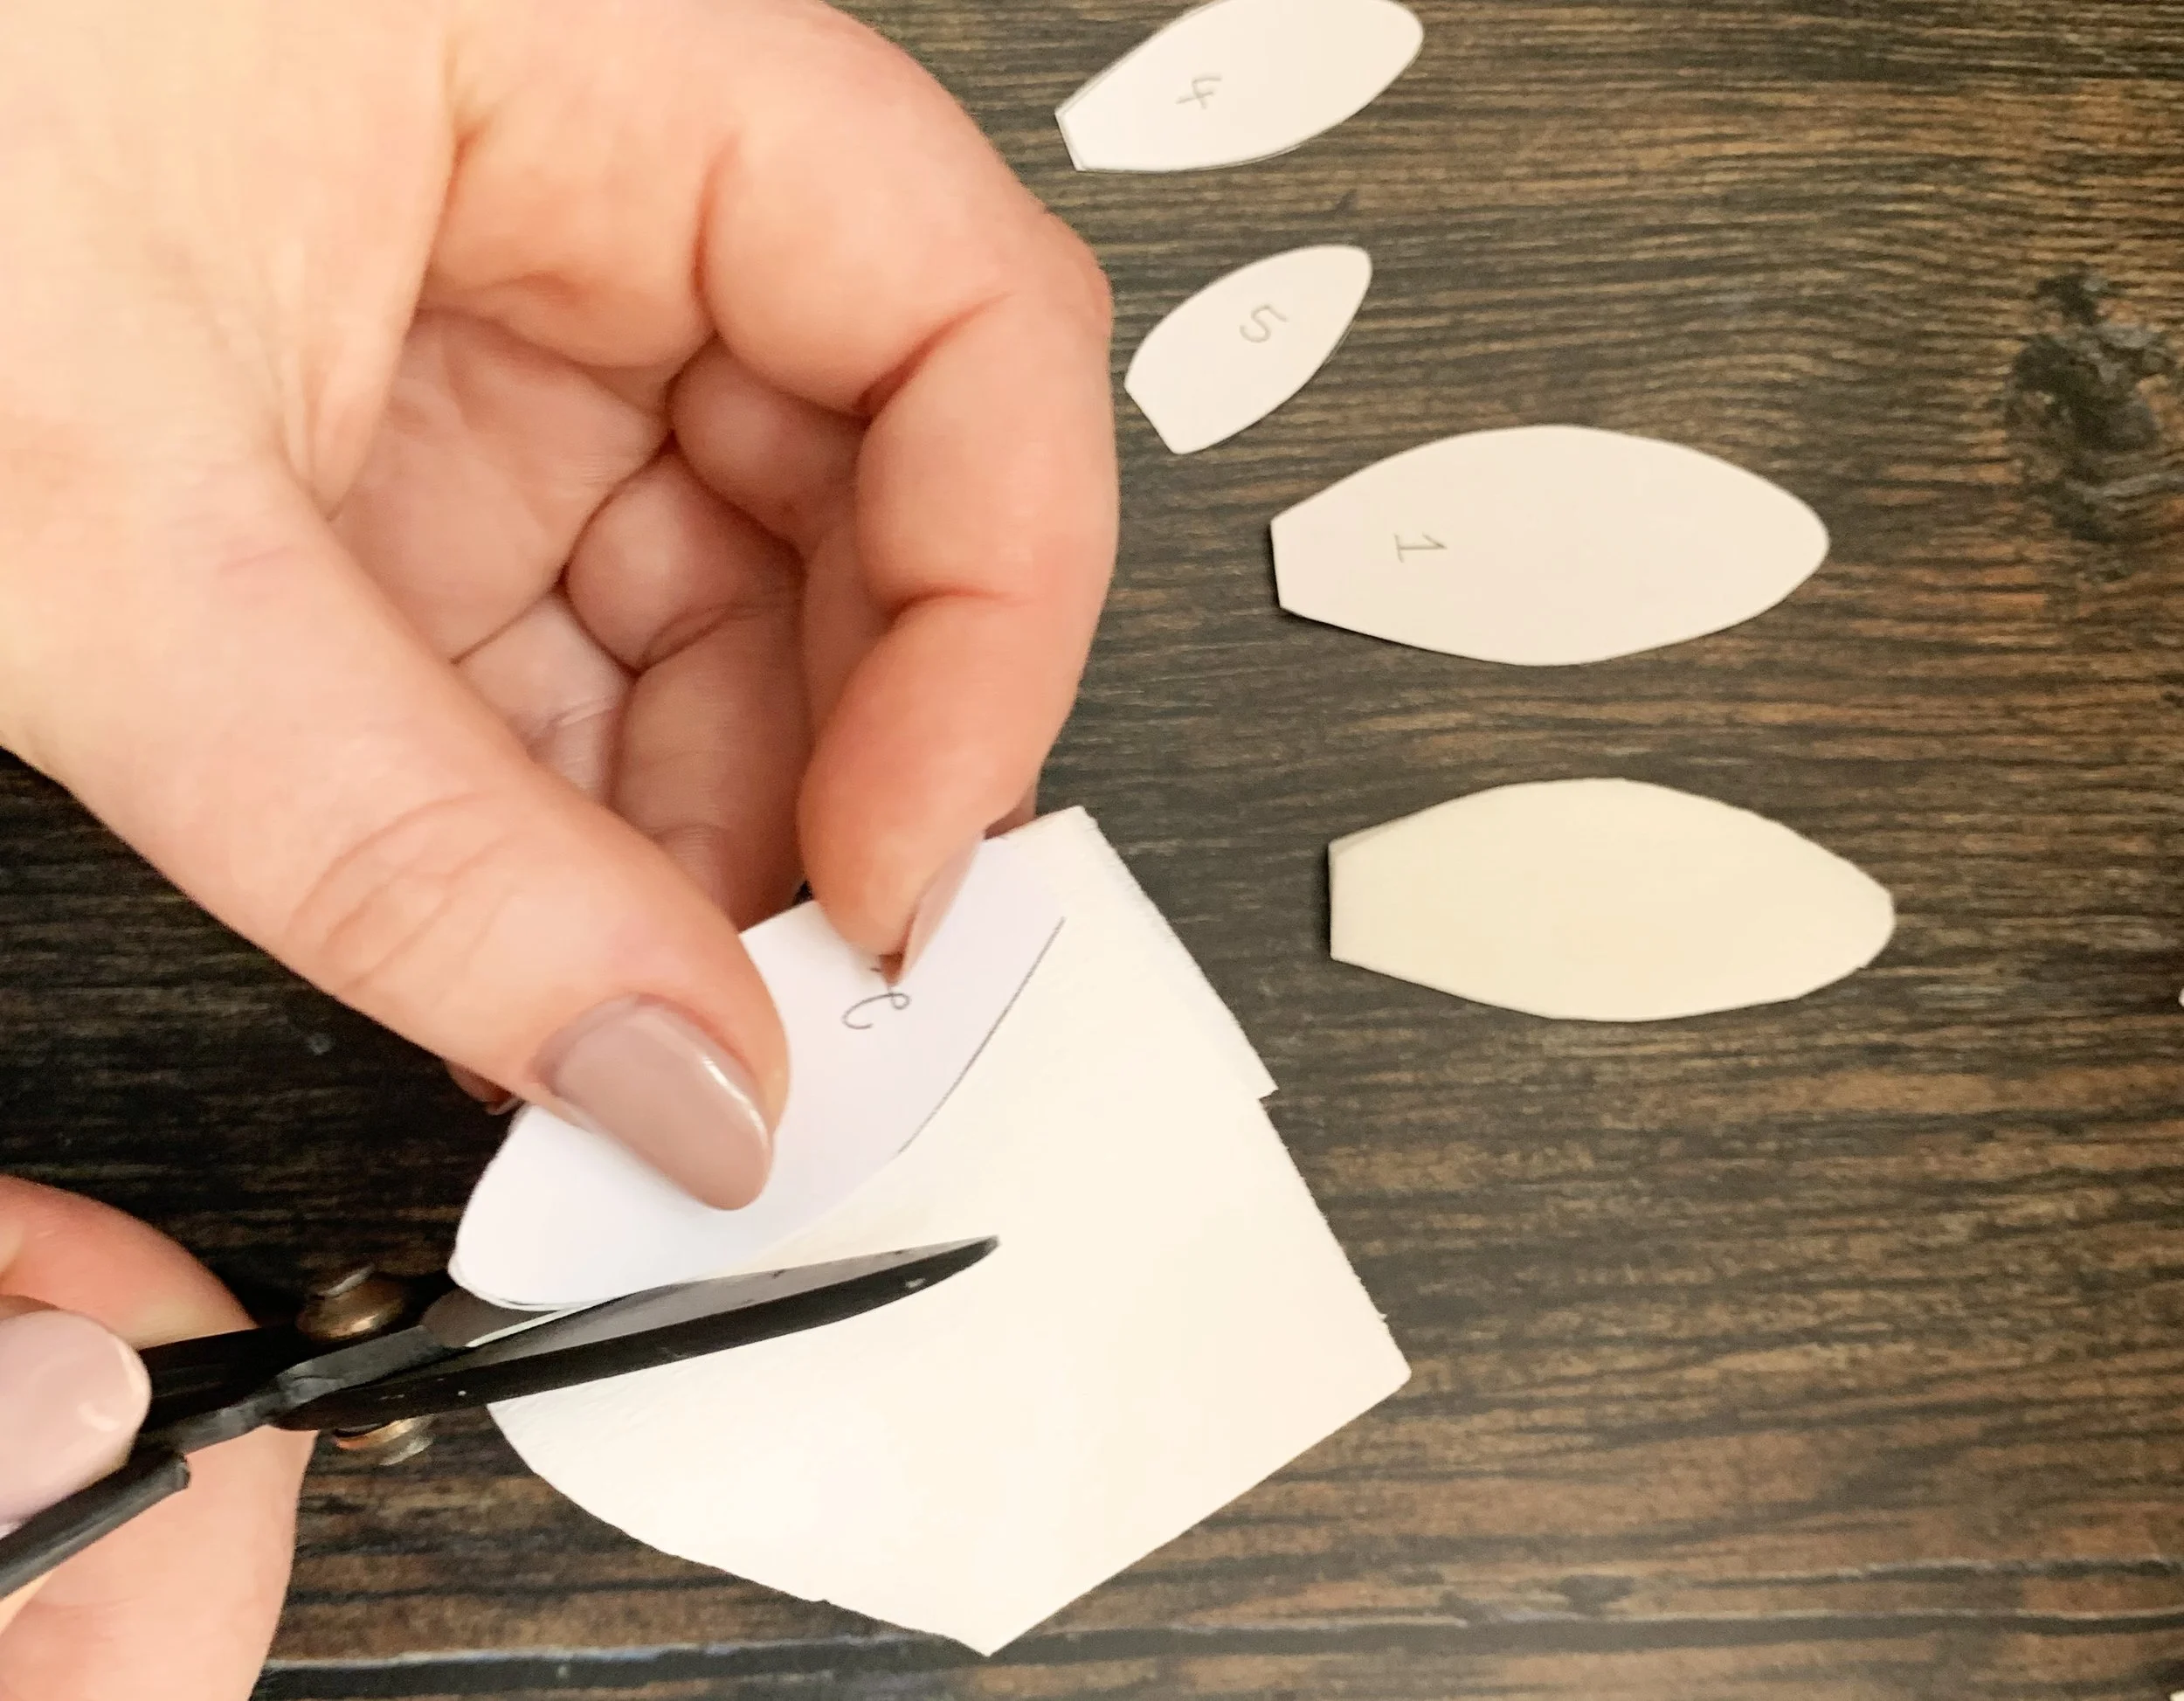
Cutting out the petals

First, cut out each piece from your pattern. Then layer up your crepe paper so you can cut a few pieces at a time. Place your pattern over the folded paper and cut around it. Do this with each piece, so that you have 10 pieces cut of each size. You’ll only need 8 of each size but it’s useful to have extras in case any of them break.

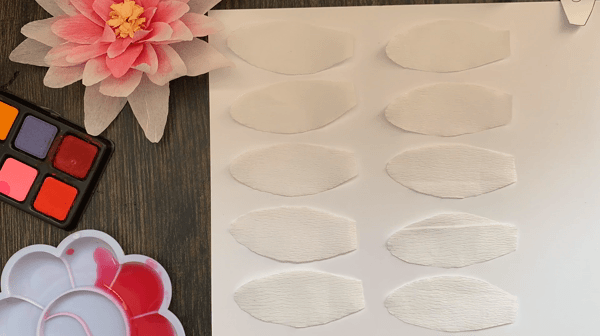
Lay each petal out on a piece of card. Add on some pink watercolour paint as shown below. Keep the paint towards the base (flat end) of each petal. For the smaller pieces, for the centre of your water lily, add a bit more paint as they tend to be darker towards the middle.

You will also need a strip of crepe paper that measures about 6cm x 3cm. Lay this out on some card and paint it yellow. This will be for the centre of your water lily.

Leave the petals to dry out a bit. Peel your petals off the card before they’re completely dry so they don’t stick. You can place them onto another piece while they finish drying.

Once your petals are completely dry, cut a small slit in the base of each one. Then put a tiny amount of glue onto one side of the cut and pull the other side of the cut over to cover it. This will give your petals shape and a natural crease towards the bottom of each one.

Next cut out a small piece of card that measures approximately 1cm x 2cm. Roll it up tight and dip one end of it into some strong pink watercolour paint.

Take your piece of yellow paper and make lots of parallel cuts about 3/4 of the way down. The more cuts you make the fluffier the centre will look. Roll the yellow paper around your rolled up card so that the fringe is free at the top. Once you get to the end of your yellow paper add a few small dabs of glue to stick it to itself. Let this dry a bit and then trim a bit of the solid base. If the fringe seems too long you can also trim it down.

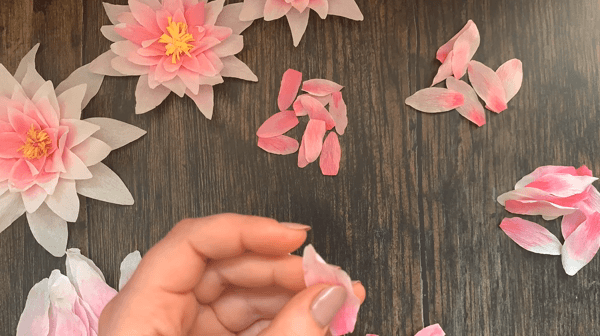
Cut out a small circle of card with a diameter of roughly 2 or 3cm. Starting with the largest petals, glue down four petals onto your circle of card as pictured below. Then glue down four more so that they sit inbetween each of the previous petals. Then move on to the next size down. Glue four more petals so they’re sitting inbetween where your previous petals were placed. Keep doing this with 8 of each petal size.

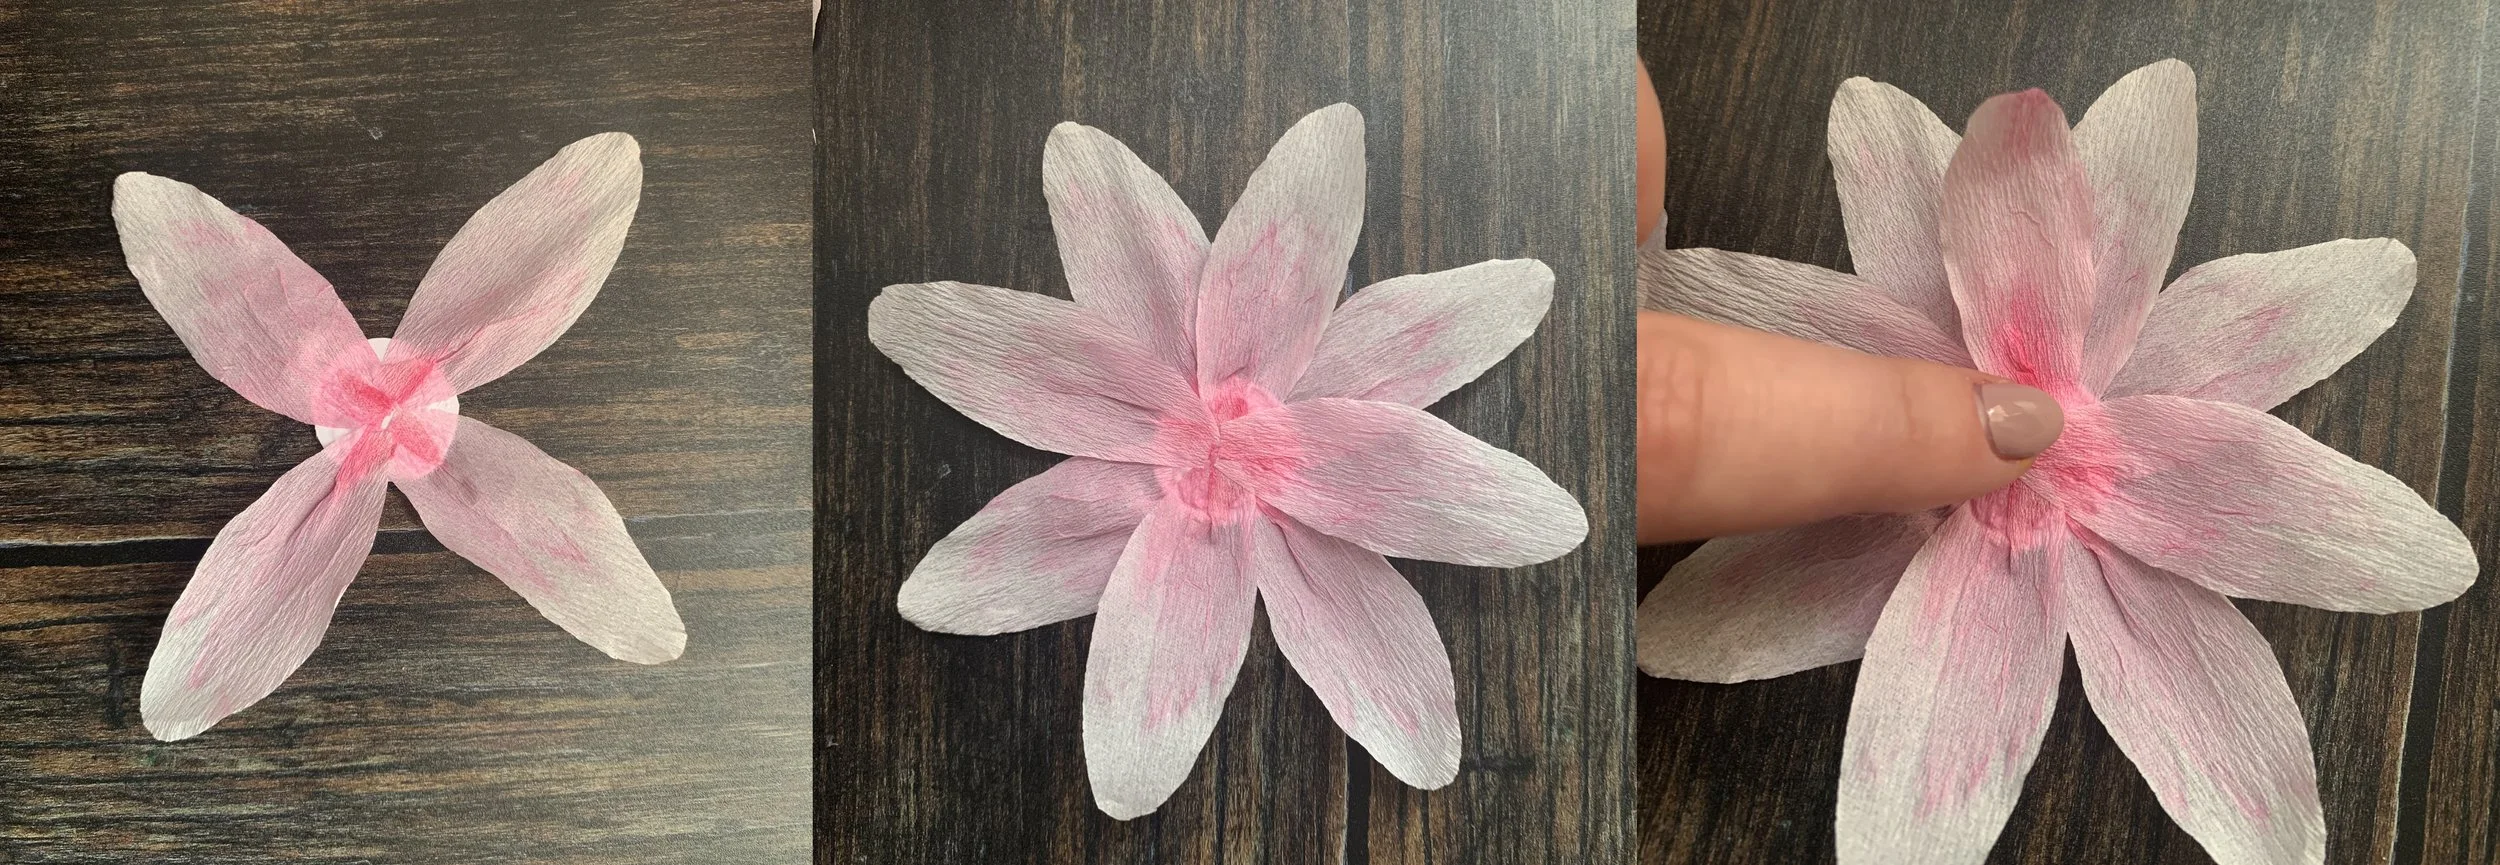
Once you've glue down all of your petals your water lily should look like this..

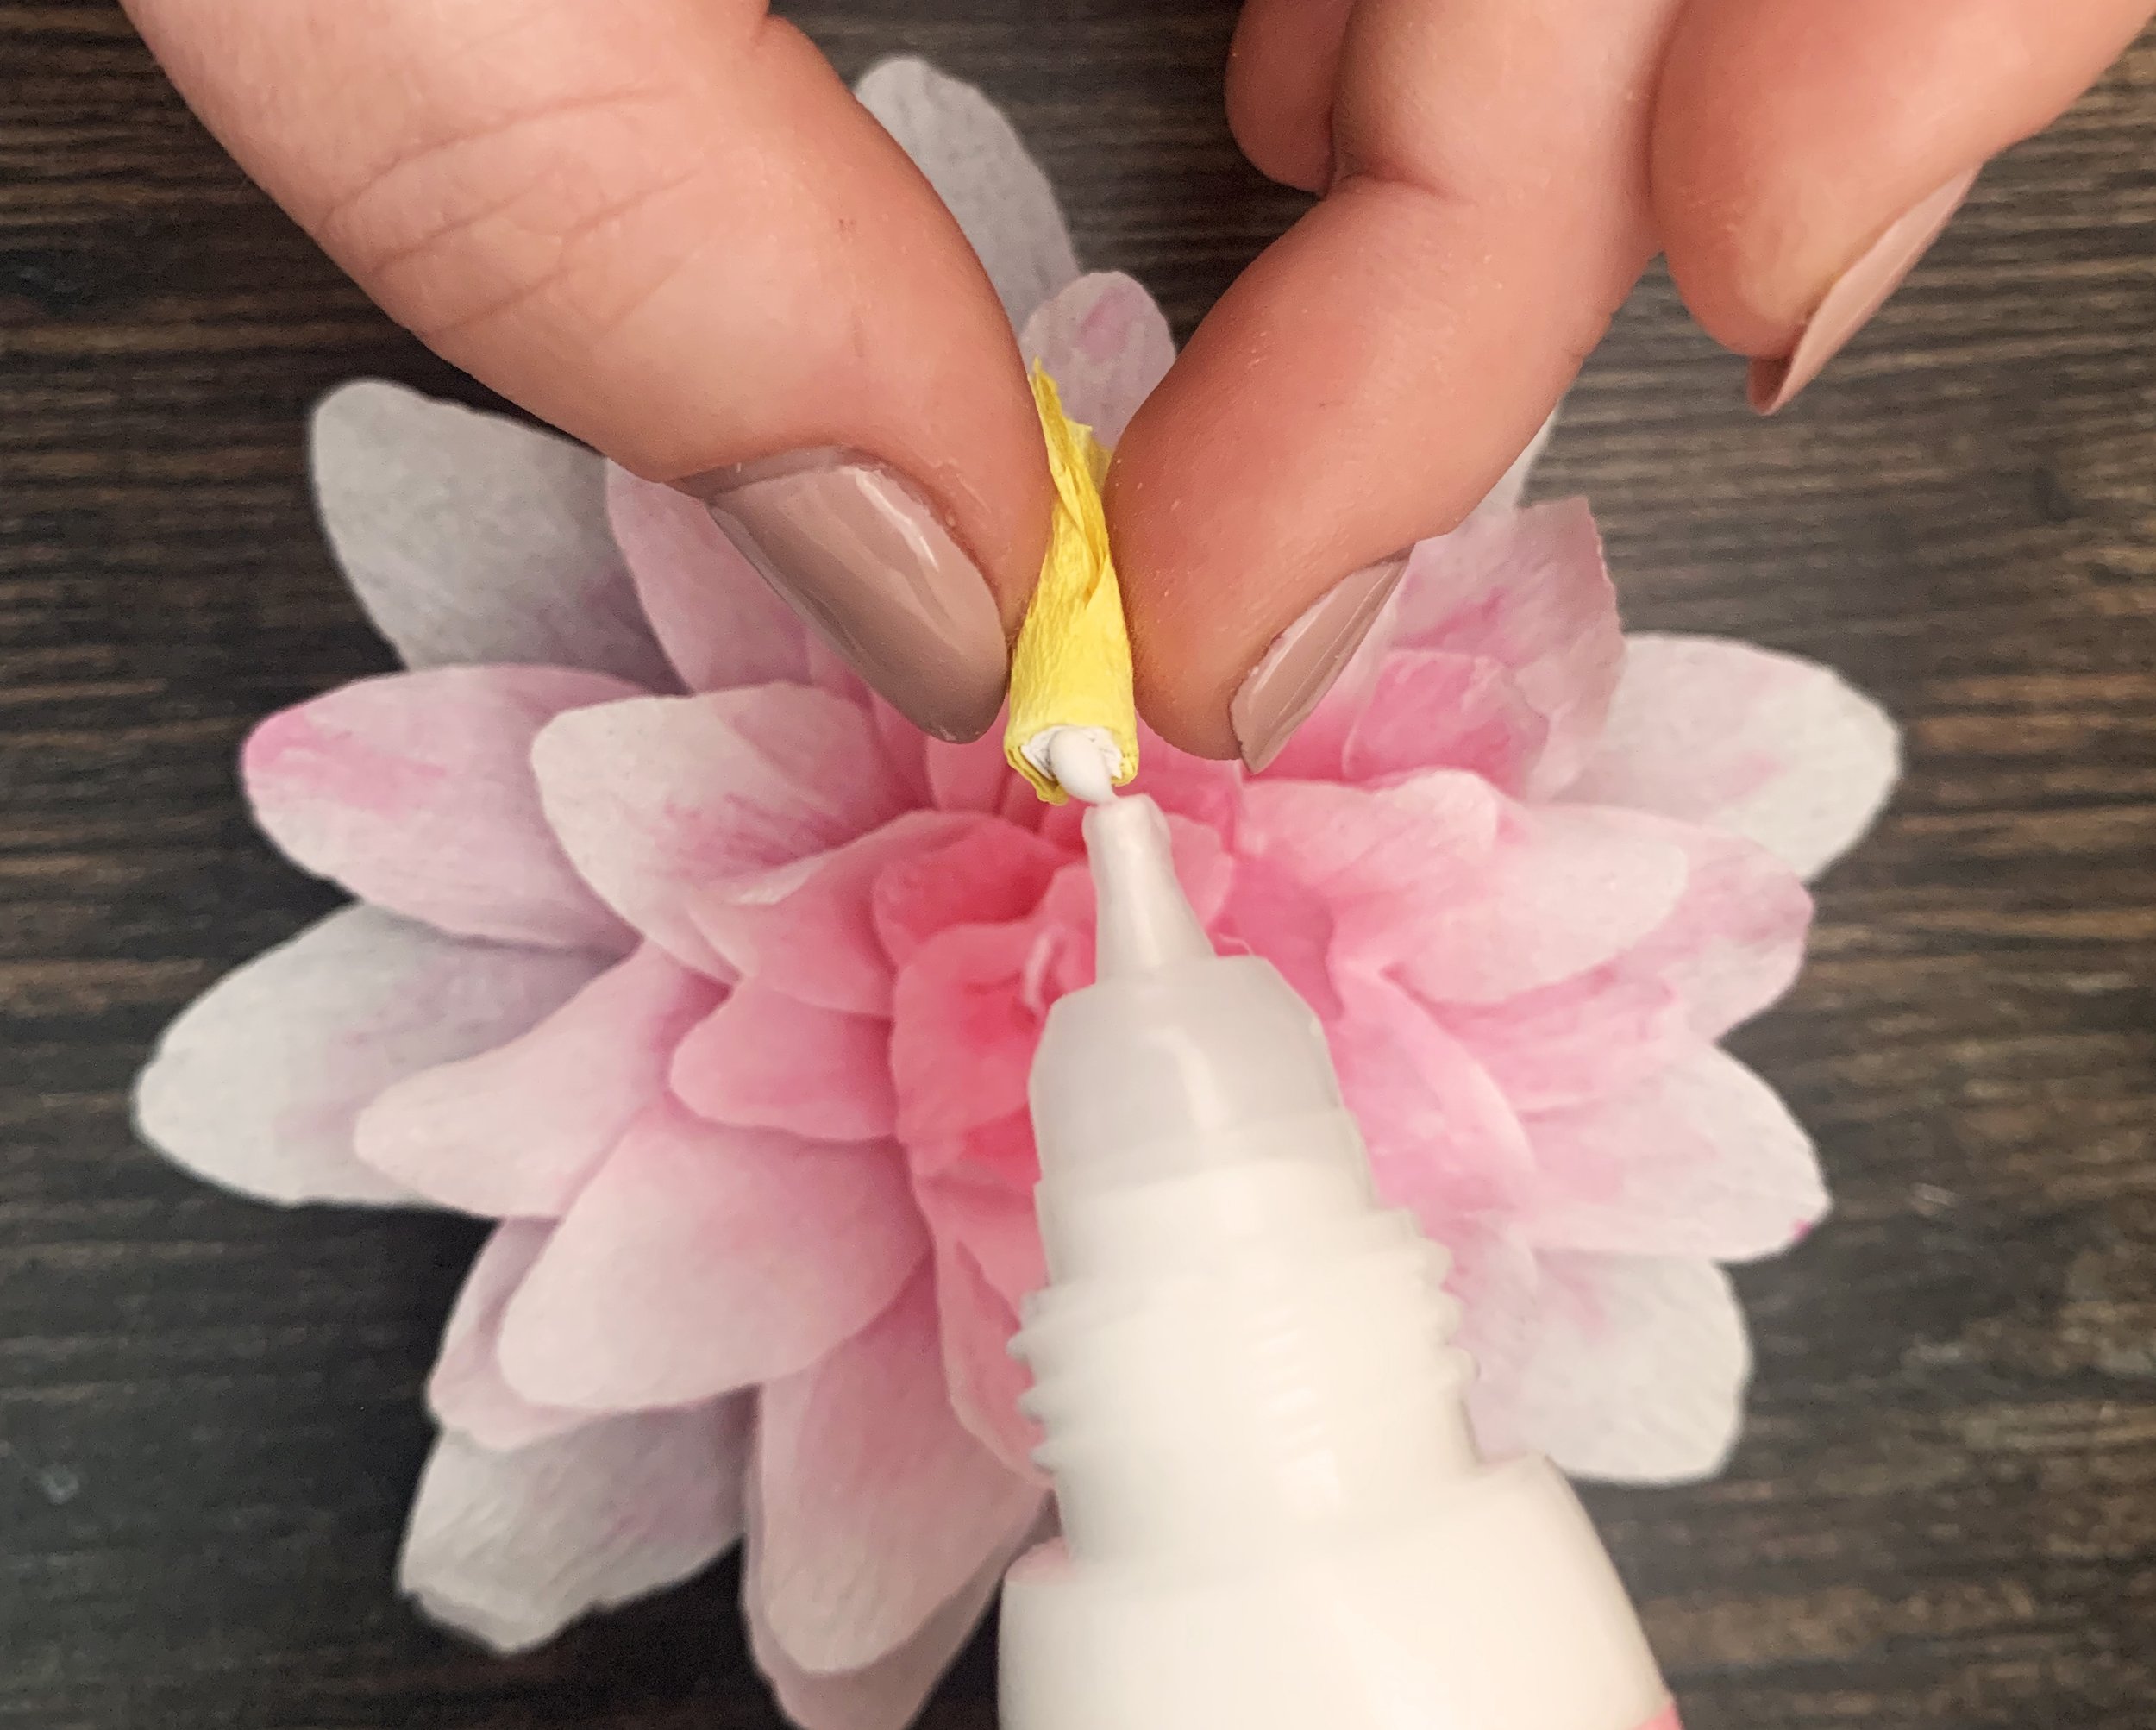
Then add a small amount of glue to the bottom of your yellow centre and stick it into the middle of your petals. Leave your water lily to dry for a few hours as the glue can stay tacky for a while.

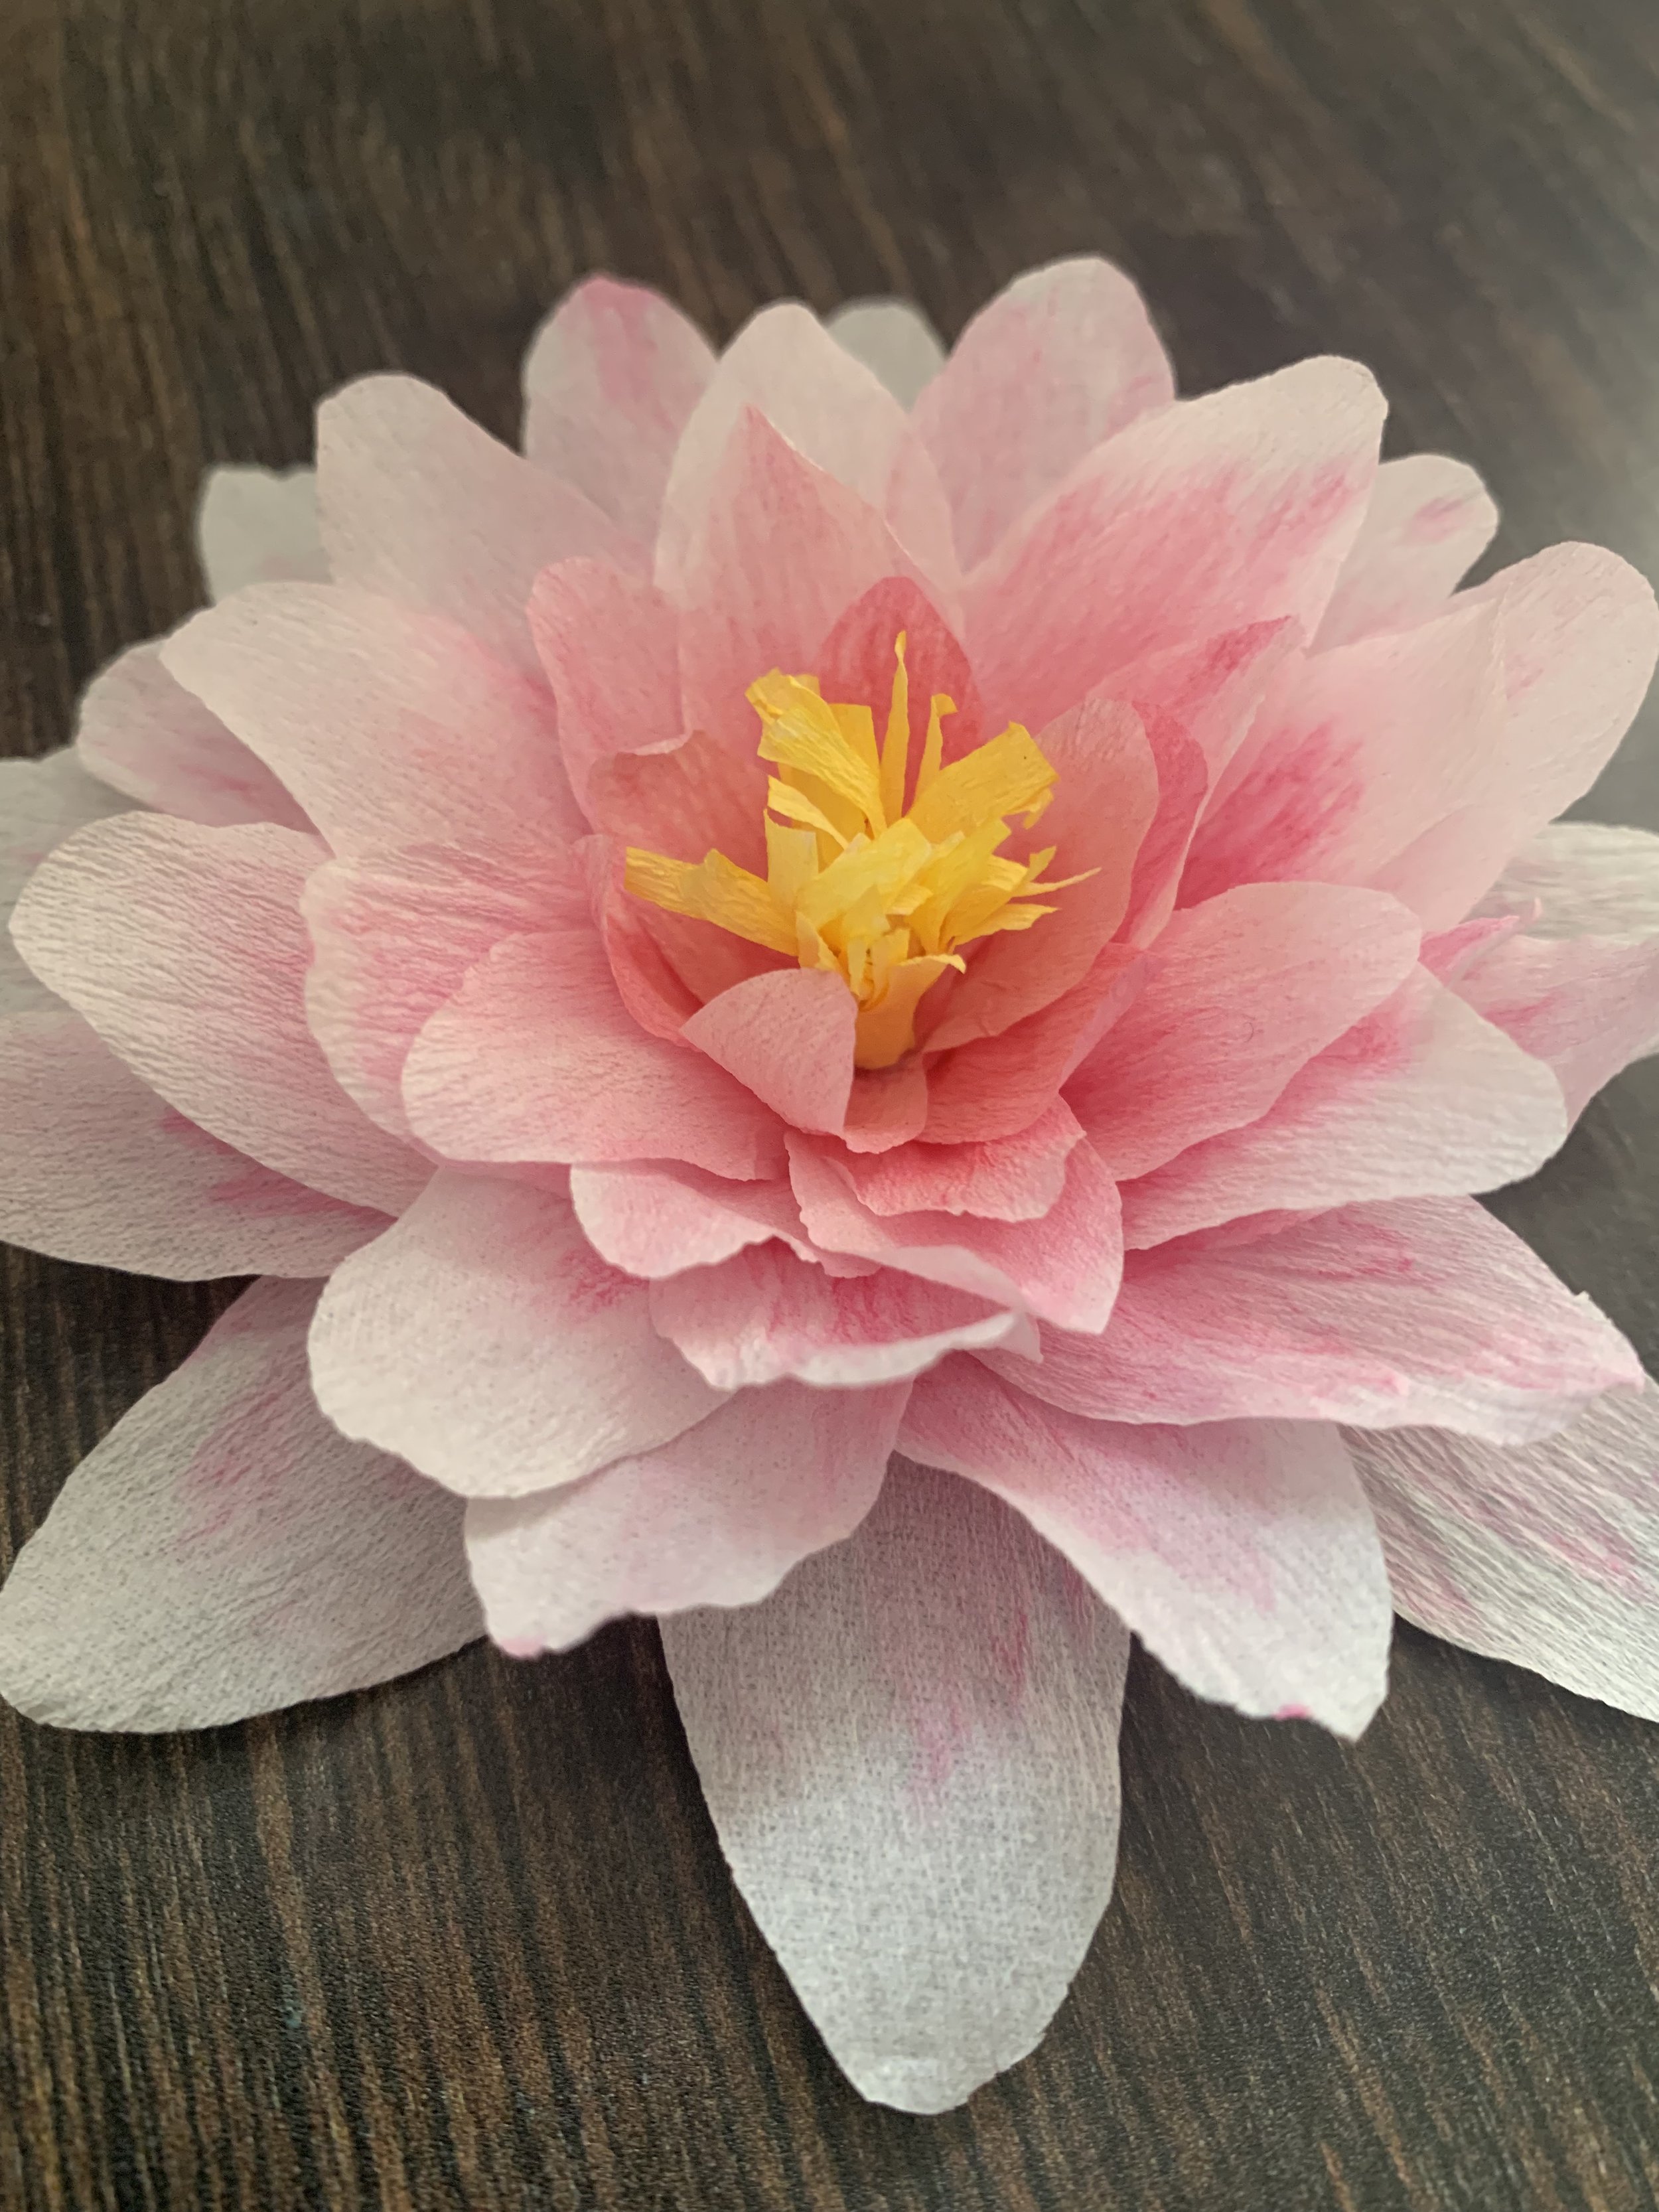
I hope you enjoyed making these water lilies as much as we did. We love to see your finished projects so do tag us on Instagram at @craftpod_

Love, Immi & Jo x

Autumn Leaves Pumpkin Pie Recipe

This is our favourite pumpkin pie recipe. You can use pumpkins or butternut squash instead. It makes a delicious and comforting autumnal dessert.

You will need:

  • 9 or 10 inch Pie or Flan Dish

  • Cookie cutters - a few different leaf shapes

  • Baking beans / lentils

  • Baking paper

Ingredients:

For the sweet pastry:

  • 400g of plain white flour

  • 80g caster sugar

  • 1/2 tsp salt

  • 230g unsalted butter

  • 2 large eggs - beaten

  • 1 egg (for the egg wash)

For the pie filling:

  • 750g pumpkin or butternut squash - peeled and cut into small chunks

  • 140g dark muscovado sugar

  • 1/2tsp of salt

  • 2 tsp cinnamon

  • 1/2 - 1 tsp fresh grated nutmeg (or 1 tsp ground)

  • 2 eggs beaten

  • 25g melted butter

  • 100ml milk

  • 75ml double cream

Start by making your pastry. Beat the butter and sugar together until fluffy. Slowly add the 2 eggs, then add the flour and salt, and mix until a ball is formed. Don’t over mix otherwise the pastry will become hard when baked.

Flatten into a fat disc and then chill in the fridge for at least an hour to firm up.

Pre-heat your oven to 180°C. Roll out half of the dough, on a generous dusting of flour, to a thickness of about 5mm and use a rolling pin to transfer the pastry into your pie dish. If the pastry breaks up, you can just patch it up by pressing pieces of pastry with your finger tips into the dish. Try to handle it as little as possible.

Lay a piece of baking paper over the pastry shell, then fill it with baking beans or lentils (this helps it keep its shape) then bake for 15 minutes at 180°C, beat one egg for your egg wash. Remove the dish from the oven, take out the baking beans and paper, then reduce the oven temperature down to 160°C. Brush your pastry with the egg wash, make sure to leave some for later. Bake for a further 5 minutes. Leave the pastry shell to cool.

Roll out the other half of your dough (to about 5mm thick) and use the leaf cutters to cut some pastry leaves. (Use a knife and freehand if you don’t have cutters). Use a knife to create the indents of the veins. Put aside some of the leaves to go around the edges of the pie crust (about 15). Bake the rest of the leaves in the same was as you baked the shell above, including the egg wash. Bake until they start to turn brown. Allow the leaves to cool.

For the filling:

Increase the oven’s temperature back to 180°C. Meanwhile, cook the pumpkin or squash for about 20 mins in boiling water until very tender. Drain well and then allow to cool, then puree well until smooth. In a bowl mix together the dark muscovado sugar, salt, cinnamon and nutmeg. Add in the beaten eggs, melted butter, milk and cream. Then add the pumpkin puree and combine well.

Pour the mixture into the pie shell until it nearly reaches the top (you may end up with some left over).

Brush the rim of the shell with some of your egg wash once more. Then lay the reserved uncooked pastry leaves around the edge. Brush the leaves with the rest of the egg wash. Bake the pie at 180°C for 10 mins, then drop the temperature to 140°C and bake for a further 40-45 minutes until the filling has just set. Leave to cool and then decorate with the cooked pastry leaves.

Serve chilled with whipped cream.